Assembly
Tools required for assembly:
Rubber mallet
Wrenches – 17, 18 and 24 mm
Set of hex (Allen) wrenches
Exposed metal surfaces on the drill press have been
The drill press should be placed in a dry area with a level floor and good lighting. Provide enough space around the drill press to allow for operations and any adjustments or servicing.
![]() Assembly is a two person operation to avoid injury from accidental dropping.
Assembly is a two person operation to avoid injury from accidental dropping.
Column
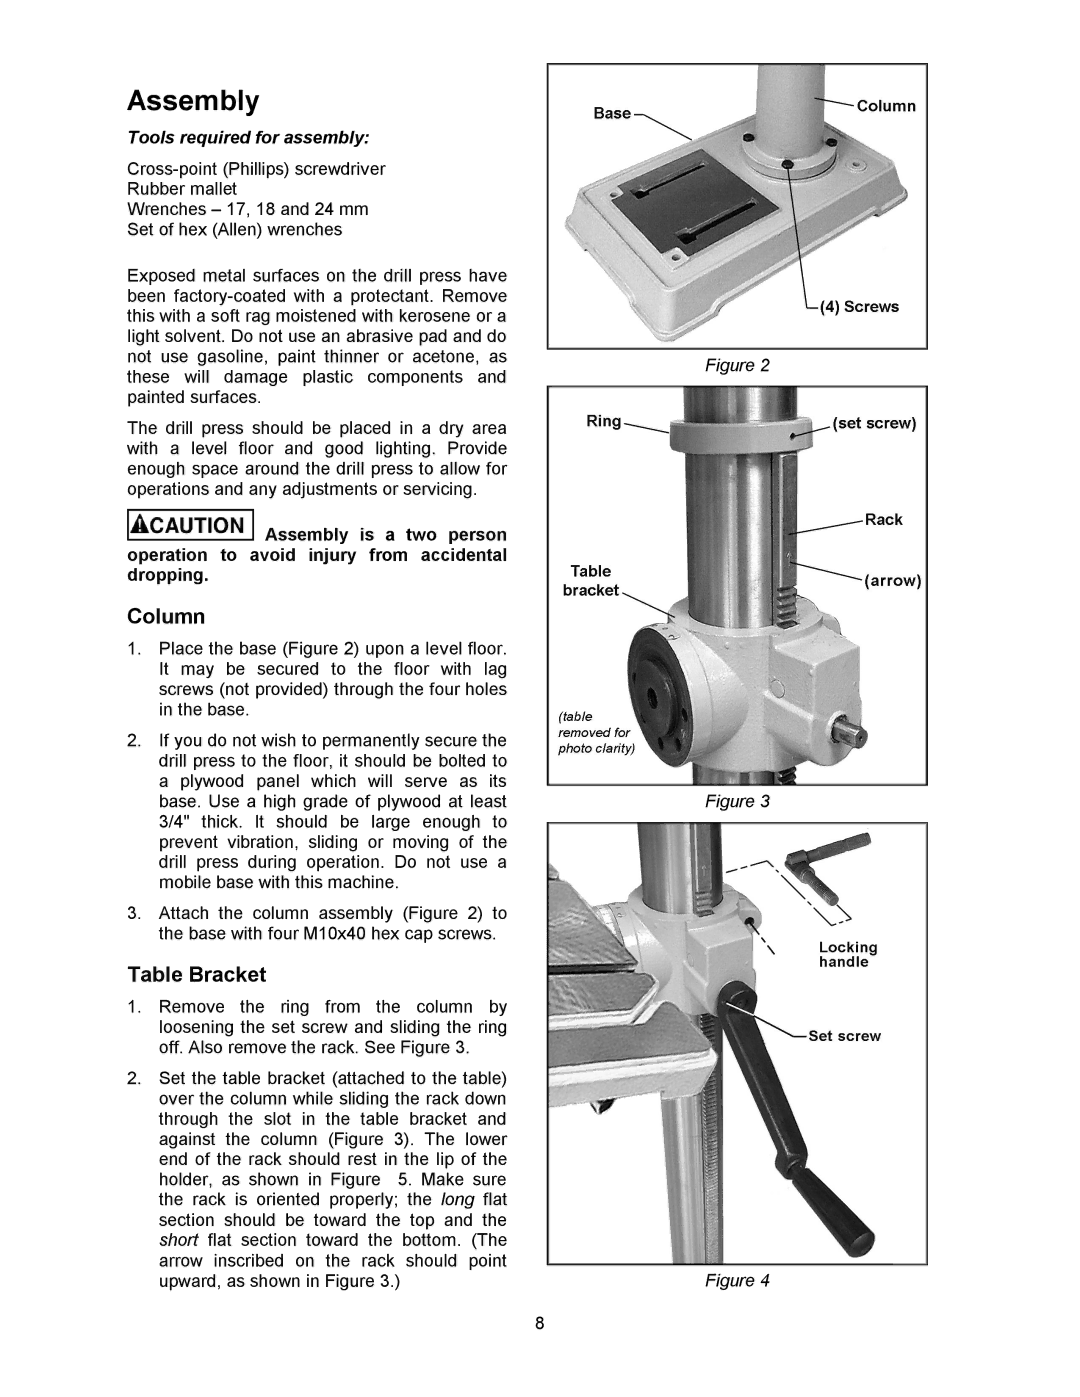
1.Place the base (Figure 2) upon a level floor. It may be secured to the floor with lag screws (not provided) through the four holes in the base.
2.If you do not wish to permanently secure the drill press to the floor, it should be bolted to a plywood panel which will serve as its base. Use a high grade of plywood at least 3/4" thick. It should be large enough to prevent vibration, sliding or moving of the drill press during operation. Do not use a mobile base with this machine.
3.Attach the column assembly (Figure 2) to the base with four M10x40 hex cap screws.
Table Bracket
1.Remove the ring from the column by loosening the set screw and sliding the ring off. Also remove the rack. See Figure 3.
2.Set the table bracket (attached to the table) over the column while sliding the rack down through the slot in the table bracket and against the column (Figure 3). The lower end of the rack should rest in the lip of the holder, as shown in Figure 5. Make sure the rack is oriented properly; the long flat section should be toward the top and the short flat section toward the bottom. (The arrow inscribed on the rack should point upward, as shown in Figure 3.)
8
Figure 2
Figure 3
Figure 4