8.6Installing table extensions
Refer to Figure 10.
Figure 10
1.Attach a table extension to the saw table. Make sure edge bevel on table extension faces front, to match that of saw table. Use three screws, lock washers and flat washers
Assembly Tip: If you are doing this without an assistant, lift table extension vertically to the table edge. Install center screw and washer, and make snug. Then pivot the extension parallel to saw table to insert the other two screws.
2.Repeat for opposite table extension. Lightly snug screws.
3.The front edge of table extensions must be flush with front edge of saw table. If needed, tap front edge of extension with a rubber mallet to make flush. See Figure 11.
Figure 11
8.7Leveling table extensions
Refer to Figure 12.
Level table extensions to saw table using a straight edge. A metal straight edge is ideal, though a carefully jointed board may also be used.
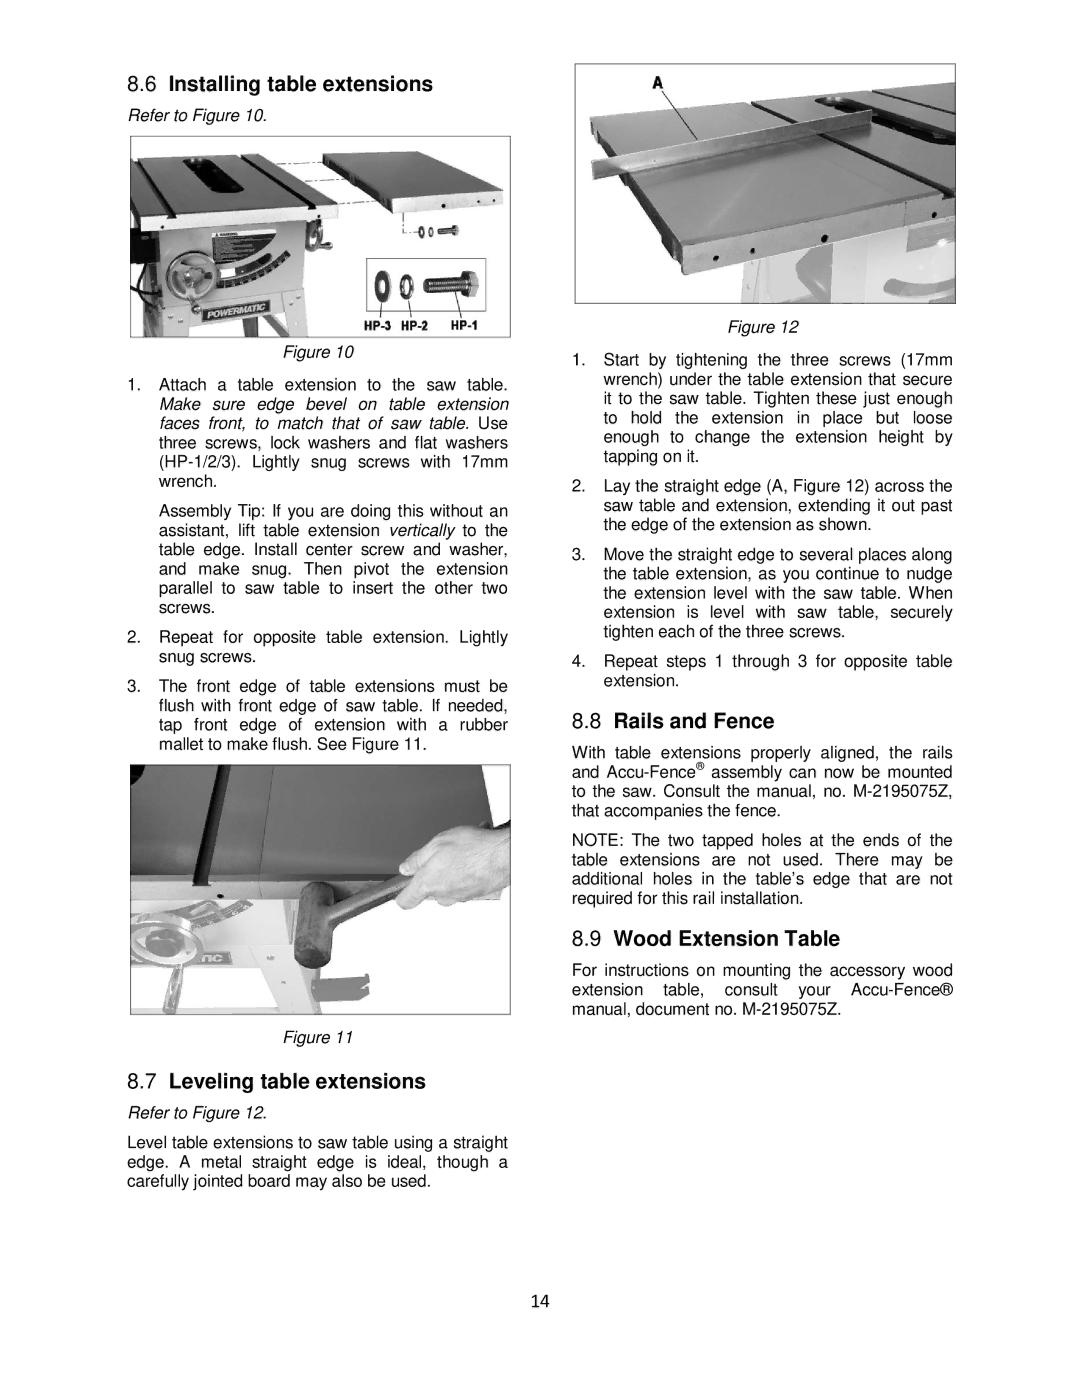
Figure 12
1.Start by tightening the three screws (17mm wrench) under the table extension that secure it to the saw table. Tighten these just enough to hold the extension in place but loose enough to change the extension height by tapping on it.
2.Lay the straight edge (A, Figure 12) across the saw table and extension, extending it out past the edge of the extension as shown.
3.Move the straight edge to several places along the table extension, as you continue to nudge the extension level with the saw table. When extension is level with saw table, securely tighten each of the three screws.
4.Repeat steps 1 through 3 for opposite table extension.
8.8Rails and Fence
With table extensions properly aligned, the rails and
NOTE: The two tapped holes at the ends of the table extensions are not used. There may be additional holes in the table’s edge that are not required for this rail installation.
8.9Wood Extension Table
For instructions on mounting the accessory wood extension table, consult your
14