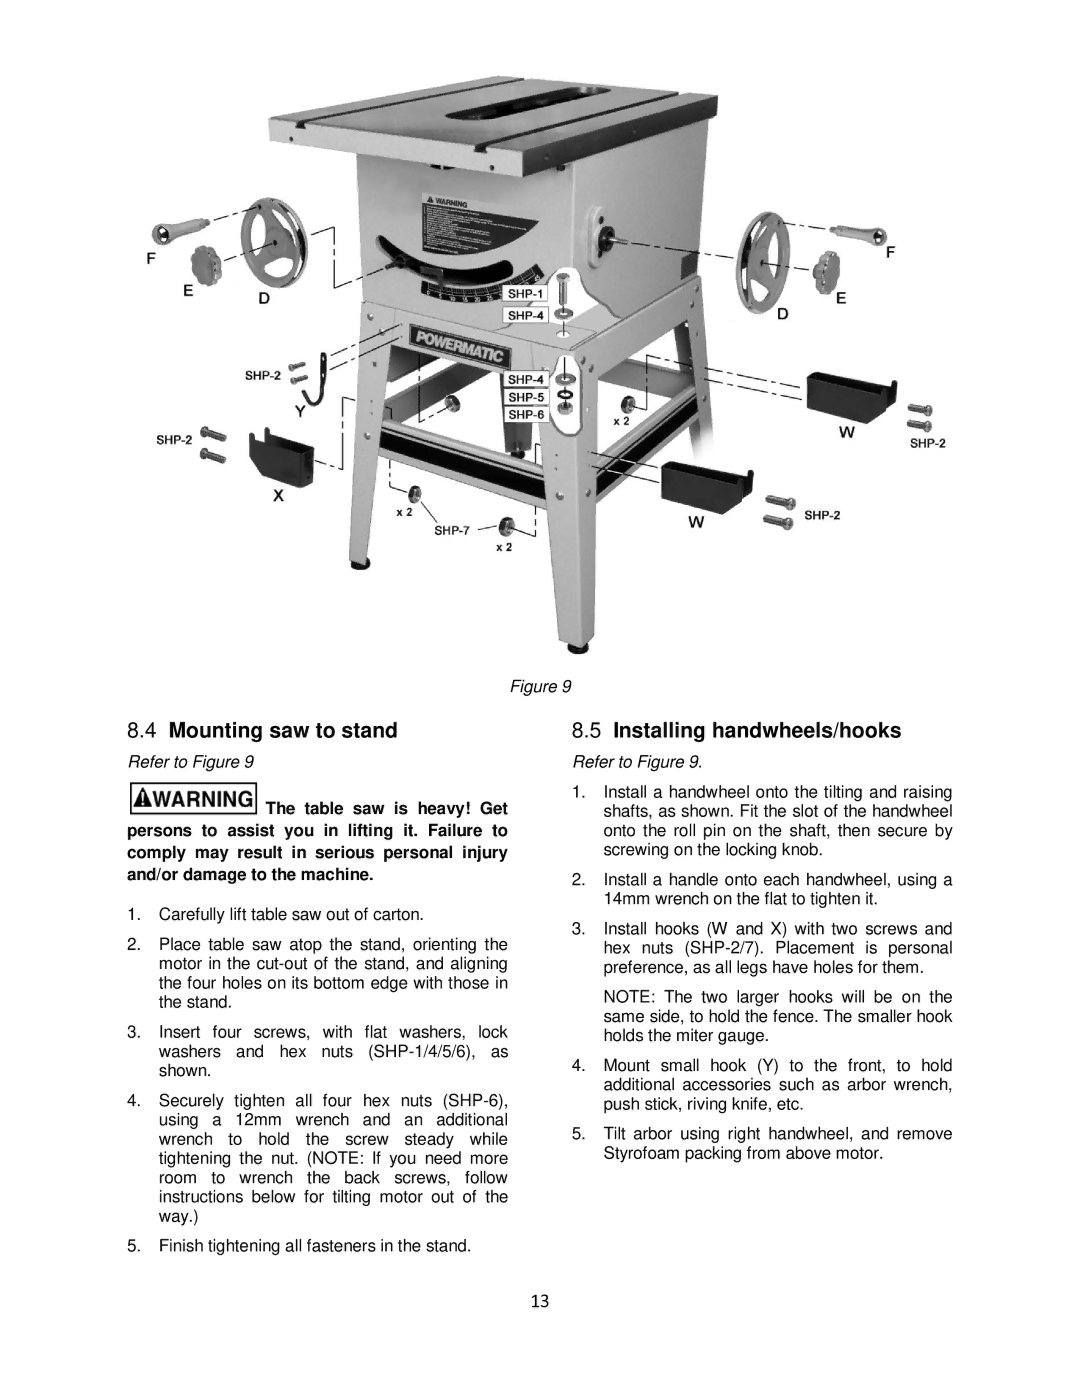
Figure 9
8.4Mounting saw to stand
Refer to Figure 9
![]() The table saw is heavy! Get persons to assist you in lifting it. Failure to comply may result in serious personal injury and/or damage to the machine.
The table saw is heavy! Get persons to assist you in lifting it. Failure to comply may result in serious personal injury and/or damage to the machine.
1.Carefully lift table saw out of carton.
2.Place table saw atop the stand, orienting the motor in the
3.Insert four screws, with flat washers, lock washers and hex nuts
4.Securely tighten all four hex nuts
5.Finish tightening all fasteners in the stand.
8.5Installing handwheels/hooks
Refer to Figure 9.
1.Install a handwheel onto the tilting and raising shafts, as shown. Fit the slot of the handwheel onto the roll pin on the shaft, then secure by screwing on the locking knob.
2.Install a handle onto each handwheel, using a 14mm wrench on the flat to tighten it.
3.Install hooks (W and X) with two screws and hex nuts
NOTE: The two larger hooks will be on the same side, to hold the fence. The smaller hook holds the miter gauge.
4.Mount small hook (Y) to the front, to hold additional accessories such as arbor wrench, push stick, riving knife, etc.
5.Tilt arbor using right handwheel, and remove Styrofoam packing from above motor.
13