Installing Chisel and Auger
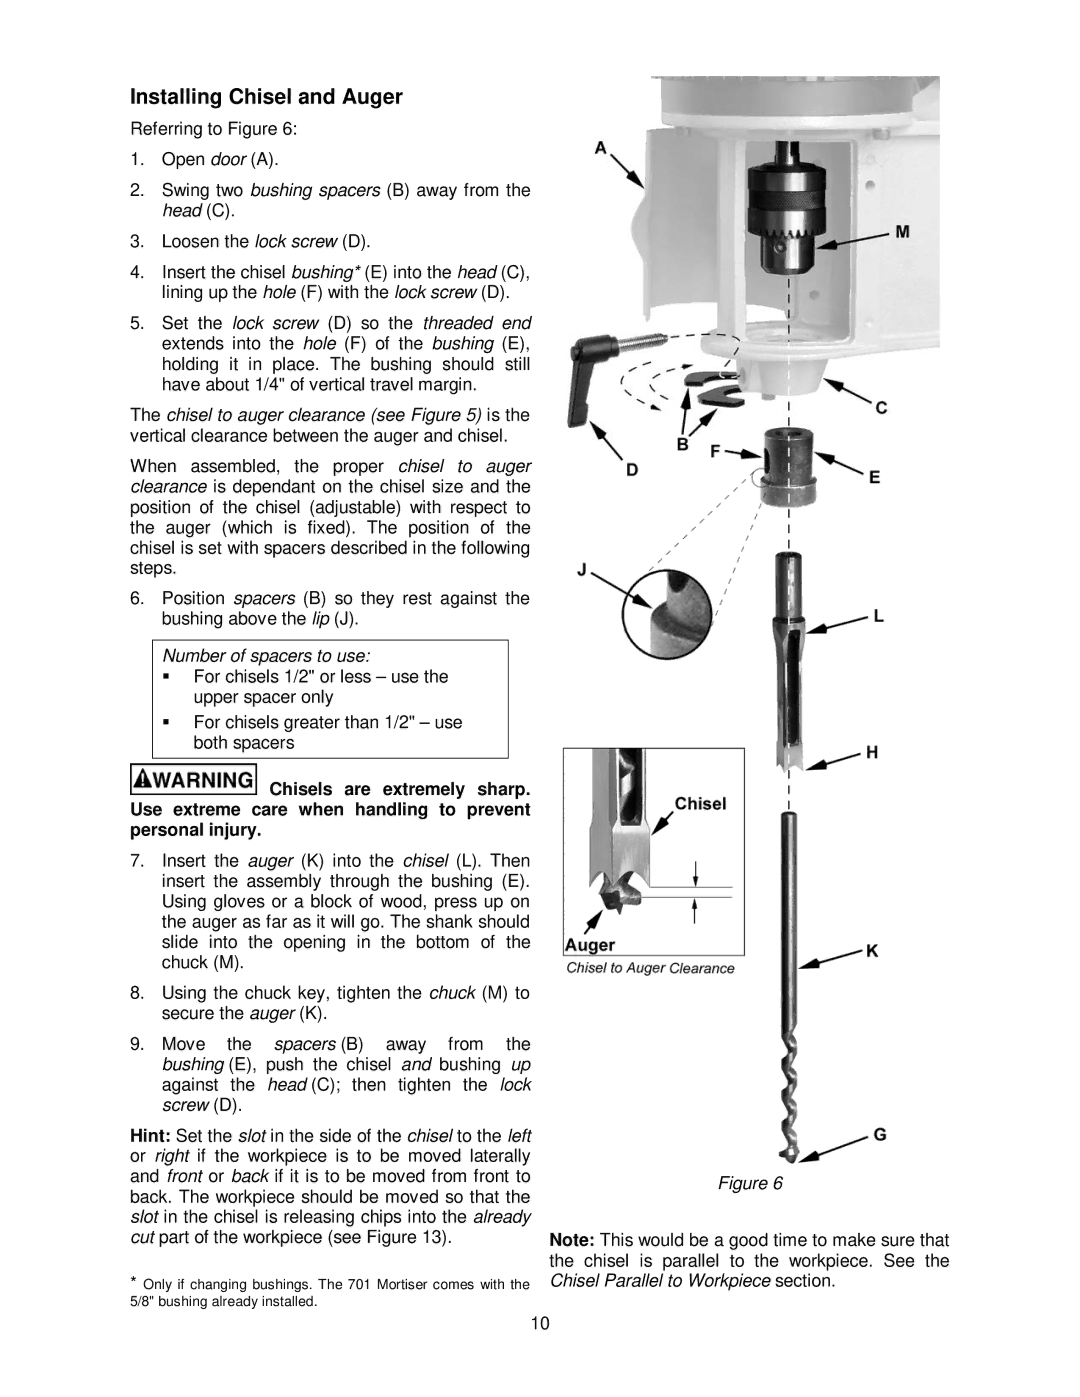
Referring to Figure 6:
1.Open door (A).
2.Swing two bushing spacers (B) away from the head (C).
3.Loosen the lock screw (D).
4.Insert the chisel bushing* (E) into the head (C), lining up the hole (F) with the lock screw (D).
5.Set the lock screw (D) so the threaded end extends into the hole (F) of the bushing (E), holding it in place. The bushing should still have about 1/4" of vertical travel margin.
The chisel to auger clearance (see Figure 5) is the vertical clearance between the auger and chisel.
When assembled, the proper chisel to auger clearance is dependant on the chisel size and the position of the chisel (adjustable) with respect to the auger (which is fixed). The position of the chisel is set with spacers described in the following steps.
6.Position spacers (B) so they rest against the bushing above the lip (J).
Number of spacers to use:
For chisels 1/2" or less – use the upper spacer only
For chisels greater than 1/2" – use both spacers
![]() Chisels are extremely sharp. Use extreme care when handling to prevent personal injury.
Chisels are extremely sharp. Use extreme care when handling to prevent personal injury.
7.Insert the auger (K) into the chisel (L). Then insert the assembly through the bushing (E). Using gloves or a block of wood, press up on the auger as far as it will go. The shank should slide into the opening in the bottom of the chuck (M).
8.Using the chuck key, tighten the chuck (M) to secure the auger (K).
9.Move the spacers (B) away from the bushing (E), push the chisel and bushing up against the head (C); then tighten the lock screw (D).
Hint: Set the slot in the side of the chisel to the left or right if the workpiece is to be moved laterally and front or back if it is to be moved from front to back. The workpiece should be moved so that the slot in the chisel is releasing chips into the already cut part of the workpiece (see Figure 13).
*Only if changing bushings. The 701 Mortiser comes with the 5/8" bushing already installed.
Figure 6
Note: This would be a good time to make sure that the chisel is parallel to the workpiece. See the Chisel Parallel to Workpiece section.
10