Powermatic 701 operating instructions Electrical

Models: 701

1 60
Download 60 pages 25.6 Kb
Page 11
Image 11

Securing Mortiser to Work Bench

It is highly recommended to secure the mortiser to the workbench to prevent the possibility of tipping, sliding or "walking" during operation.

Secure the mortiser to the bench with fasteners (not supplied) through four holes located in the base (Figure 7).

Tool Holder

Referring to Figure 8:

The 701 Bench-top Mortiser has a tool holder (A) that is installed at the factory and requires no assembly. It can be used to store the extra bushing (B), chuck key (C), extension (D) as well as any additional chisels and accessories.

Diamond Sharpening Cone

Referring to Figure 8:

1.From hardware kit insert the diamond sharpening cone (E) into the opening (F) at the top of the column.

2.Secure with the setscrew (G). The threaded opening is located behind the tool holder (A) which needs to be raised to access.

Electrical

115V/230V Operation

The Powermatic 701 Mortiser comes
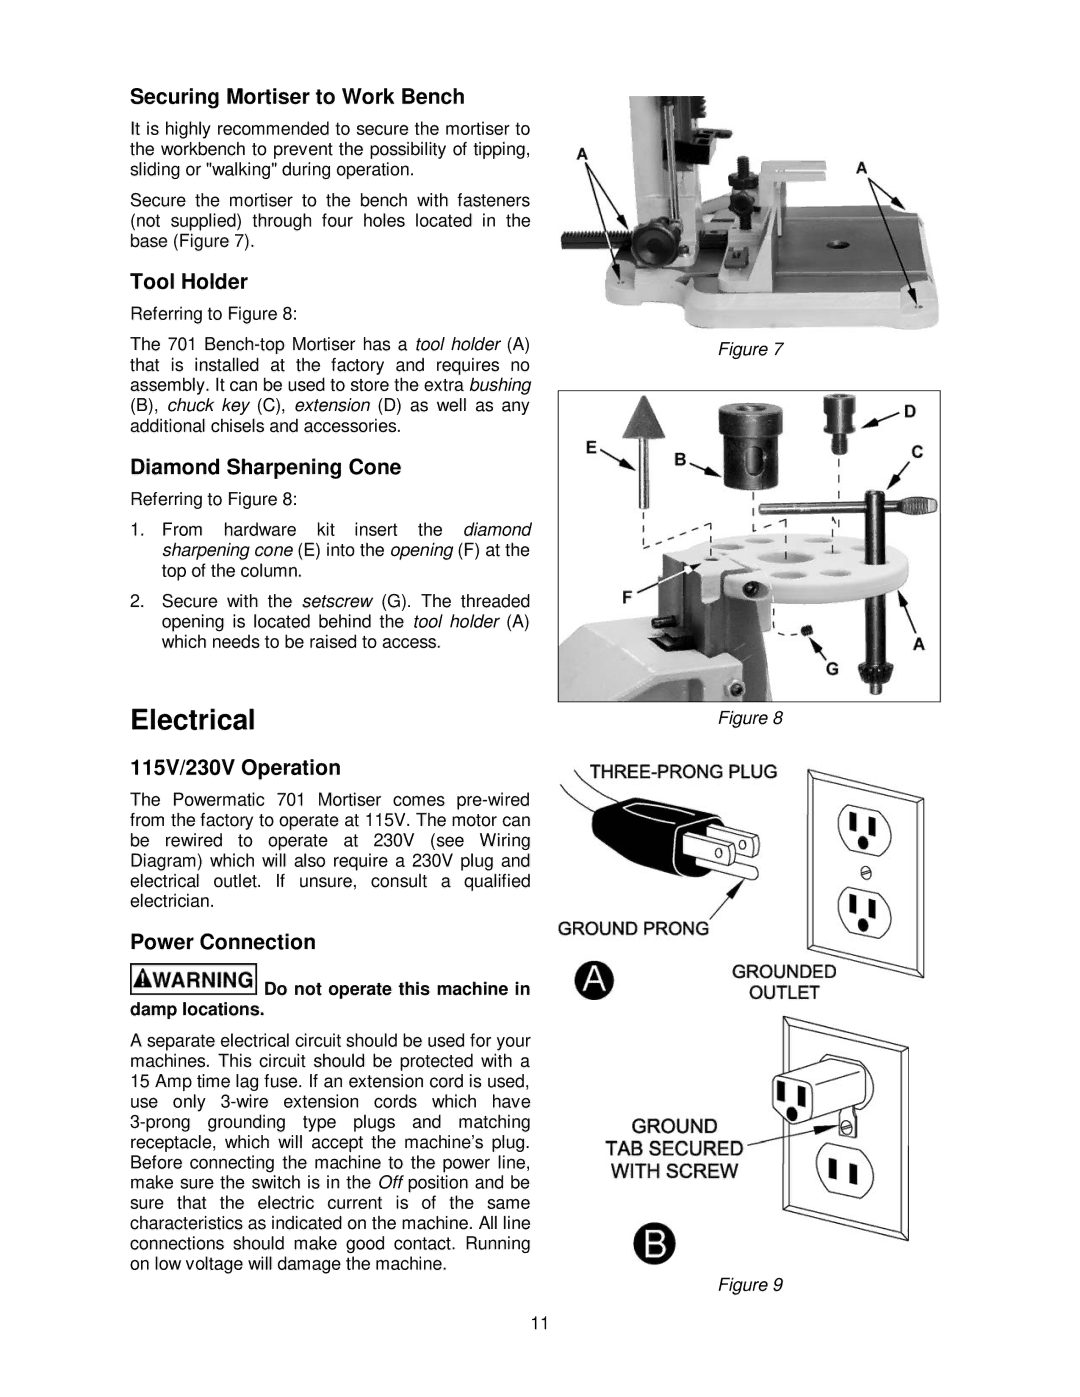
 pre-wired from the factory to operate at 115V. The motor can be rewired to operate at 230V (see Wiring Diagram) which will also require a 230V plug and electrical outlet. If unsure, consult a qualified electrician.

Power Connection

Do not operate this machine in damp locations.

A separate electrical circuit should be used for your machines. This circuit should be protected with a 15 Amp time lag fuse. If an extension cord is used, use only 3-wire extension cords which have 3-prong grounding type plugs and matching receptacle, which will accept the machine’s plug. Before connecting the machine to the power line, make sure the switch is in the Off position and be sure that the electric current is of the same characteristics as indicated on the machine. All line connections should make good contact. Running on low voltage will damage the machine.

11

Figure 7

Figure 8

Figure 9

Page 11
Image 11
Powermatic 701 operating instructions Electrical