Operation
1.Set the depth stop to the required depth of cut (refer to the Depth Stop Adjustment section on page 12).
2.Place workpiece on table and against the fence.
3.Adjust the fence until the workpiece is in the correct position (see the Fence and Clamp section on page 14).
4.Clamp the workpiece or set the clamp to the desired height as described in the Fence and Clamp section on page 14)
![]() Before turning the machine on, verify that the chuck key is not in the chuck.
Before turning the machine on, verify that the chuck key is not in the chuck.
5.Turn on the machine and feed the chisel and auger steadily into workpiece by pulling down the operating handle.
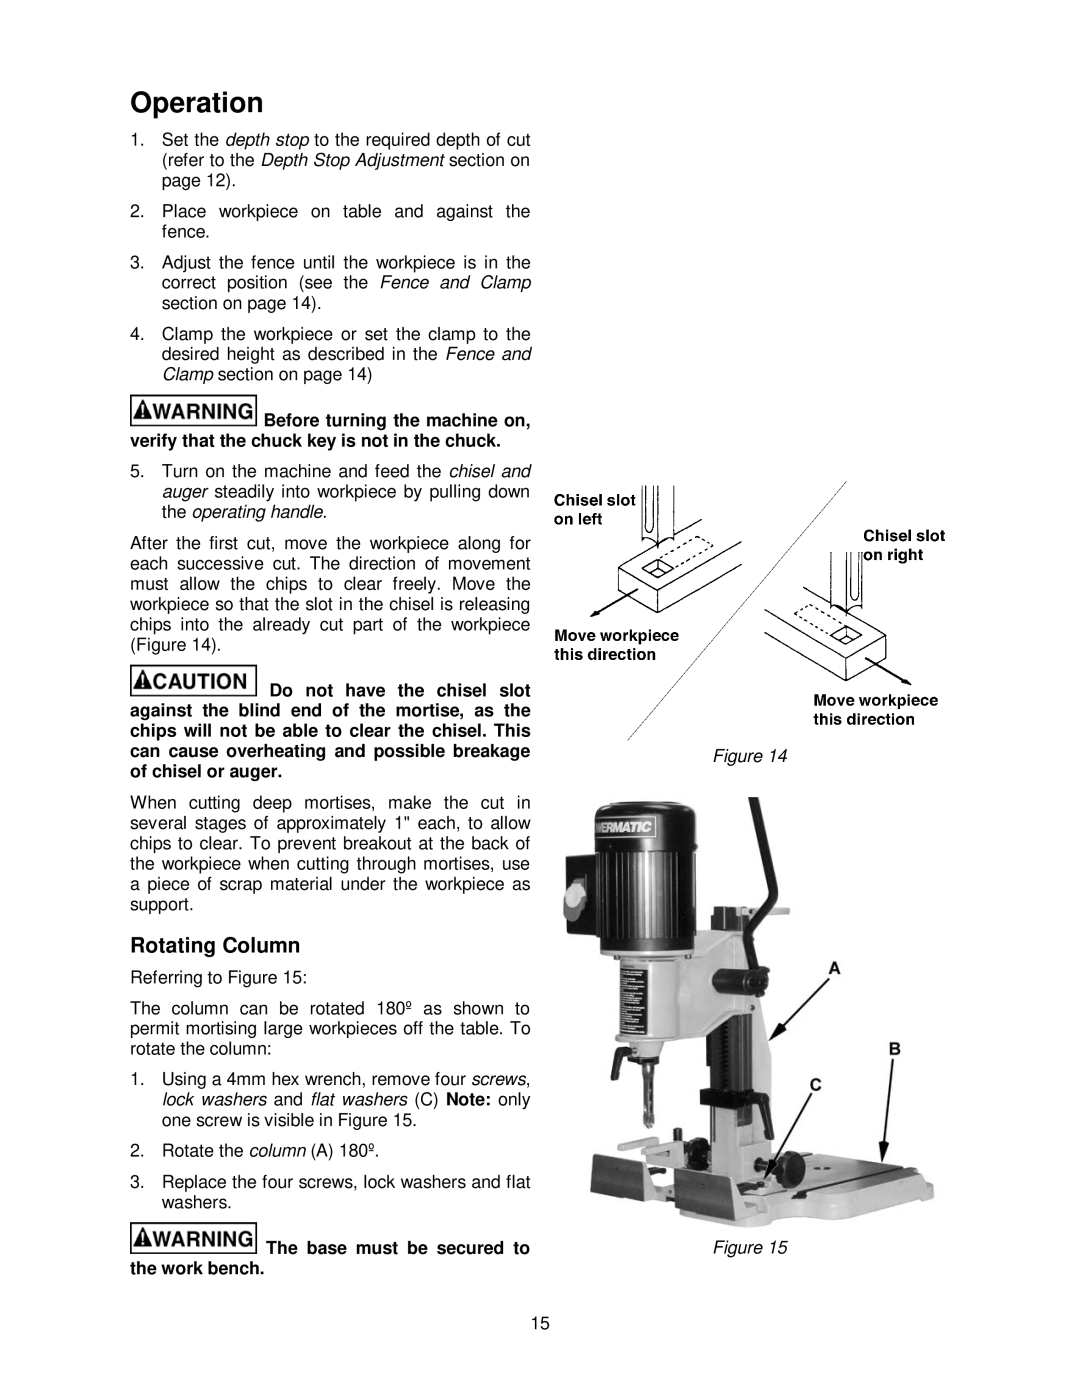
After the first cut, move the workpiece along for each successive cut. The direction of movement must allow the chips to clear freely. Move the workpiece so that the slot in the chisel is releasing chips into the already cut part of the workpiece (Figure 14).
![]() Do not have the chisel slot against the blind end of the mortise, as the chips will not be able to clear the chisel. This can cause overheating and possible breakage of chisel or auger.
Do not have the chisel slot against the blind end of the mortise, as the chips will not be able to clear the chisel. This can cause overheating and possible breakage of chisel or auger.
When cutting deep mortises, make the cut in several stages of approximately 1" each, to allow chips to clear. To prevent breakout at the back of the workpiece when cutting through mortises, use a piece of scrap material under the workpiece as support.
Rotating Column
Referring to Figure 15:
The column can be rotated 180º as shown to permit mortising large workpieces off the table. To rotate the column:
1.Using a 4mm hex wrench, remove four screws, lock washers and flat washers (C) Note: only one screw is visible in Figure 15.
2.Rotate the column (A) 180º.
3.Replace the four screws, lock washers and flat washers.
 The base must be secured to the work bench.
15
Figure 14
Figure 15