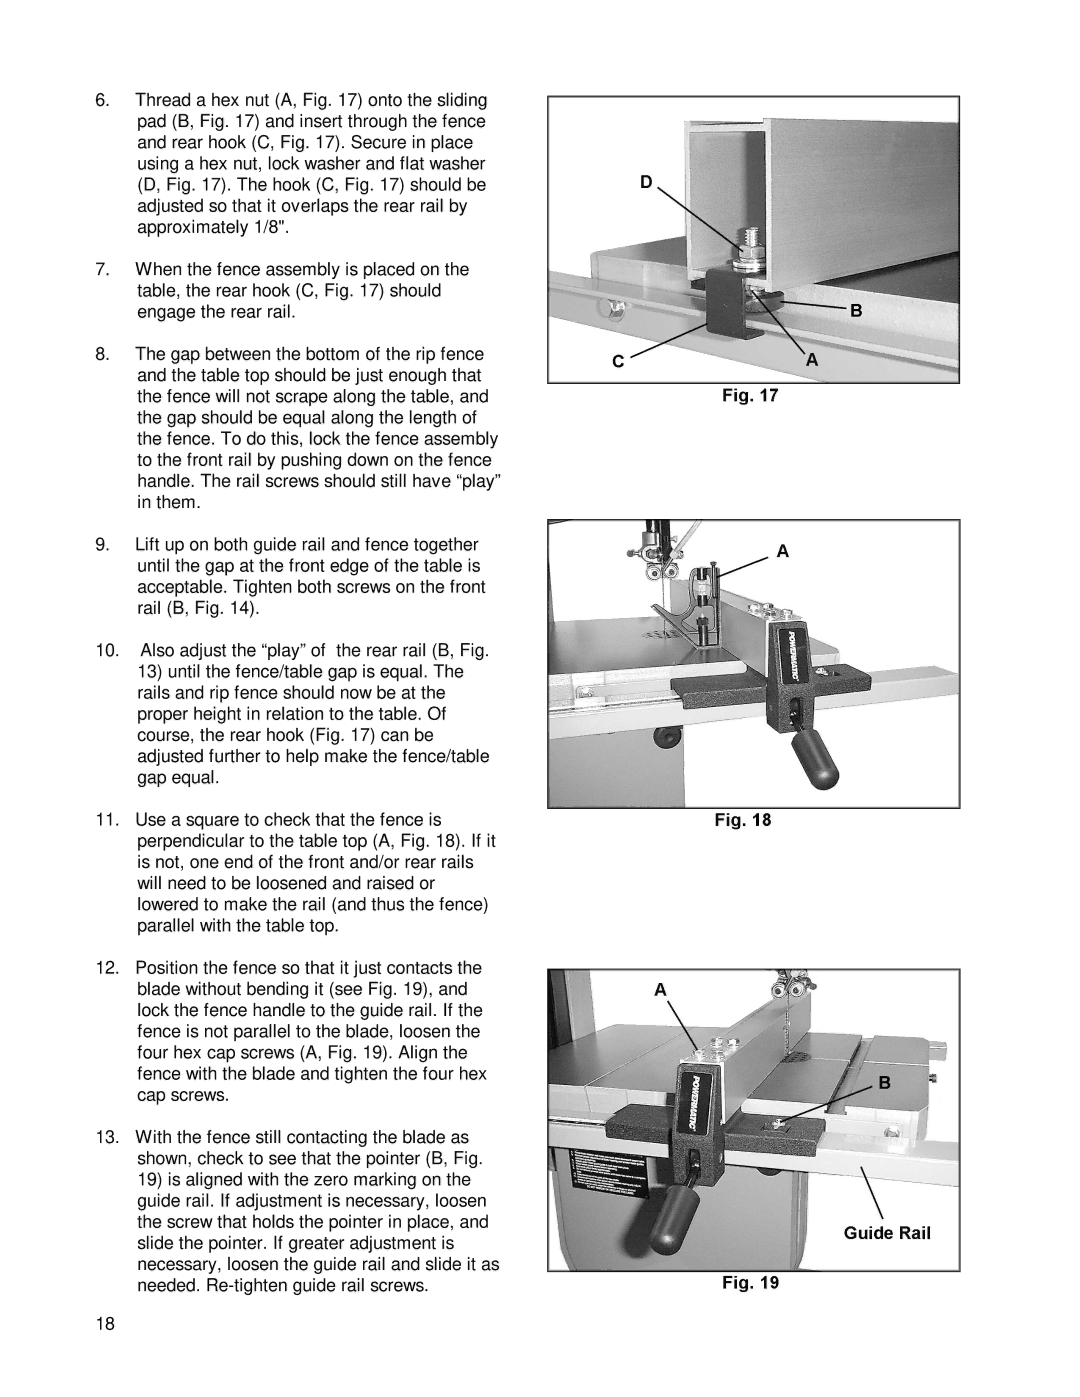
6.Thread a hex nut (A, Fig. 17) onto the sliding pad (B, Fig. 17) and insert through the fence and rear hook (C, Fig. 17). Secure in place using a hex nut, lock washer and flat washer (D, Fig. 17). The hook (C, Fig. 17) should be adjusted so that it overlaps the rear rail by approximately 1/8".
7.When the fence assembly is placed on the table, the rear hook (C, Fig. 17) should engage the rear rail.
8.The gap between the bottom of the rip fence and the table top should be just enough that the fence will not scrape along the table, and the gap should be equal along the length of the fence. To do this, lock the fence assembly to the front rail by pushing down on the fence handle. The rail screws should still have “play” in them.
9.Lift up on both guide rail and fence together until the gap at the front edge of the table is acceptable. Tighten both screws on the front rail (B, Fig. 14).
10.Also adjust the “play” of the rear rail (B, Fig.
13)until the fence/table gap is equal. The rails and rip fence should now be at the proper height in relation to the table. Of course, the rear hook (Fig. 17) can be adjusted further to help make the fence/table gap equal.
11.Use a square to check that the fence is perpendicular to the table top (A, Fig. 18). If it is not, one end of the front and/or rear rails will need to be loosened and raised or lowered to make the rail (and thus the fence) parallel with the table top.
12.Position the fence so that it just contacts the blade without bending it (see Fig. 19), and lock the fence handle to the guide rail. If the fence is not parallel to the blade, loosen the four hex cap screws (A, Fig. 19). Align the fence with the blade and tighten the four hex cap screws.
13.With the fence still contacting the blade as shown, check to see that the pointer (B, Fig.
19)is aligned with the zero marking on the guide rail. If adjustment is necessary, loosen the screw that holds the pointer in place, and slide the pointer. If greater adjustment is necessary, loosen the guide rail and slide it as needed.
18