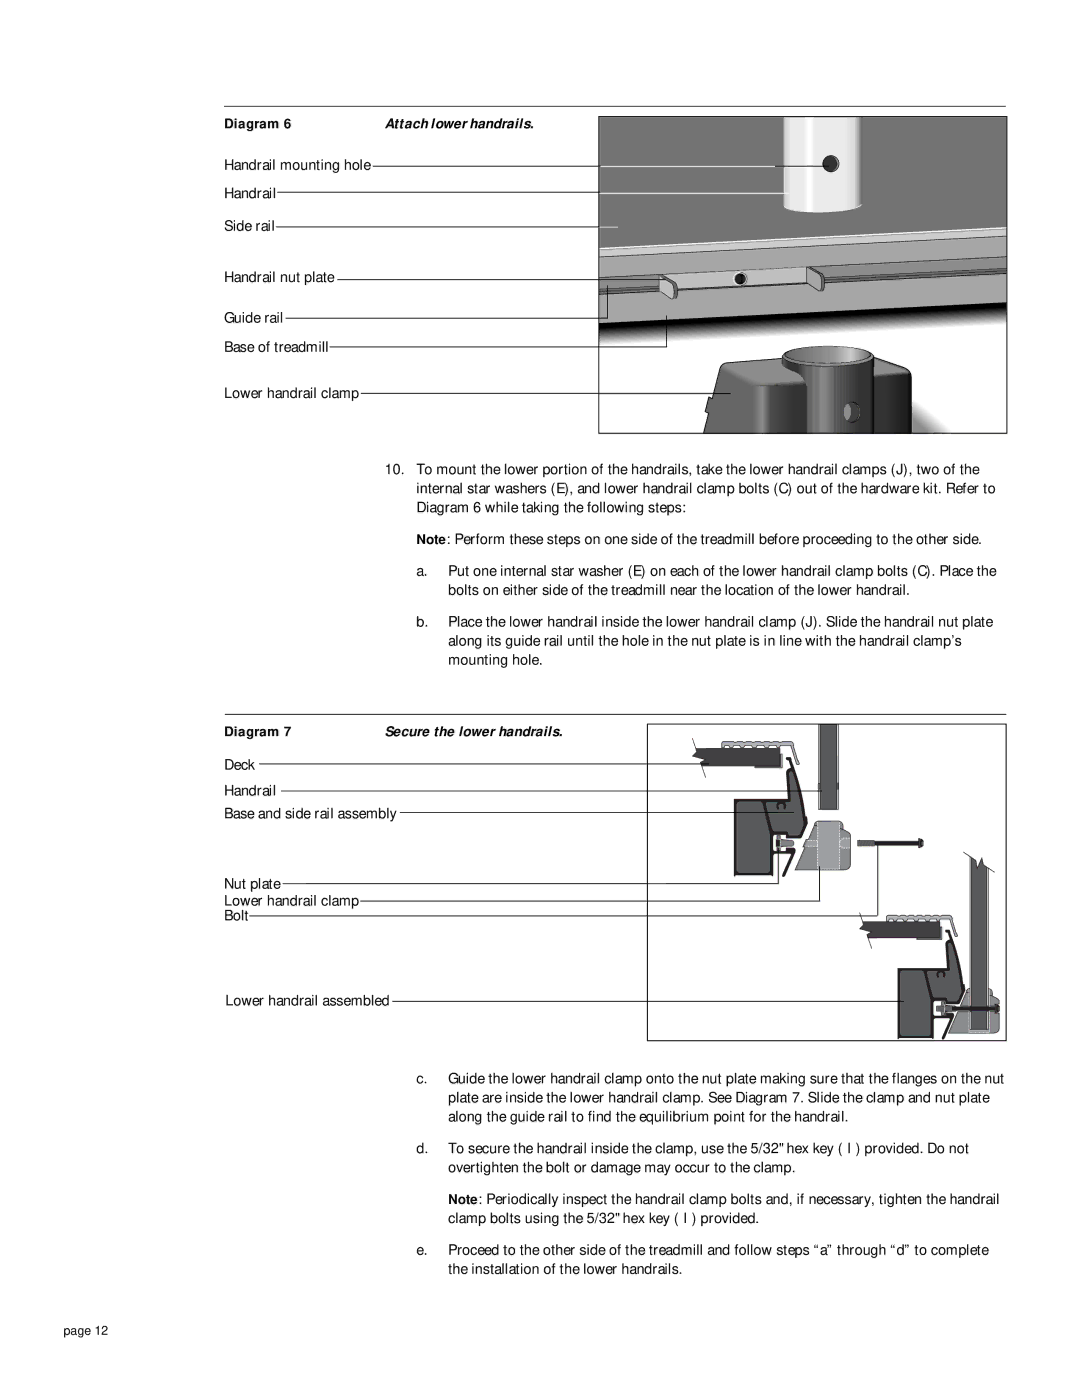
Diagram 6 | Attach lower handrails. |
Handrail mounting hole |
|
Handrail |
|
Side rail |
|
Handrail nut plate |
|
Guide rail |
|
Base of treadmill |
|
Lower handrail clamp |
|
10.To mount the lower portion of the handrails, take the lower handrail clamps (J), two of the internal star washers (E), and lower handrail clamp bolts (C) out of the hardware kit. Refer to Diagram 6 while taking the following steps:
Note: Perform these steps on one side of the treadmill before proceeding to the other side.
a.Put one internal star washer (E) on each of the lower handrail clamp bolts (C). Place the bolts on either side of the treadmill near the location of the lower handrail.
b.Place the lower handrail inside the lower handrail clamp (J). Slide the handrail nut plate along its guide rail until the hole in the nut plate is in line with the handrail clamp’s mounting hole.
Diagram 7 | Secure the lower handrails. |
Deck
Handrail
Base and side rail assembly
Nut plate
Lower handrail clamp
Bolt
Lower handrail assembled
c.Guide the lower handrail clamp onto the nut plate making sure that the flanges on the nut plate are inside the lower handrail clamp. See Diagram 7. Slide the clamp and nut plate along the guide rail to find the equilibrium point for the handrail.
d.To secure the handrail inside the clamp, use the 5/32" hex key ( I ) provided. Do not overtighten the bolt or damage may occur to the clamp.
Note: Periodically inspect the handrail clamp bolts and, if necessary, tighten the handrail clamp bolts using the 5/32" hex key ( I ) provided.
e.Proceed to the other side of the treadmill and follow steps “a” through “d” to complete the installation of the lower handrails.
page 12
