Cardio Theater Integrated Bracket Assembly Instructions
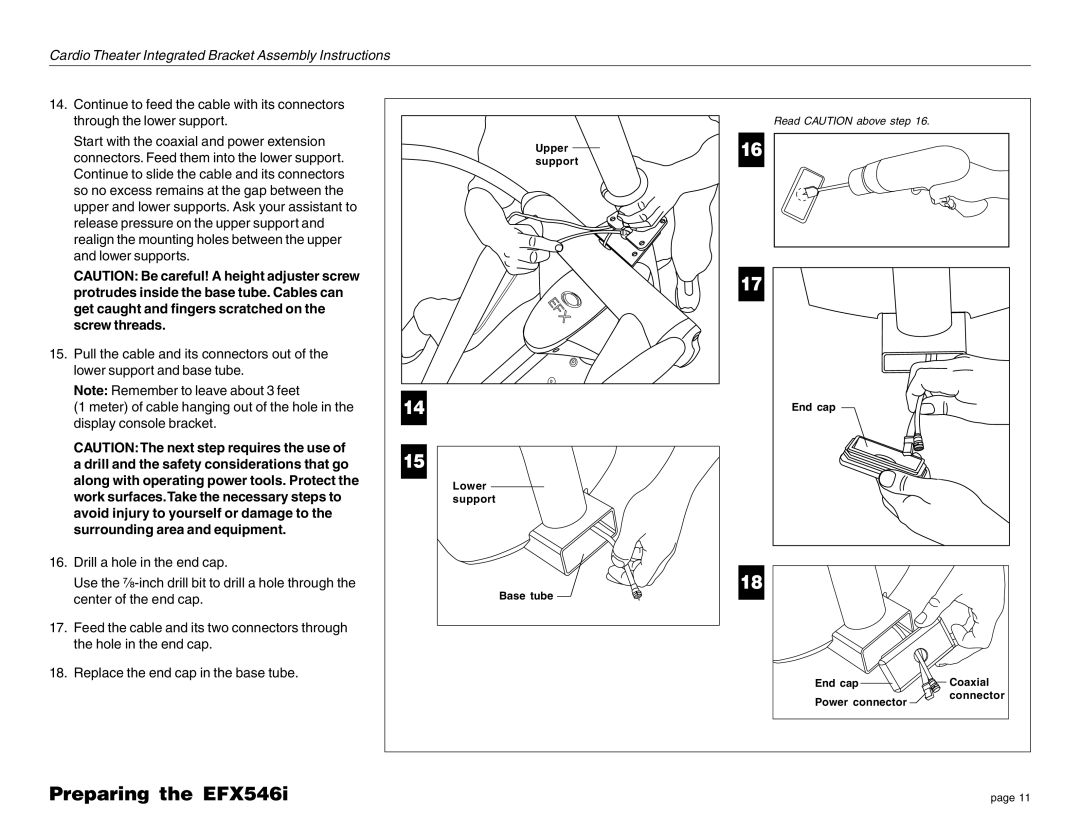
14.Continue to feed the cable with its connectors through the lower support.
Start with the coaxial and power extension connectors. Feed them into the lower support. Continue to slide the cable and its connectors so no excess remains at the gap between the upper and lower supports. Ask your assistant to release pressure on the upper support and realign the mounting holes between the upper and lower supports.
CAUTION: Be careful! A height adjuster screw protrudes inside the base tube. Cables can get caught and fingers scratched on the screw threads.
15.Pull the cable and its connectors out of the lower support and base tube.
Note: Remember to leave about 3 feet
(1 meter) of cable hanging out of the hole in the display console bracket.
CAUTION:The next step requires the use of a drill and the safety considerations that go along with operating power tools. Protect the work surfaces.Take the necessary steps to avoid injury to yourself or damage to the surrounding area and equipment.
16.Drill a hole in the end cap.
Use the
17.Feed the cable and its two connectors through the hole in the end cap.
18.Replace the end cap in the base tube.
Upper | 16 |
support |
|
| 17 |
14 |
|
15 |
|
Lower |
|
support |
|
| 18 |
Base tube
Read CAUTION above step 16.
End cap
End cap | Coaxial |
Power connector | connector |
|
Preparing the EFX546i
page 11
