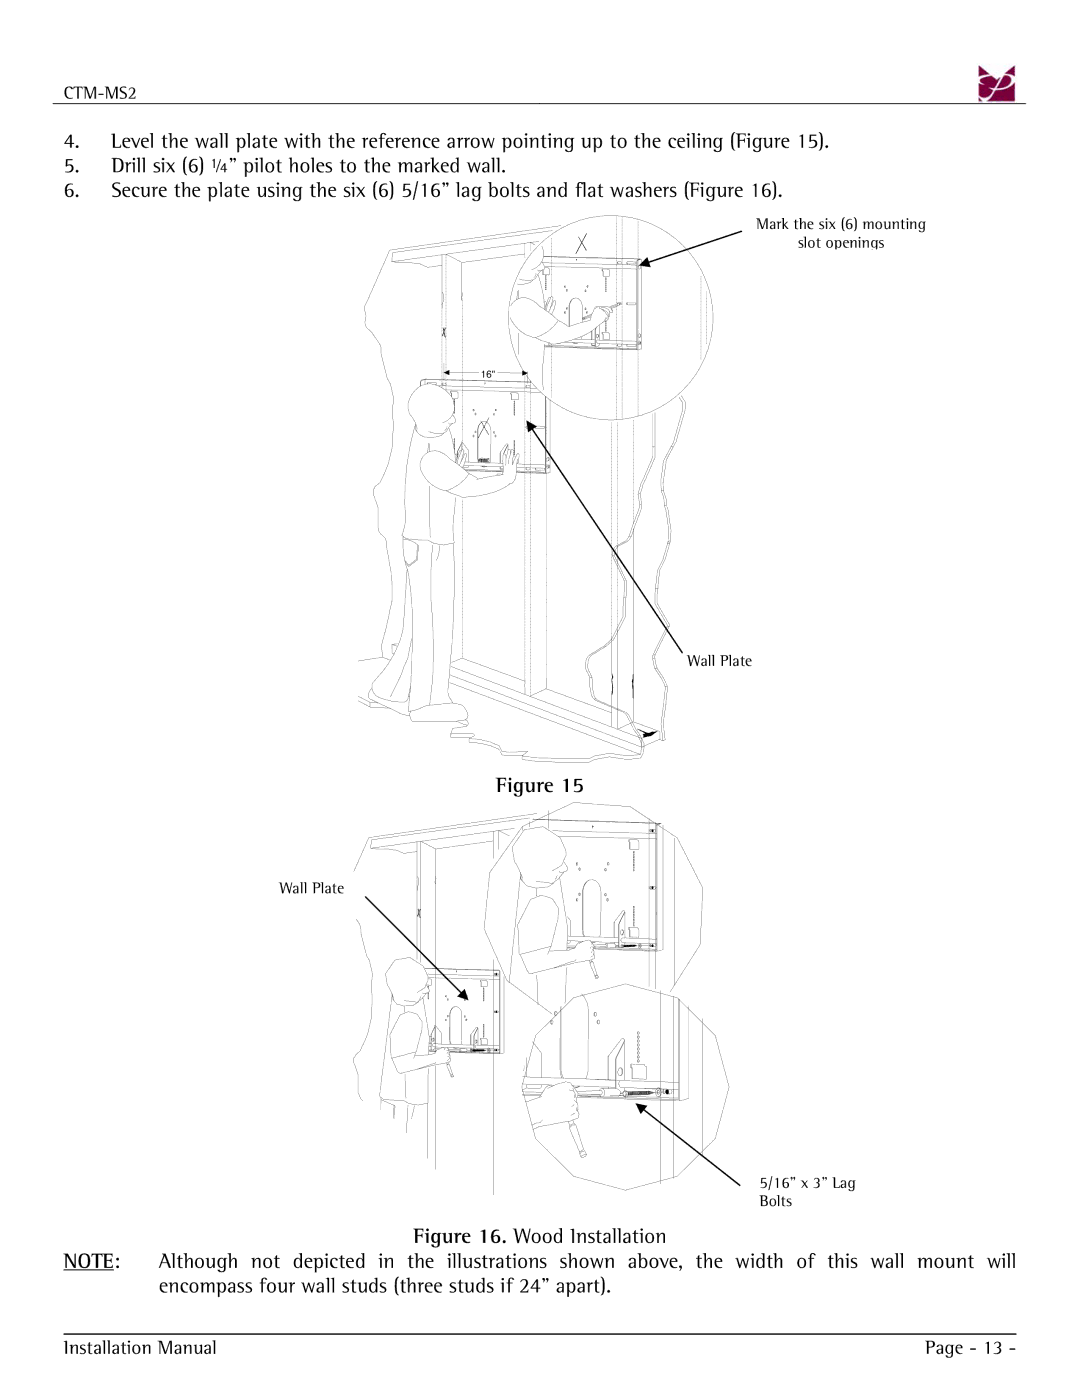
4.Level the wall plate with the reference arrow pointing up to the ceiling (Figure 15).
5.Drill six (6) ¼" pilot holes to the marked wall.
6.Secure the plate using the six (6) 5/16" lag bolts and flat washers (Figure 16).
Mark the six (6) mounting
slot openings
16"
Wall Plate
Figure 15
Wall Plate
5/16” x 3” Lag
Bolts
Figure 16. Wood Installation
NOTE: Although not depicted in the illustrations shown above, the width of this wall mount will encompass four wall studs (three studs if 24” apart).
Installation Manual | Page - 13 - |
