AST-2446/2 INSTALLATION INSTRUCTIONS
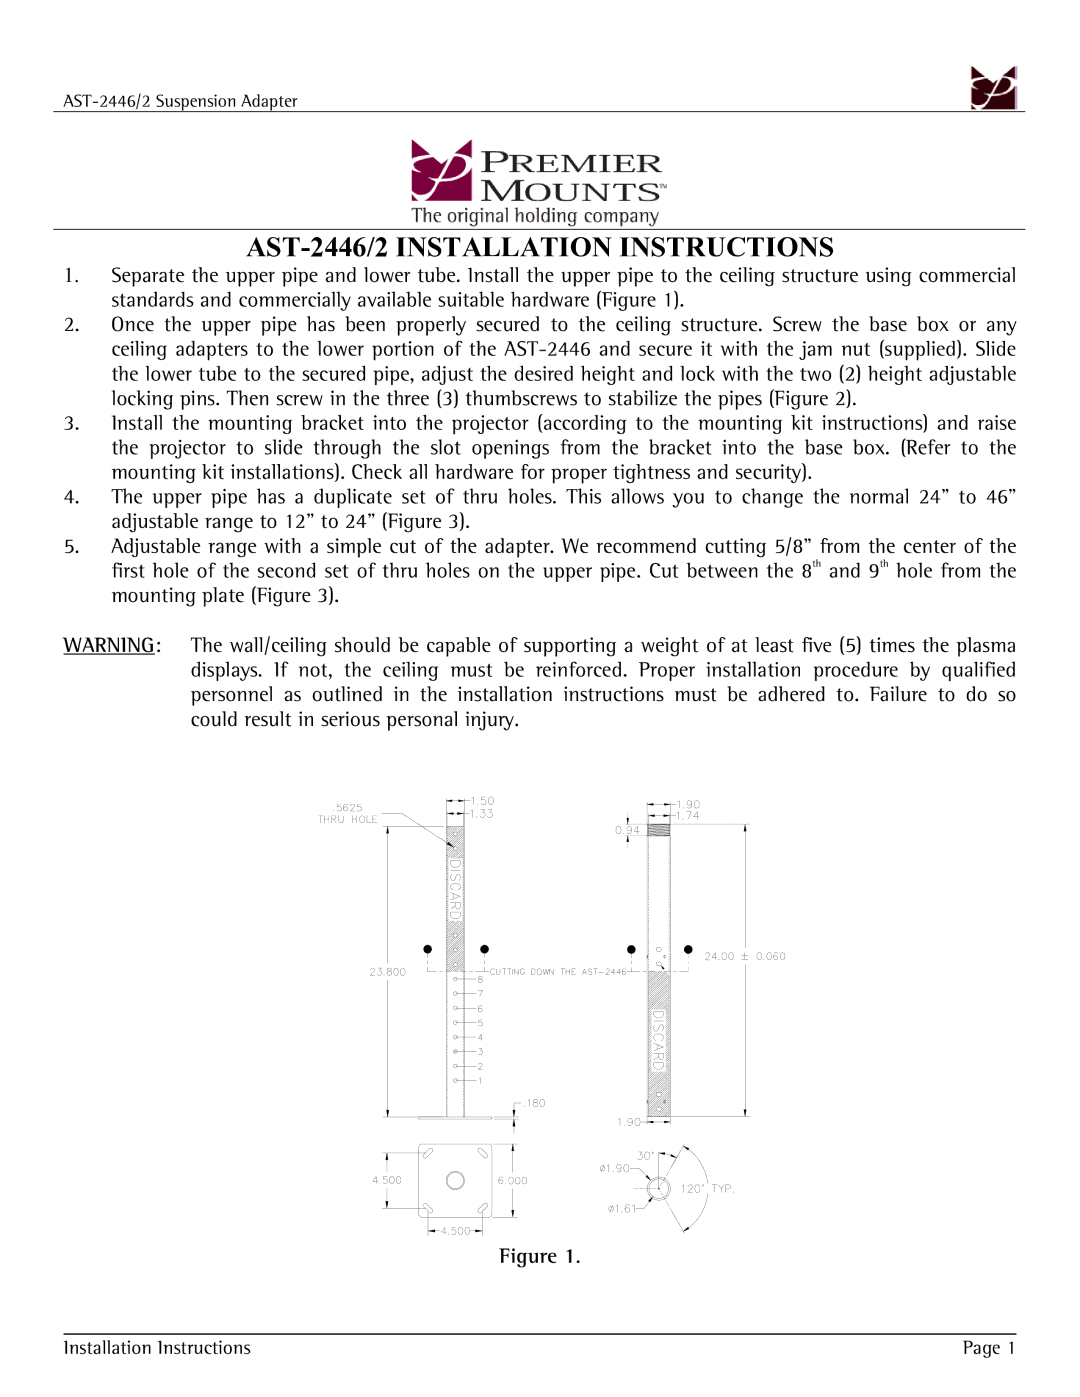
1.Separate the upper pipe and lower tube. Install the upper pipe to the ceiling structure using commercial standards and commercially available suitable hardware (Figure 1).
2.Once the upper pipe has been properly secured to the ceiling structure. Screw the base box or any ceiling adapters to the lower portion of the
3.Install the mounting bracket into the projector (according to the mounting kit instructions) and raise the projector to slide through the slot openings from the bracket into the base box. (Refer to the mounting kit installations). Check all hardware for proper tightness and security).
4.The upper pipe has a duplicate set of thru holes. This allows you to change the normal 24" to 46" adjustable range to 12" to 24" (Figure 3).
5.Adjustable range with a simple cut of the adapter. We recommend cutting 5/8" from the center of the first hole of the second set of thru holes on the upper pipe. Cut between the 8th and 9th hole from the mounting plate (Figure 3).
WARNING: The wall/ceiling should be capable of supporting a weight of at least five (5) times the plasma displays. If not, the ceiling must be reinforced. Proper installation procedure by qualified personnel as outlined in the installation instructions must be adhered to. Failure to do so could result in serious personal injury.
Figure 1.
Installation Instructions | Page 1 |