V I I I . C O M F O R T A D J U S T M E N T S
WARNING! Remove the key from the key switch before adjusting the tiller or the seat. Never attempt to adjust the tiller or the seat while the scooter is in motion.
V I I I . C O M F O R T A D J U S T M E N T S
SEATBACK ADJUSTMENT
WARNING! Do not operate your scooter with the seatback in a reclined position. WARNING! Always keep your back pressed firmly against the seat back while adjusting it.
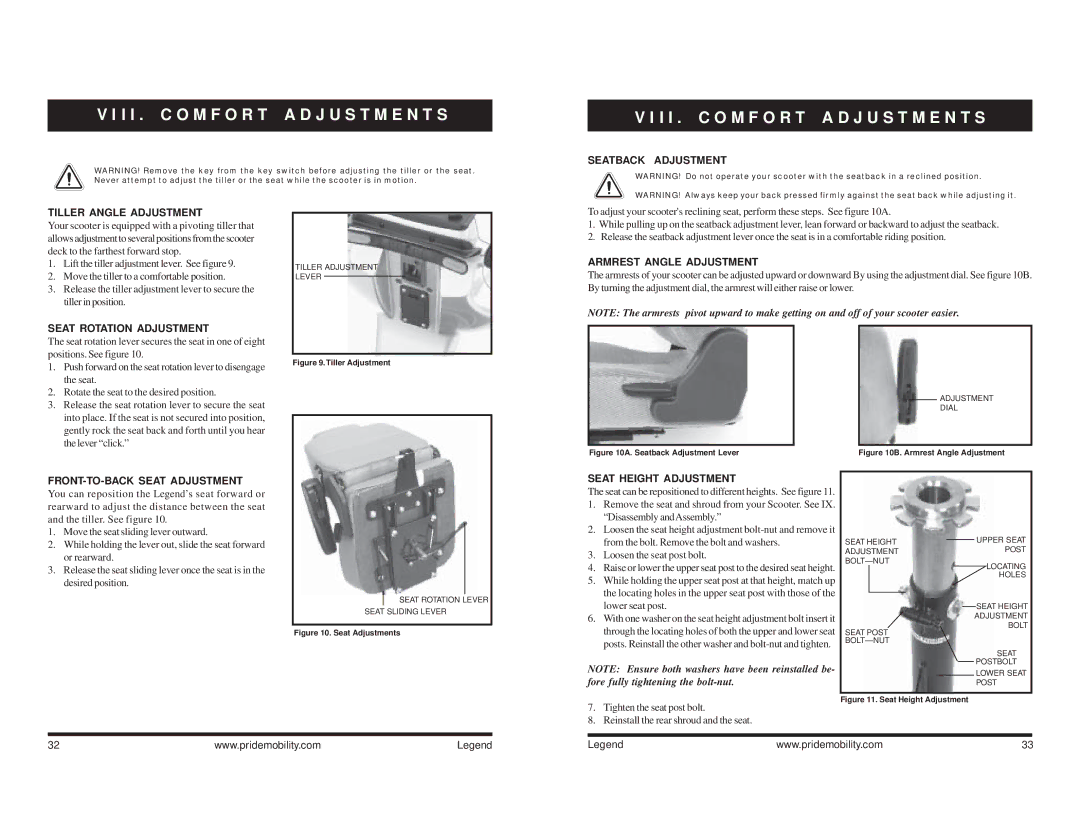
TILLER ANGLE ADJUSTMENT
Your scooter is equipped with a pivoting tiller that allows adjustment to several positions from the scooter deck to the farthest forward stop.
1.Lift the tiller adjustment lever. See figure 9.
2.Move the tiller to a comfortable position.
3.Release the tiller adjustment lever to secure the tiller in position.
SEAT ROTATION ADJUSTMENT
The seat rotation lever secures the seat in one of eight positions. See figure 10.
1.Push forward on the seat rotation lever to disengage the seat.
2.Rotate the seat to the desired position.
3.Release the seat rotation lever to secure the seat into place. If the seat is not secured into position, gently rock the seat back and forth until you hear the lever “click.”
TILLER ADJUSTMENT LEVER
Figure 9. Tiller Adjustment
To adjust your scooter's reclining seat, perform these steps. See figure 10A.
1.While pulling up on the seatback adjustment lever, lean forward or backward to adjust the seatback.
2.Release the seatback adjustment lever once the seat is in a comfortable riding position.
ARMREST ANGLE ADJUSTMENT
The armrests of your scooter can be adjusted upward or downward By using the adjustment dial. See figure 10B. By turning the adjustment dial, the armrest will either raise or lower.
NOTE: The armrests pivot upward to make getting on and off of your scooter easier.
ADJUSTMENT
DIAL
Figure 10A. Seatback Adjustment Lever | Figure 10B. Armrest Angle Adjustment |
FRONT-TO-BACK SEAT ADJUSTMENT
You can reposition the Legend’s seat forward or rearward to adjust the distance between the seat and the tiller. See figure 10.
1.Move the seat sliding lever outward.
2.While holding the lever out, slide the seat forward or rearward.
3.Release the seat sliding lever once the seat is in the desired position.
SEAT ROTATION LEVER
SEAT SLIDING LEVER
SEAT HEIGHT ADJUSTMENT
The seat can be repositioned to different heights. See figure 11.
1. | Remove the seat and shroud from your Scooter. See IX. |
| “Disassembly andAssembly.” |
2. | Loosen the seat height adjustment |
| from the bolt. Remove the bolt and washers. |
3. | Loosen the seat post bolt. |
4. | Raise or lower the upper seat post to the desired seat height. |
5. | While holding the upper seat post at that height, match up |
| the locating holes in the upper seat post with those of the |
| lower seat post. |
6. | With one washer on the seat height adjustment bolt insert it |
SEAT HEIGHT |
| UPPER SEAT |
| ||
ADJUSTMENT |
| POST |
| LOCATING | |
|
| |
|
| HOLES |
|
| SEAT HEIGHT |
|
| ADJUSTMENT |
|
| BOLT |
Figure 10. Seat Adjustments
through the locating holes of both the upper and lower seat |
posts. Reinstall the other washer and |
NOTE: Ensure both washers have been reinstalled be- fore fully tightening the
7.Tighten the seat post bolt.
8.Reinstall the rear shroud and the seat.
SEAT POST |
SEAT |
POSTBOLT |
LOWER SEAT |
POST |
Figure 11. Seat Height Adjustment
32 | www.pridemobility.com | Legend |
Legend | www.pridemobility.com | 33 |