Attaching Mounting Bracket To Wall

Note: Wall anchors, mounting screws, and spacers are in hardware package. The hardware package is provided with heater.

Attaching to Wall Stud Method

For attaching mounting bracket to wall studs

1.Drill holes at marked locations using 9/64" drill bit.

2.Place mounting bracket onto wall. Line up last hole on each end of bracket with holes drilled in wall.

3.Insert mounting screws through bracket and into wall studs.

4.Tighten screws until mounting bracket is firmly fastened to wall studs.

Attaching to Wall Anchor Method

For attaching mounting bracket to hollow walls (wall areas between studs) or solid walls (concrete or masonry)

1.Drill holes at marked locations using 5/16" drill bit. For solid

walls (concrete or masonry), drill at least 1" deep.

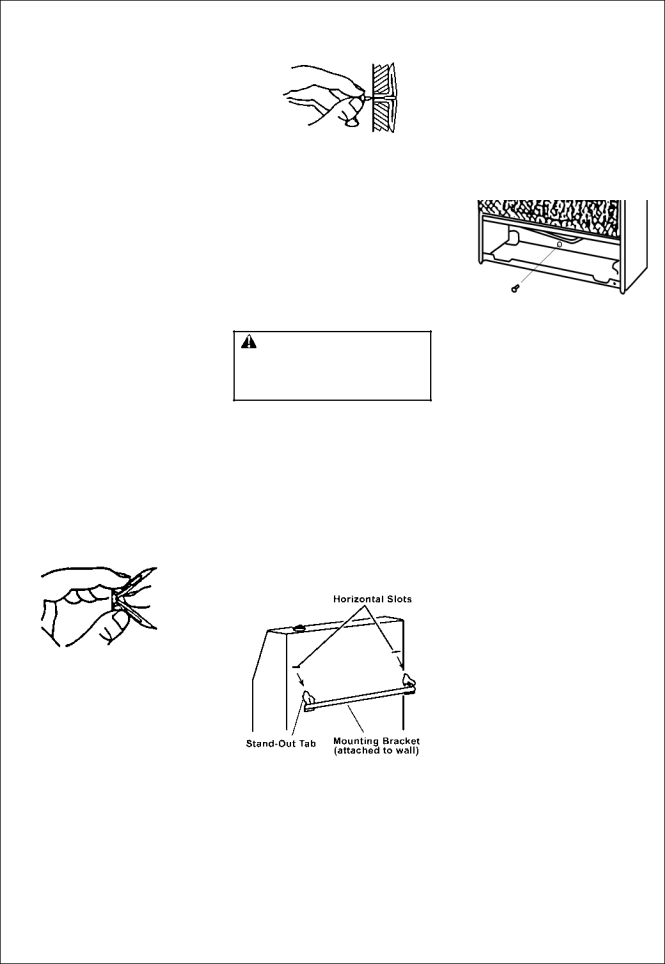
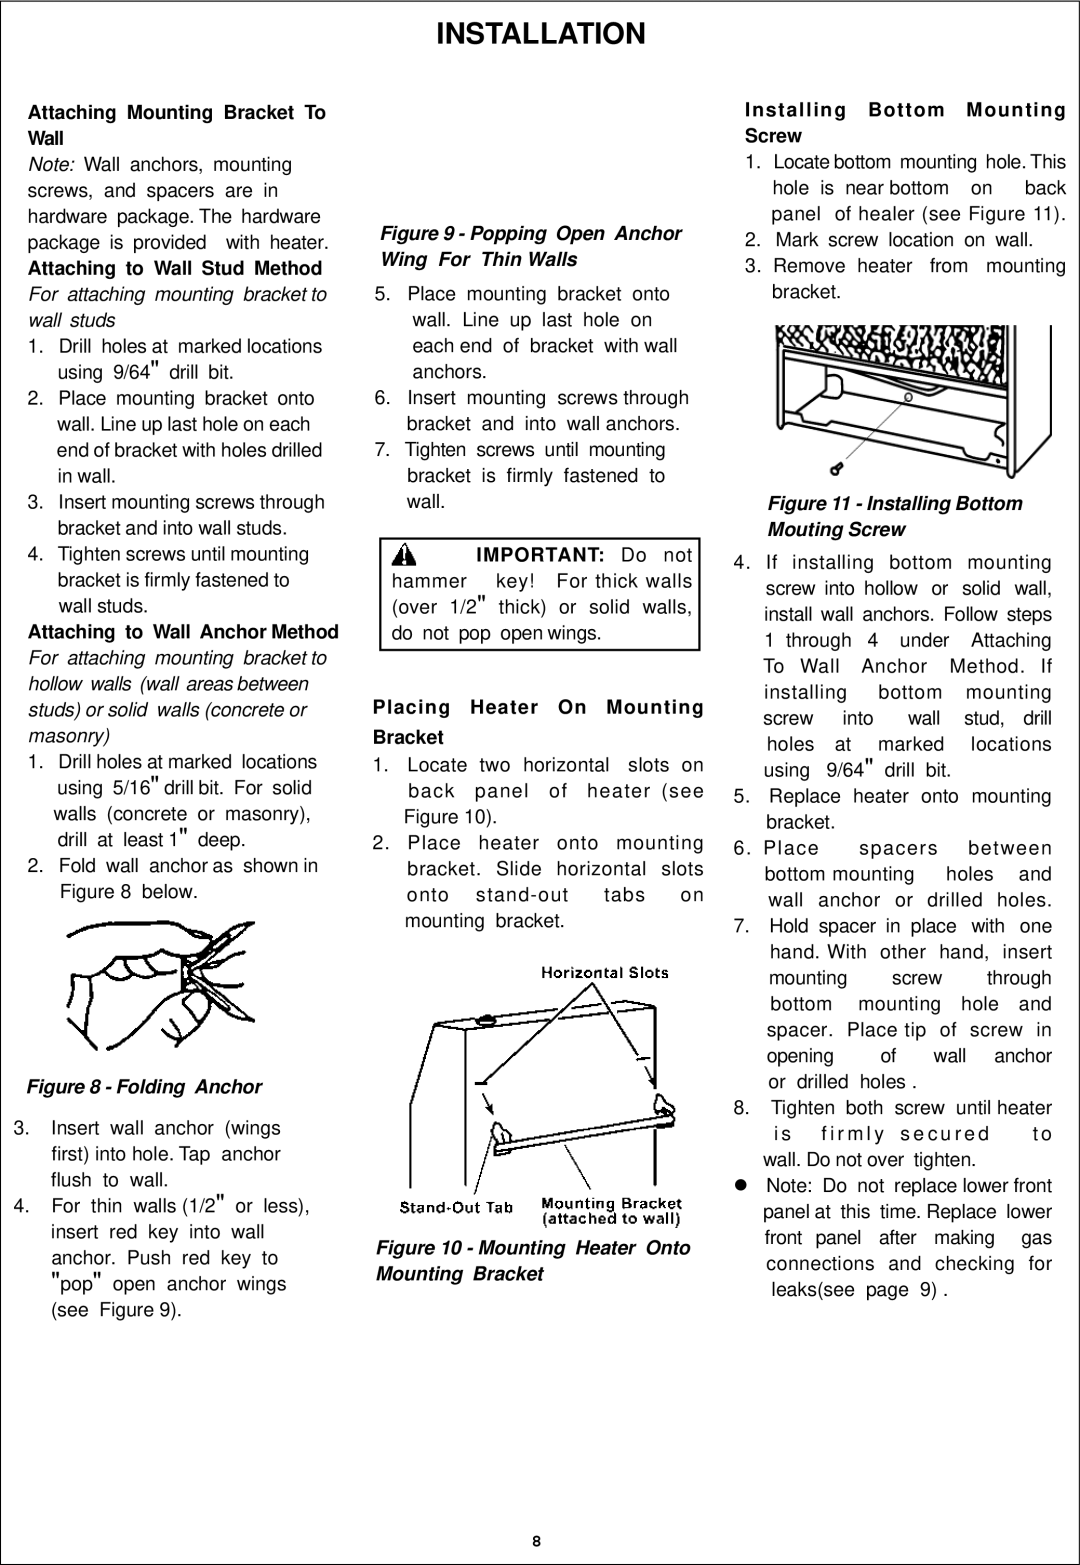
2.Fold wall anchor as shown in Figure 8 below.

Figure 8 - Folding Anchor

3.Insert wall anchor (wings first) into hole. Tap anchor flush to wall.

4.For thin walls (1/2" or less), insert red key into wall

anchor. Push red key to "pop" open anchor wings

(see Figure 9).

INSTALLATION

Figure 9 - Popping Open Anchor Wing For Thin Walls

5.Place mounting bracket onto wall. Line up last hole on each end of bracket with wall anchors.

6.Insert mounting screws through bracket and into wall anchors.

7.Tighten screws until mounting bracket is firmly fastened to wall.

IMPORTANT: Do not hammer key! For thick walls (over 1/2" thick) or solid walls, do not pop open wings.

Placing Heater On Mounting

Bracket

1.Locate two horizontal slots on back panel of heater (see Figure 10).

2.Place heater onto mounting bracket. Slide horizontal slots onto stand-out tabs on mounting bracket.

Figure 10 - Mounting Heater Onto Mounting Bracket

Installing Bottom Mounting Screw

1. Locate bottom mounting hole. This hole is near bottom on back panel of healer (see Figure 11).

2.Mark screw location on wall.

3.Remove heater from mounting bracket.

Figure 11 - Installing Bottom Mouting Screw

4.If installing bottom mounting screw into hollow or solid wall, install wall anchors. Follow steps 1 through 4 under Attaching To Wall Anchor Method. If installing bottom mounting screw into wall stud, drill

holes at marked locations using 9/64" drill bit.

5.Replace heater onto mounting bracket.

6. Place spacers between bottom mounting holes and wall anchor or drilled holes.

7.Hold spacer in place with one hand. With other hand, insert

mounting screw through

bottom

mounting

hole

and

spacer. Place tip

of

screw in

opening


of

wall

anchor

or drilled

holes .


8. Tighten both screw

until heater

i s

f i r m l y s e c u r e d

t o

wall. Do not over tighten.


Note: Do

not replace lower front

panel at this time. Replace lower

front

panel

after

making

gas

connections

and

checking

for

leaks(see

page 9) .


8

Page 8
Image 8
Procom ML100TPA, ML060HPA, ML100HPA installation manual Attaching to Wall Anchor Method, Installing Bottom Mounting Screw

ML060HPA, ML100TPA, ML100HPA specifications

Procom's ML100TPA, ML100HPA, and ML060HPA are cutting-edge amplifiers designed to enhance communication capabilities across various applications. These models are particularly popular in the fields of radio and communication technology, providing reliable performance and superior signal quality.

The ML100TPA is a high-performance, compact transmitter amplifier. It boasts an impressive power output of up to 100 watts, making it suitable for long-range communications. One of its standout features is its wide frequency range, accommodating multiple bands, which allows users to switch between applications seamlessly. The built-in thermal management system ensures stable operation even under heavy loads, preventing overheating and enhancing durability.

The ML100HPA is another powerful offering from Procom, specifically tailored for high-power applications. With a power output similar to the ML100TPA, this amplifier delivers robust performance while maintaining a compact form factor. It includes advanced features such as automatic gain control, ensuring consistent output levels regardless of input variations, which is essential for maintaining signal integrity. Additionally, the ML100HPA integrates an innovative protection circuit that safeguards against mismatches and overloads, enhancing reliability in demanding environments.

On the other hand, the ML060HPA is designed for applications where size and weight are critical considerations without compromising on performance. This model offers a power output of 60 watts, making it ideal for portable setups and mobile operations. Despite its smaller size, the ML060HPA does not skimp on features, including a high-efficiency design that maximizes battery life in mobile applications. It is also equipped with advanced filtering technologies to minimize harmonic distortion and maintain clear communication.

All three models leverage Procom's proprietary technologies, ensuring that they meet the stringent requirements of modern communication systems. They are built with high-quality components to ensure longevity and consistent performance in various environments, from urban settings to remote locations. Moreover, each model is user-friendly, with easy setup and configuration options, making them accessible for both novice and seasoned users.

In summary, the Procom ML100TPA, ML100HPA, and ML060HPA amplifiers represent the pinnacle of communication technology, each offering unique features tailored to specific user needs. Their combination of power, efficiency, and advanced technology makes them invaluable tools for enhancing communication capabilities across a wide range of applications. Whether for broadcasting, emergency communications, or mobile operations, Procom's amplifiers provide the quality and reliability needed to keep users connected.