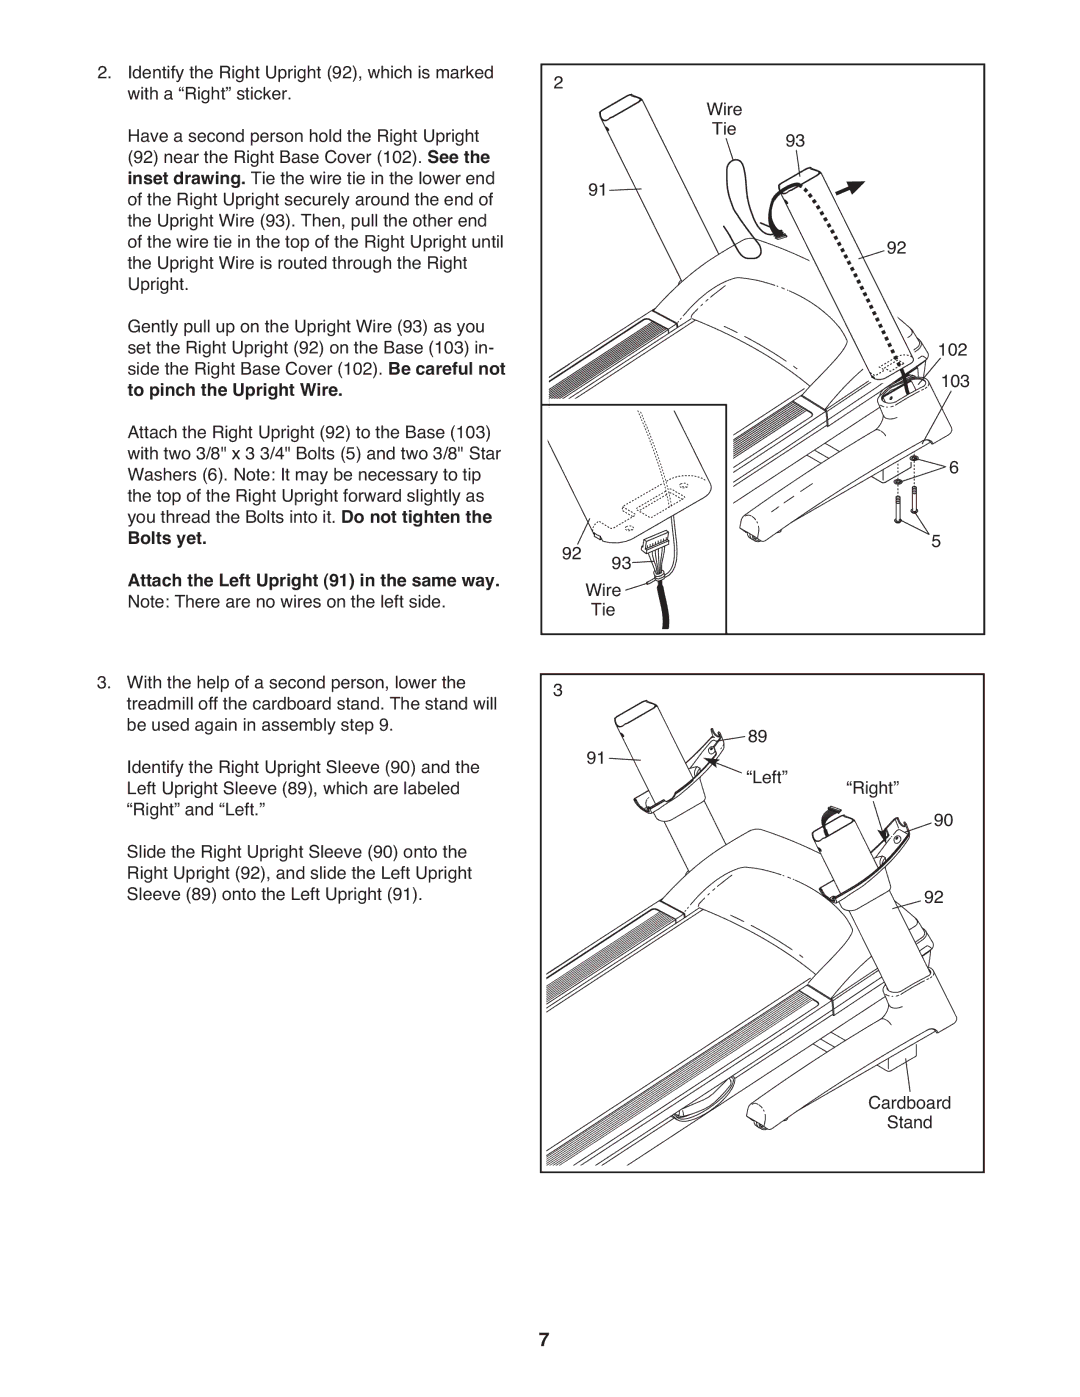
2. Identify the Right Upright (92), which is marked | 2 |
| Wire |
|
with a “Right” sticker. |
|
| ||
Have a second person hold the Right Upright |
|
| Tie | 93 |
(92) near the Right Base Cover (102). See the |
|
|
| |
inset drawing. Tie the wire tie in the lower end |
| 91 |
|
|
of the Right Upright securely around the end of |
|
|
| |
the Upright Wire (93). Then, pull the other end |
|
|
|
|
of the wire tie in the top of the Right Upright until |
|
|
| 92 |
the Upright Wire is routed through the Right |
|
|
| |
Upright. |
|
|
|
|
Gently pull up on the Upright Wire (93) as you |
|
|
| 102 |
set the Right Upright (92) on the Base (103) in- |
|
|
| |
side the Right Base Cover (102). Be careful not |
|
|
| 103 |
to pinch the Upright Wire. |
|
|
| |
Attach the Right Upright (92) to the Base (103) |
|
|
|
|
with two 3/8" x 3 3/4" Bolts (5) and two 3/8" Star |
|
|
| 6 |
Washers (6). Note: It may be necessary to tip |
|
|
| |
the top of the Right Upright forward slightly as |
|
|
|
|
you thread the Bolts into it. Do not tighten the | 92 | 93 |
| 5 |
Bolts yet. |
| |||
Attach the Left Upright (91) in the same way. |
| Wire |
|
|
Note: There are no wires on the left side. |
| Tie |
|
|
3. With the help of a second person, lower the | 3 |
|
|
|
treadmill off the cardboard stand. The stand will | 89 |
|
| |
be used again in assembly step 9. | 91 |
|
| |
Identify the Right Upright Sleeve (90) and the | “Left” | “Right” |
| |
Left Upright Sleeve (89), which are labeled |
| 90 | ||
“Right” and “Left.” |
|
|
| |
Slide the Right Upright Sleeve (90) onto the |
|
|
|
|
Right Upright (92), and slide the Left Upright |
|
|
| 92 |
Sleeve (89) onto the Left Upright (91). |
|
|
| |
|
|
| Cardboard | |
|
|
| Stand | |
| 7 |
|
|
|