7.Calibrate the speed of the treadmill.
Stand on the foot rails or stand on the floor. Press the Calibrate Speed button and then press the Begin button. The walking belt will begin to move. When the walking belt stops moving, press the Back button. Press the Cancel button to return to the maintenance mode. Note: This feature may not be enabled.
8.Update the console firmware.
For the best results, regularly check for firmware updates.
Press the Firmware Update button. Press the Begin button to check for updates or the Cancel button to return to the maintenance mode.
A status bar will appear in the grey box on your screen. When the update is complete, the words PLEASE CYCLE POWER will appear in the grey box. Press the power switch on the treadmill frame into the off position. Wait for several seconds, and then press the power switch into the reset position. It may take a minute for the console to be ready for use.
9.View technical information.
Press the Technical Info button to view the total number of hours that the treadmill has been used and the total number of miles that the walking belt has moved. After you view the information, press the Finish button.
10.Exit the maintenance mode.
To exit the maintenance mode, press the Back but- ton repeatedly.
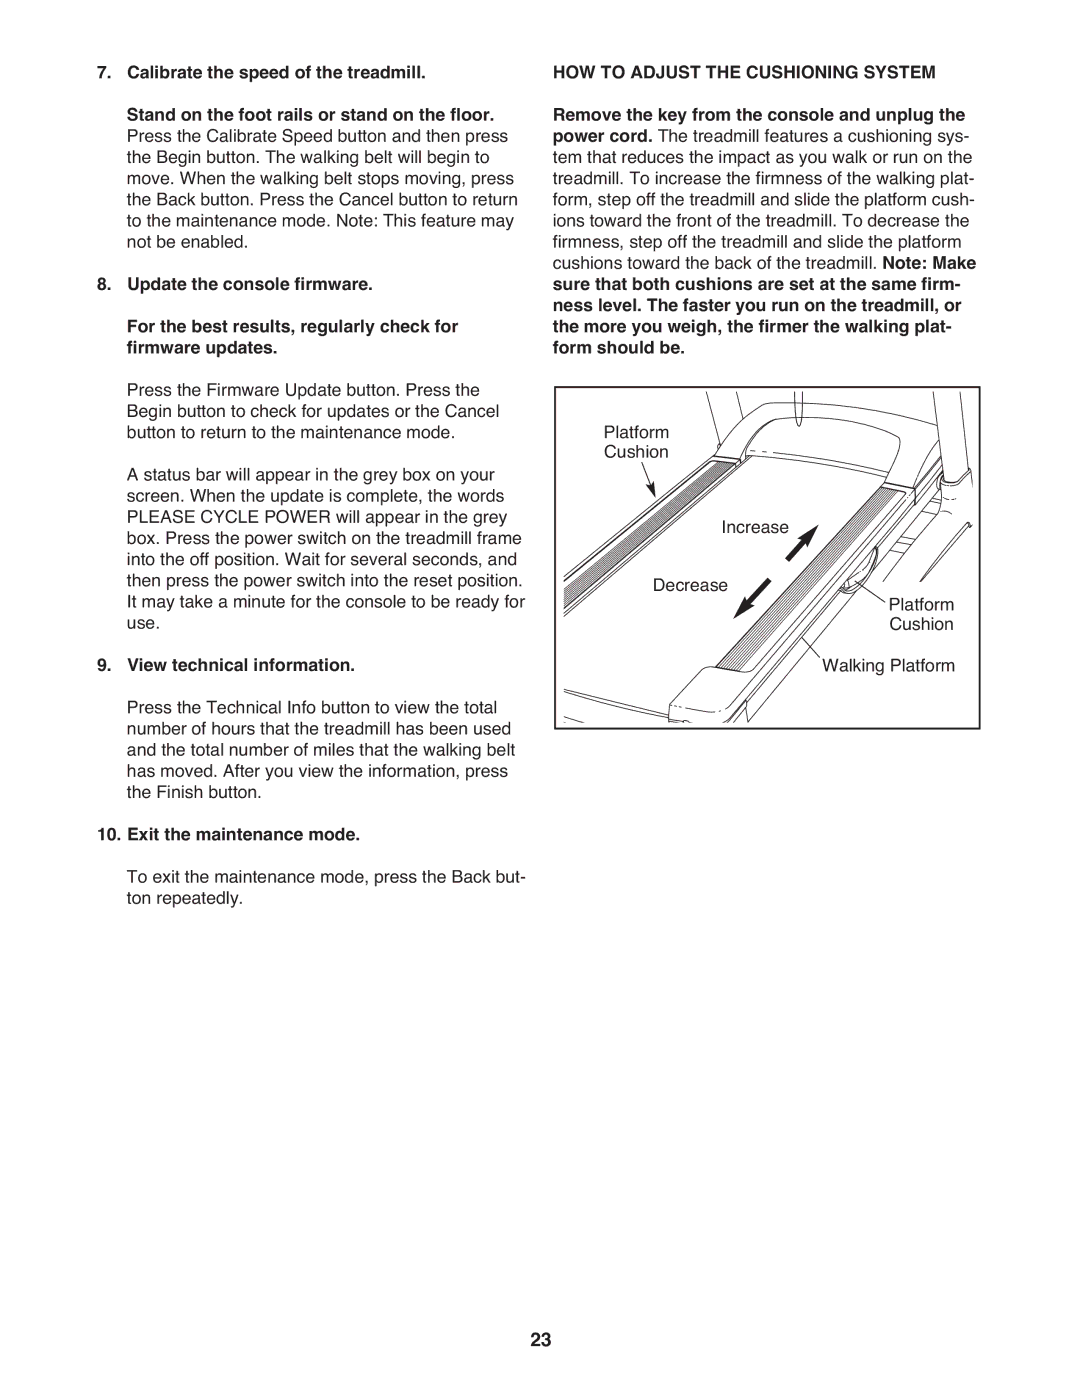
HOW TO ADJUST THE CUSHIONING SYSTEM Remove the key from the console and unplug the power cord. The treadmill features a cushioning sys- tem that reduces the impact as you walk or run on the treadmill. To increase the firmness of the walking plat- form, step off the treadmill and slide the platform cush- ions toward the front of the treadmill. To decrease the firmness, step off the treadmill and slide the platform cushions toward the back of the treadmill. Note: Make sure that both cushions are set at the same firm- ness level. The faster you run on the treadmill, or the more you weigh, the firmer the walking plat- form should be.
Platform |
|
Cushion |
|
Increase |
|
Decrease | Platform |
| Cushion |
| Walking Platform |
23
