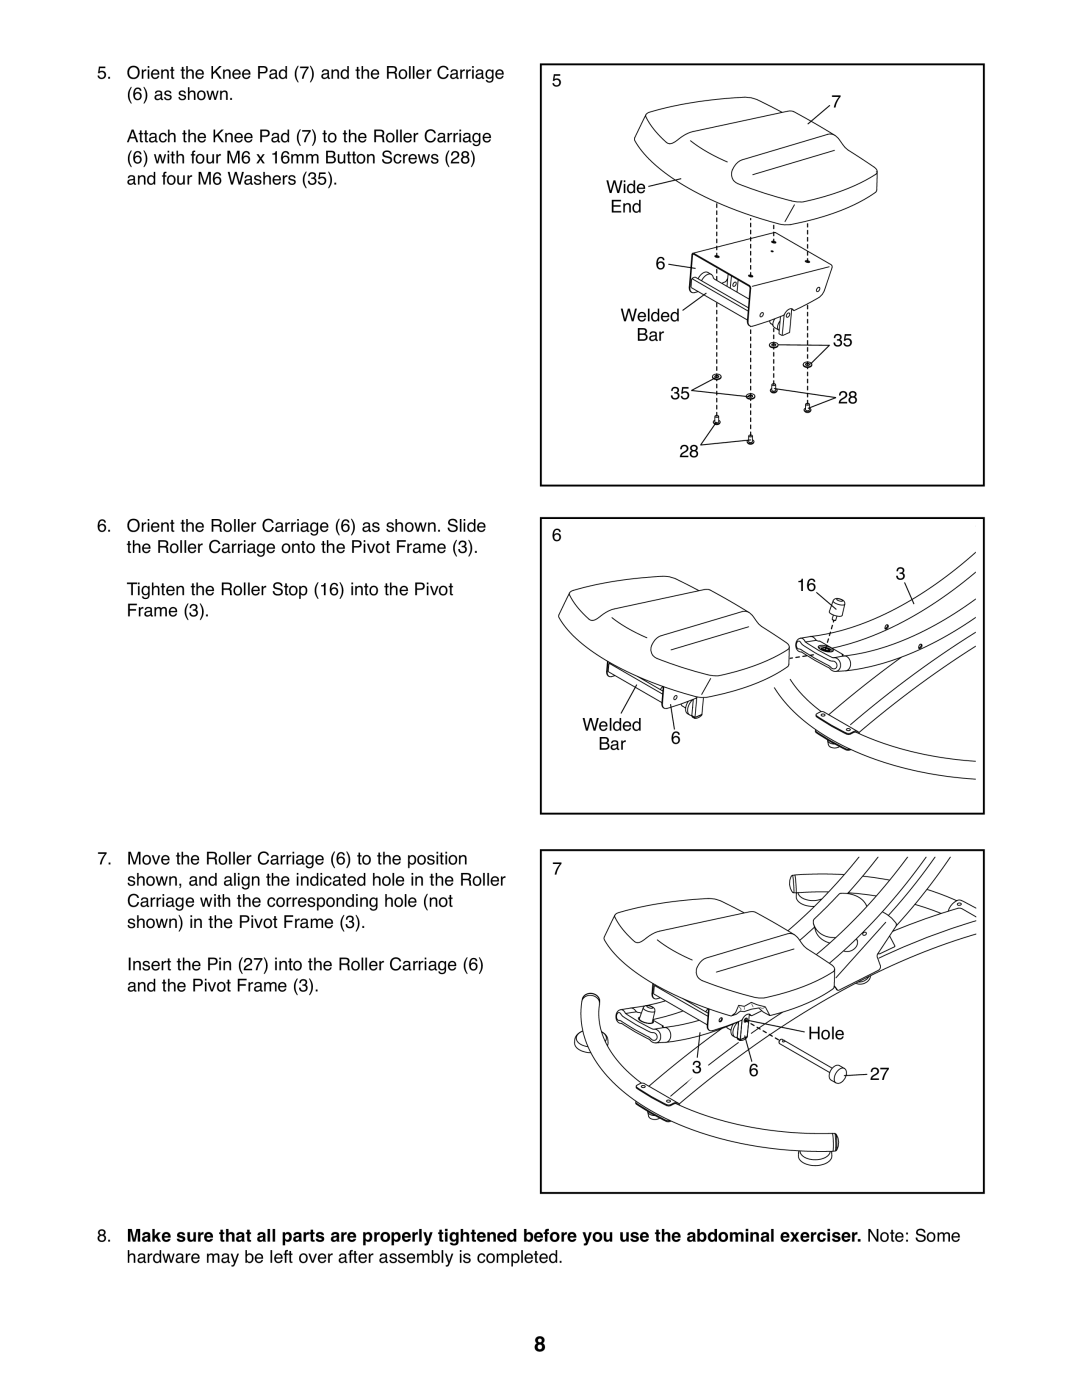
5.Orient the Knee Pad (7) and the Roller Carriage
(6) as shown.
Attach the Knee Pad (7) to the Roller Carriage
(6) with four M6 x 16mm Button Screws (28) and four M6 Washers (35).
6. Orient the Roller Carriage (6) as shown. Slide the Roller Carriage onto the Pivot Frame (3). Tighten the Roller Stop (16) into the Pivot Frame (3).
7. Move the Roller Carriage (6) to the position shown, and align the indicated hole in the Roller Carriage with the corresponding hole (not shown) in the Pivot Frame (3).
Insert the Pin (27) into the Roller Carriage (6) and the Pivot Frame (3).
5 |
|
| 7 |
|
|
| |
Wide |
|
|
|
End |
|
|
|
6 |
|
|
|
Welded |
| 35 | |
Bar | 35 |
| |
|
| 28 | |
| 28 |
|
|
6 |
| 16 | 3 |
|
| ||
Welded | 6 |
|
|
Bar |
|
| |
7 |
|
|
|
| 3 | Hole | |
| 6 | 27 | |
8.Make sure that all parts are properly tightened before you use the abdominal exerciser. Note: Some hardware may be left over after assembly is completed.
8
