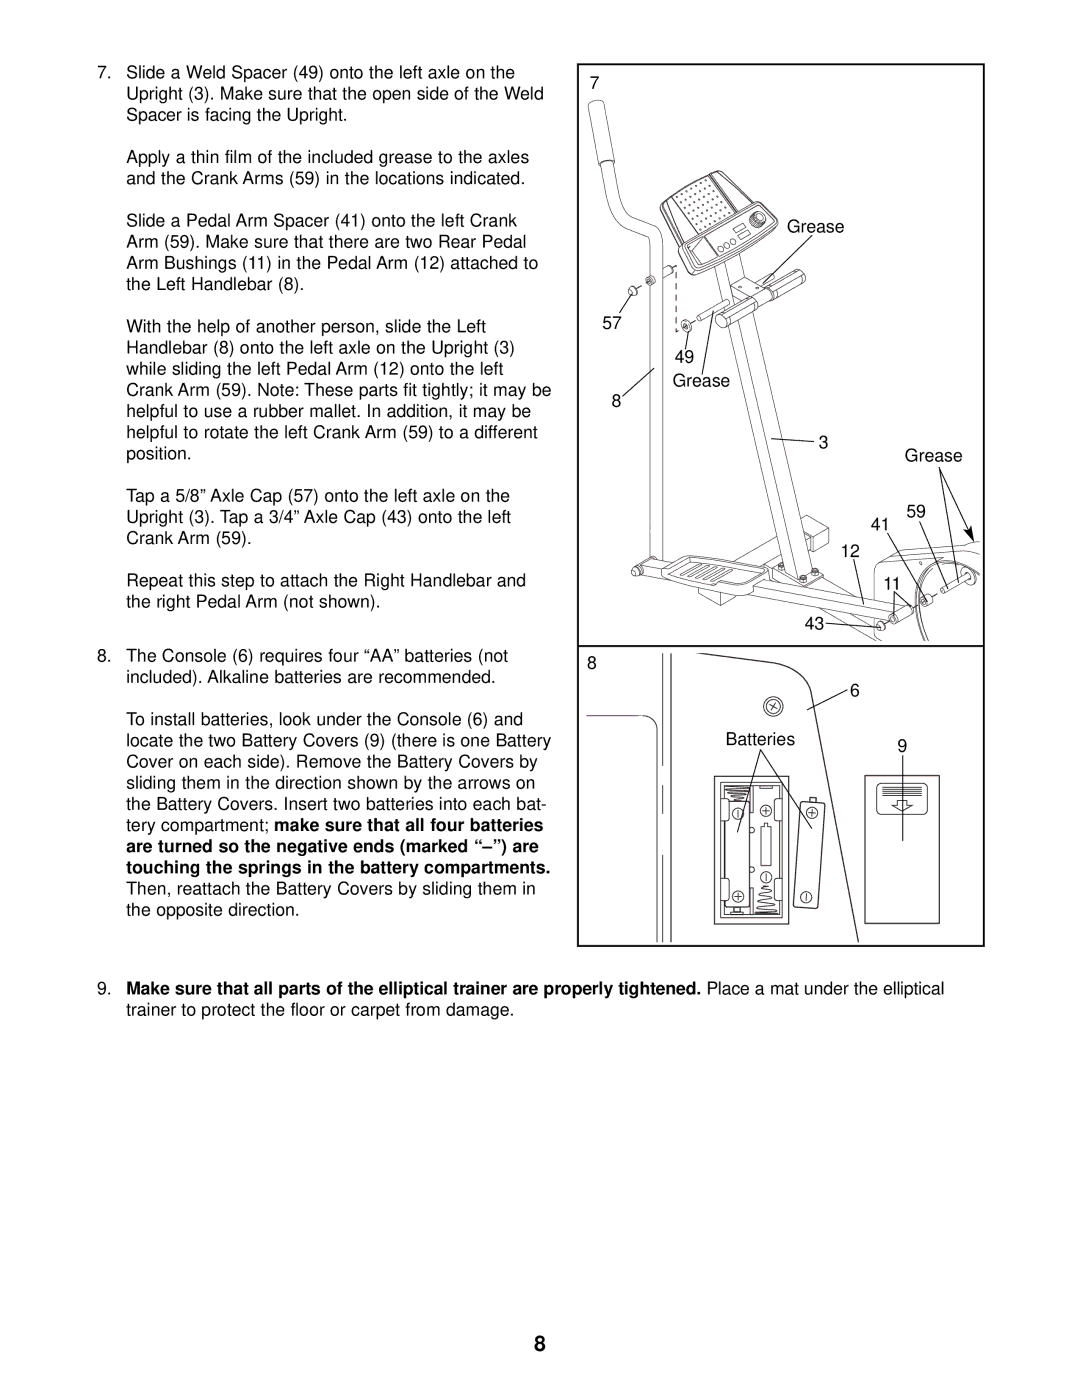
7.Slide a Weld Spacer (49) onto the left axle on the Upright (3). Make sure that the open side of the Weld Spacer is facing the Upright.
Apply a thin film of the included grease to the axles and the Crank Arms (59) in the locations indicated.
Slide a Pedal Arm Spacer (41) onto the left Crank Arm (59). Make sure that there are two Rear Pedal Arm Bushings (11) in the Pedal Arm (12) attached to the Left Handlebar (8).
With the help of another person, slide the Left Handlebar (8) onto the left axle on the Upright (3) while sliding the left Pedal Arm (12) onto the left Crank Arm (59). Note: These parts fit tightly; it may be helpful to use a rubber mallet. In addition, it may be helpful to rotate the left Crank Arm (59) to a different position.
Tap a 5/8” Axle Cap (57) onto the left axle on the Upright (3). Tap a 3/4” Axle Cap (43) onto the left Crank Arm (59).
Repeat this step to attach the Right Handlebar and the right Pedal Arm (not shown).
8.The Console (6) requires four “AA” batteries (not included). Alkaline batteries are recommended.
To install batteries, look under the Console (6) and locate the two Battery Covers (9) (there is one Battery Cover on each side). Remove the Battery Covers by sliding them in the direction shown by the arrows on the Battery Covers. Insert two batteries into each bat- tery compartment; make sure that all four batteries are turned so the negative ends (marked
7 |
|
Grease |
|
57 |
|
49 |
|
Grease |
|
8 |
|
3 | Grease |
| |
| 59 |
| 41 |
12 |
|
| 11 |
43 |
|
8 |
|
6 |
|
Batteries | 9 |
|
9.Make sure that all parts of the elliptical trainer are properly tightened. Place a mat under the elliptical trainer to protect the floor or carpet from damage.
8