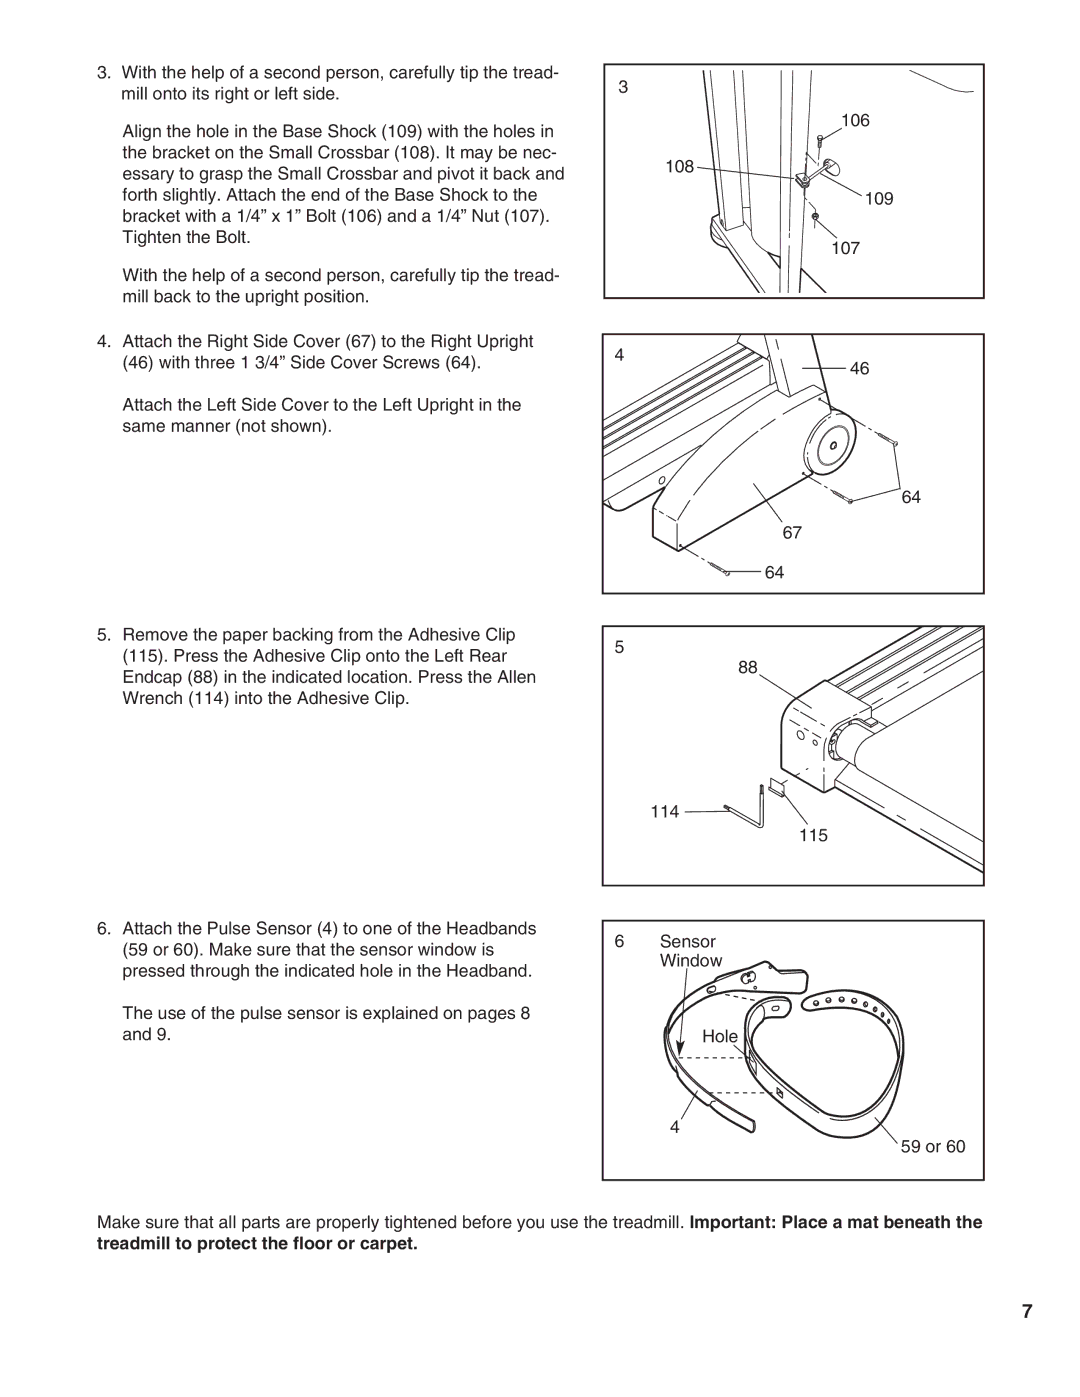
3.With the help of a second person, carefully tip the tread- mill onto its right or left side.
Align the hole in the Base Shock (109) with the holes in the bracket on the Small Crossbar (108). It may be nec- essary to grasp the Small Crossbar and pivot it back and forth slightly. Attach the end of the Base Shock to the bracket with a 1/4” x 1” Bolt (106) and a 1/4” Nut (107). Tighten the Bolt.
With the help of a second person, carefully tip the tread- mill back to the upright position.
4.Attach the Right Side Cover (67) to the Right Upright (46) with three 1 3/4” Side Cover Screws (64).
Attach the Left Side Cover to the Left Upright in the same manner (not shown).
5.Remove the paper backing from the Adhesive Clip (115). Press the Adhesive Clip onto the Left Rear Endcap (88) in the indicated location. Press the Allen Wrench (114) into the Adhesive Clip.
6.Attach the Pulse Sensor (4) to one of the Headbands (59 or 60). Make sure that the sensor window is pressed through the indicated hole in the Headband.
The use of the pulse sensor is explained on pages 8 and 9.
3 |
|
| 106 |
| 108 |
| 109 |
| 107 |
4 | 46 |
| |
| 64 |
| 67 |
| 64 |
5 |
|
| 88 |
| 114 |
| 115 |
6 | Sensor |
| Window |
| Hole |
| 4 |
| 59 or 60 |
Make sure that all parts are properly tightened before you use the treadmill. Important: Place a mat beneath the treadmill to protect the floor or carpet.
7