ASSEMBLY
To hire an authorized service technician to assemble the treadmill, call
Assembly requires the included allen wrenches | and your own phillips screwdriver | , | |
wire cutters | , and adjustable wrench | . |
|
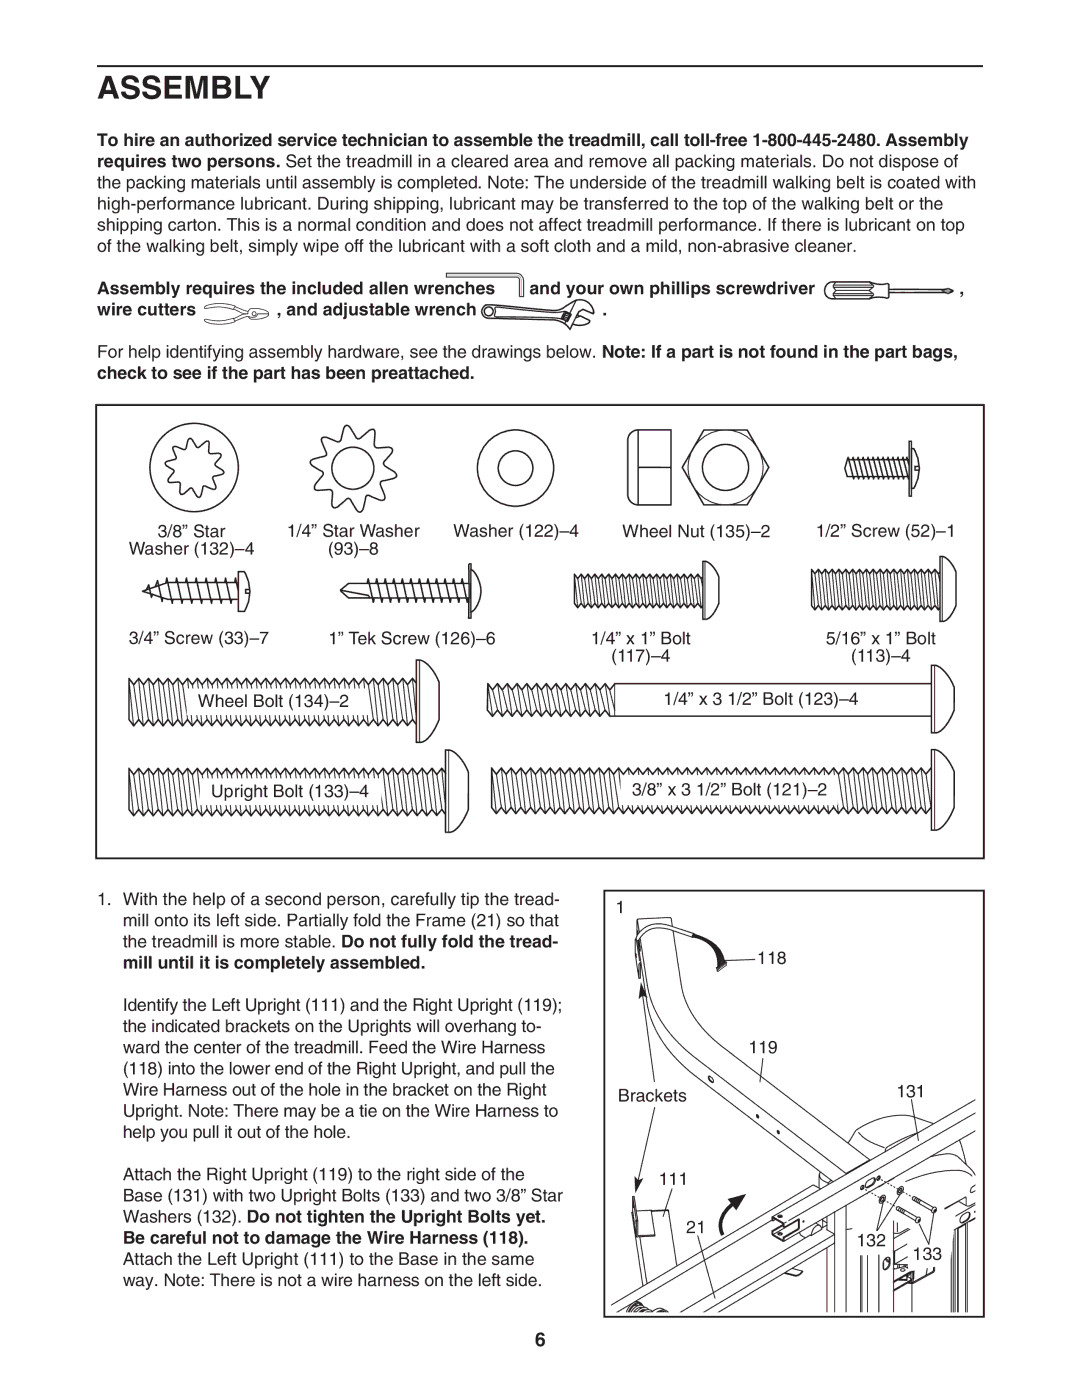
For help identifying assembly hardware, see the drawings below. Note: If a part is not found in the part bags, check to see if the part has been preattached.
3/8” Star | 1/4” Star Washer | Washer | Wheel Nut | 1/2” Screw |
Washer |
|
|
| |
3/4” Screw | 1” Tek Screw | 1/4” x 1” Bolt | 5/16” x 1” Bolt | |
|
|
| ||
Wheel Bolt |
| 1/4” x 3 1/2” Bolt | ||
Upright Bolt |
| 3/8” x 3 1/2” Bolt | ||
1.With the help of a second person, carefully tip the tread- mill onto its left side. Partially fold the Frame (21) so that the treadmill is more stable. Do not fully fold the tread- mill until it is completely assembled.
Identify the Left Upright (111) and the Right Upright (119); the indicated brackets on the Uprights will overhang to- ward the center of the treadmill. Feed the Wire Harness (118) into the lower end of the Right Upright, and pull the Wire Harness out of the hole in the bracket on the Right Upright. Note: There may be a tie on the Wire Harness to help you pull it out of the hole.
Attach the Right Upright (119) to the right side of the Base (131) with two Upright Bolts (133) and two 3/8” Star Washers (132). Do not tighten the Upright Bolts yet.
Be careful not to damage the Wire Harness (118).
Attach the Left Upright (111) to the Base in the same way. Note: There is not a wire harness on the left side.
1 |
|
| 118 |
| 119 |
Brackets | 131 |
111 |
|
21 | 132 |
| |
| 133 |
6