ASSEMBLY
Assembly requires two people. Set the treadmill in a cleared area and remove all packing materials. Do not dispose of the packing materials until assembly is completed. Assembly requires the included allen wrench
and your own phillips screwdriver | and rubber mallet | . |
Note: The underside of the treadmill walking belt is coated with
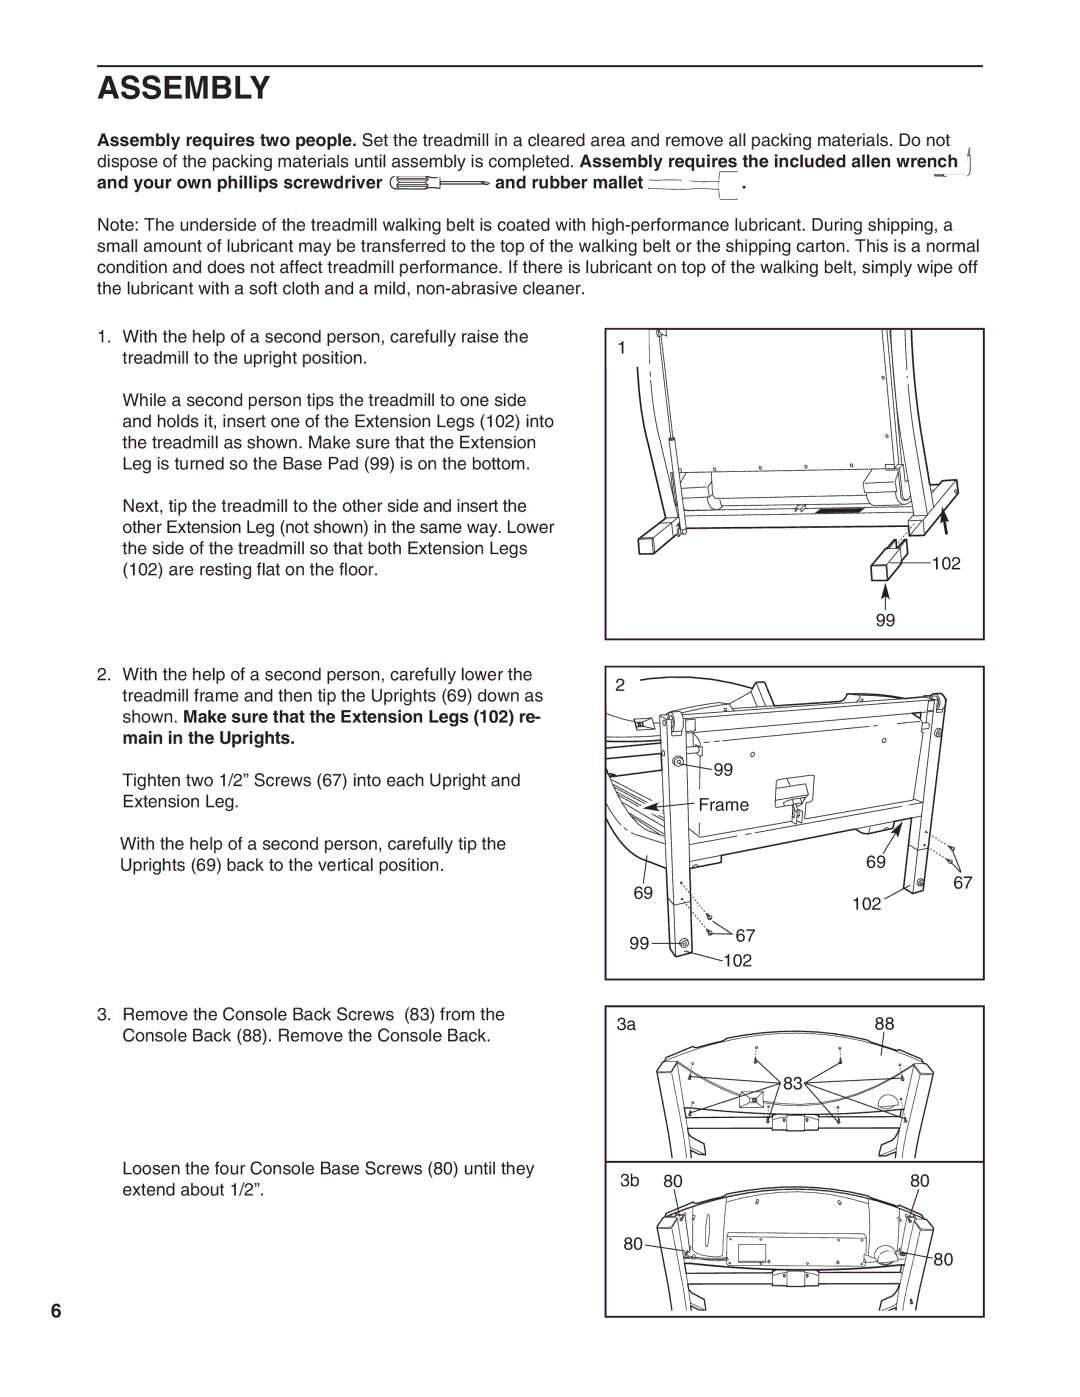
1. With the help of a second person, carefully raise the | 1 |
|
| |
| treadmill to the upright position. |
|
| |
|
|
|
| |
| While a second person tips the treadmill to one side |
|
|
|
| and holds it, insert one of the Extension Legs (102) into |
|
|
|
| the treadmill as shown. Make sure that the Extension |
|
|
|
| Leg is turned so the Base Pad (99) is on the bottom. |
|
|
|
| Next, tip the treadmill to the other side and insert the |
|
|
|
| other Extension Leg (not shown) in the same way. Lower |
|
|
|
| the side of the treadmill so that both Extension Legs |
|
| 102 |
| (102) are resting flat on the floor. |
|
| |
|
|
|
| |
|
|
|
| 99 |
2. With the help of a second person, carefully lower the | 2 |
|
| |
| treadmill frame and then tip the Uprights (69) down as |
|
| |
|
|
|
| |
| shown. Make sure that the Extension Legs (102) re- |
|
|
|
| main in the Uprights. |
|
|
|
| Tighten two 1/2” Screws (67) into each Upright and |
|
| 99 |
|
|
|
| |
| Extension Leg. |
|
| Frame |
| With the help of a second person, carefully tip the |
|
| 69 |
| Uprights (69) back to the vertical position. |
|
| |
|
| 69 |
| 67 |
|
|
| 102 | |
|
|
|
| |
|
| 99 |
| 67 |
|
|
| 102 | |
|
|
|
| |
3. | Remove the Console Back Screws (83) from the | 3a |
| 88 |
| Console Back (88). Remove the Console Back. |
| ||
|
|
|
| |
|
|
|
| 83 |
| Loosen the four Console Base Screws (80) until they | 3b | 80 | 80 |
| extend about 1/2”. | |||
|
|
|
| |
|
| 80 |
| 80 |
|
|
|
| |
6