®
Installation & Operating Instructions
Owner’s Reference PowerPack 1500 MKII
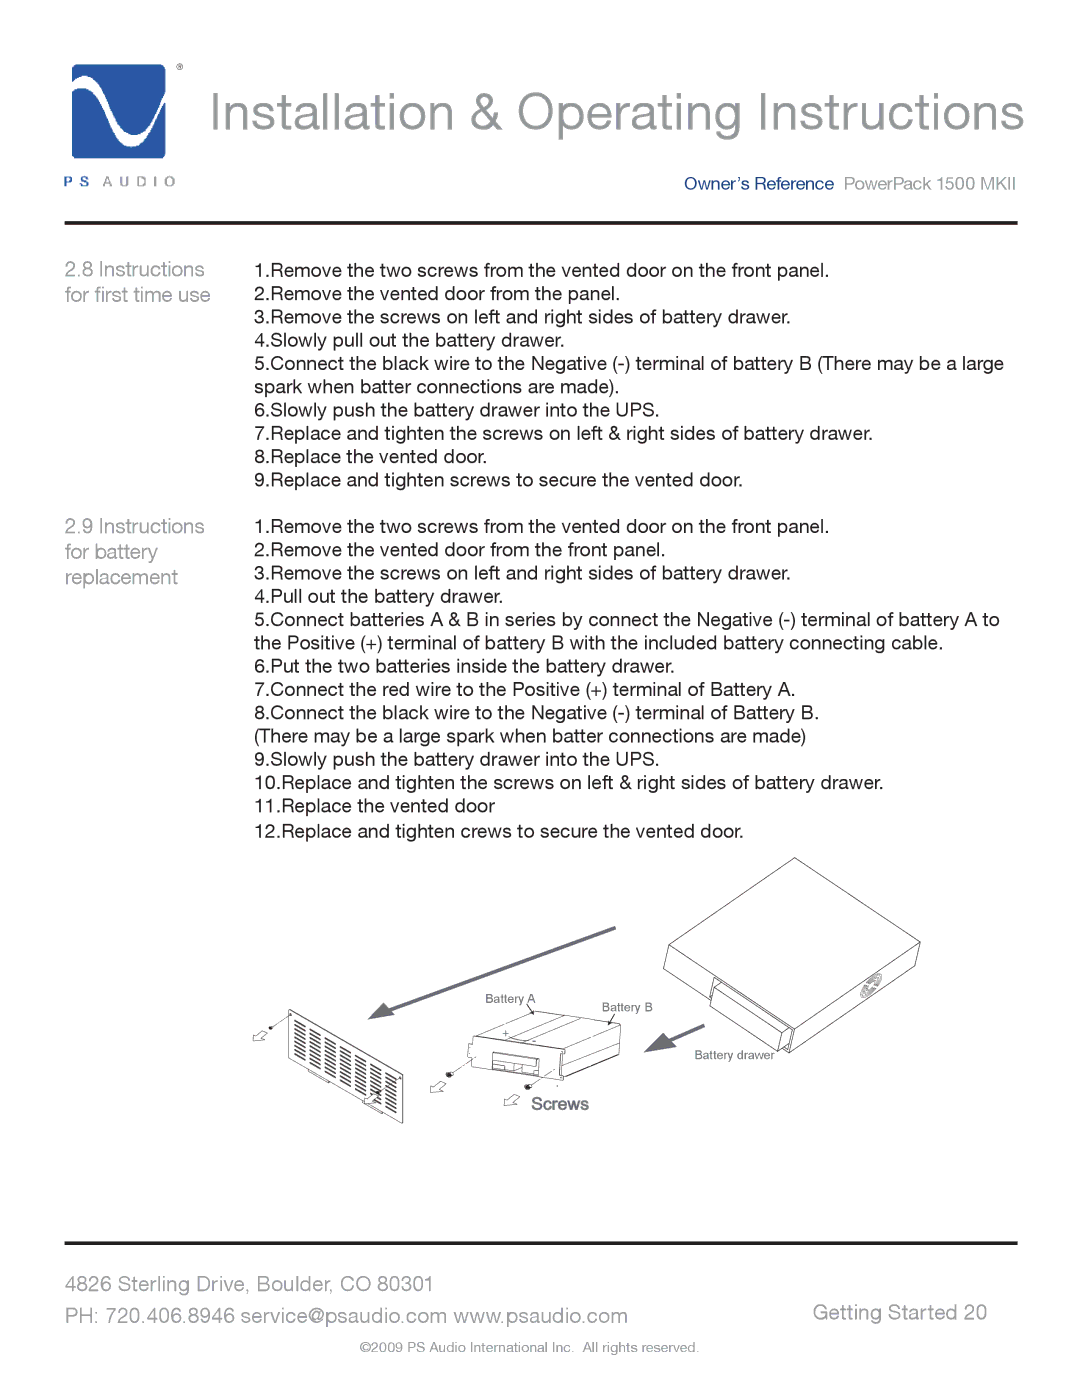
2.8Instructions for first time use
2.9Instructions for battery replacement
1.Remove the two screws from the vented door on the front panel. 2.Remove the vented door from the panel.
3.Remove the screws on left and right sides of battery drawer. 4.Slowly pull out the battery drawer.
5.Connect the black wire to the Negative
6.Slowly push the battery drawer into the UPS.
7.Replace and tighten the screws on left & right sides of battery drawer. 8.Replace the vented door.
9.Replace and tighten screws to secure the vented door.
1.Remove the two screws from the vented door on the front panel. 2.Remove the vented door from the front panel.
3.Remove the screws on left and right sides of battery drawer. 4.Pull out the battery drawer.
5.Connect batteries A & B in series by connect the Negative
6.Put the two batteries inside the battery drawer.
7.Connect the red wire to the Positive (+) terminal of Battery A. 8.Connect the black wire to the Negative
10.Replace and tighten the screws on left & right sides of battery drawer. 11.Replace the vented door
12.Replace and tighten crews to secure the vented door.
Battery A | Battery B |
|
+![]() -
-![]() Battery drawer
Battery drawer
Screws
4826 Sterling Drive, Boulder, CO 80301 |
|
PH: 720.406.8946 service@psaudio.com www.psaudio.com | Getting Started 20 |
©2009 PS Audio International Inc. All rights reserved.