Step 3. Mount the Router
Mount the SANbox 6140 using the shelf, if purchased.
Step 4. Install the SFPs
An SFP transceiver is required for each router port that will be connected to a Fibre Channel device or switch. SFPs are included in the package. If you’d prefer to use different SFP transceivers from the ones provided, please purchase one of the following QLogic recommended transceivers:
❑Finisar
❑JDS Uniphase
To install an SFP transceiver, insert the transceiver into the router port and press gently until it snaps in place. The transceiver will fit only one way. If the transceiver does not install under gentle pressure, flip it over and try again.
Step 5. Apply Power to the SANbox 6140 Router
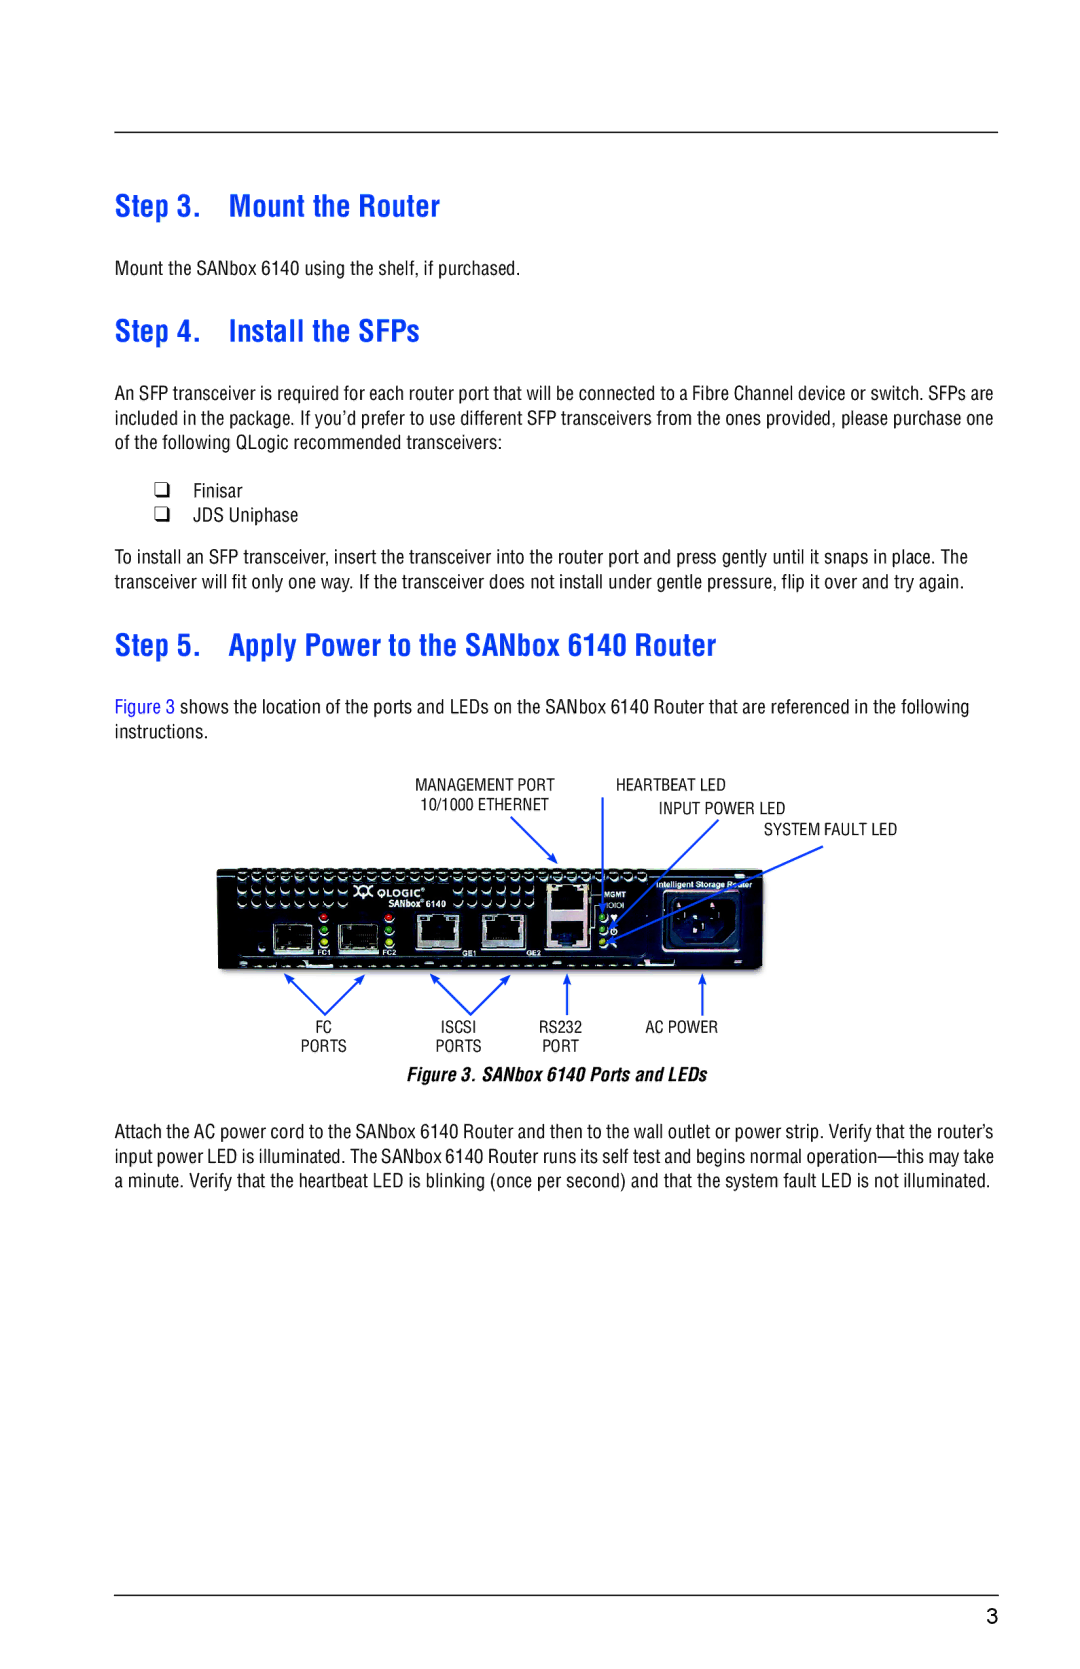
Figure 3 shows the location of the ports and LEDs on the SANbox 6140 Router that are referenced in the following instructions.
MANAGEMENT PORT 10/1000 ETHERNET
HEARTBEAT LED INPUT POWER LED
SYSTEM FAULT LED
FC | ISCSI | RS232 | AC POWER |
PORTS | PORTS | PORT |
|
Figure 3. SANbox 6140 Ports and LEDs
Attach the AC power cord to the SANbox 6140 Router and then to the wall outlet or power strip. Verify that the router’s input power LED is illuminated. The SANbox 6140 Router runs its self test and begins normal
3
