8.Rotate BRIGHT and VOLUME, located below the LCD to adjust the LCD’s brightness and the DVD player’s volume.
9.To stop playing a disc, press STOP '.
•When you stop playing a disc, the DVD player remembers where you stopped.
•When you press PLAY J to start playing the disc again, the player picks up where you left off unless you removed the disc or unplugged the DVD player.
10.To turn off the DVD player, press POWER on the DVD player. The DVD player’s POWER indicator turns off.
To turn off the display, slide OFF/ON to OFF. The LCD’s POWER indicator turns off.
16*'4"%100'%6+105
You can connect your DVD player to a TV, a TV and Audio/ Video receiver, a camcorder, a game system console, or a digital camera.
%100'%6+0)"61"#"68
Position Cables Properly to Avoid Audio
Interference.
•Insert each cable firmly into the designated jack.
•If you place components above the TV, route all cables down the side of
the back of the TV instead of straight down the middle of the back of the TV.
• If your antenna uses
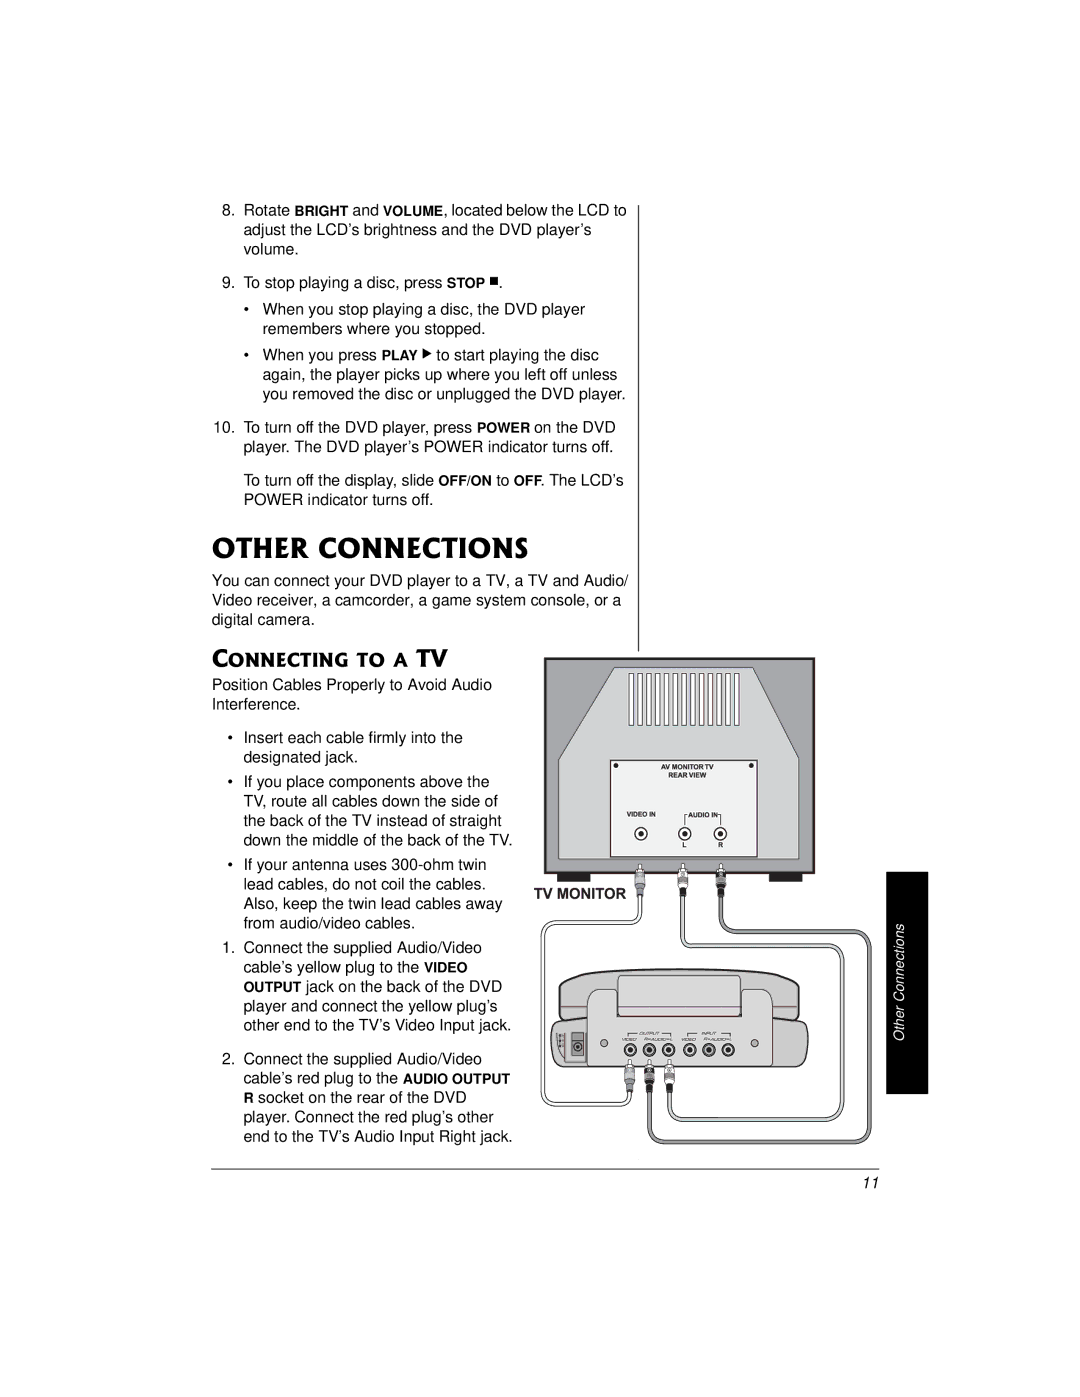
1.Connect the supplied Audio/Video cable’s yellow plug to the VIDEO OUTPUT jack on the back of the DVD player and connect the yellow plug’s other end to the TV’s Video Input jack.
2. Connect the supplied Audio/Video cable’s red plug to the AUDIO OUTPUT R socket on the rear of the DVD player. Connect the red plug’s other end to the TV’s Audio Input Right jack.
Other Connections
11