CONNECTORS/HARDWARE MAINTENANCE
q Brake
Check the brakes for proper function. When you squeeze the lever, the brake should provide positive braking action. When you apply the brake with the speed control on, the brake
Frame, Fork and Handlebars
q Check for cracks or broken connections. Although broken frames are rare, it is possible for an aggressive rider to run into a curb or wall and wreck and bend or break a frame. Get in the habit of inspecting your scooter on a regular basis.
q Safety Gear
Always wear proper protective gear such as an approved safety helmet. Elbow pads and kneepads are recommended. Always wear athletic shoes
q Battery
Make sure the power switch is turned off whenever the scooter is not in use. Never store the product in freezing or below freezing temperatures! Freezing will permanently damange the battery.
q Tires
Periodically inspect the tires for excess wear, and regularly check the front tire pressure and
Do not use this product for the first time until you have inflated the tires to the correct PSI and charged the battery for at least 18 hours.
Failure to follow these instructions may damage
your product and void your warranty.
Repair and Maintenance
Turn power switch “OFF” before conducting any maintenance procedures.
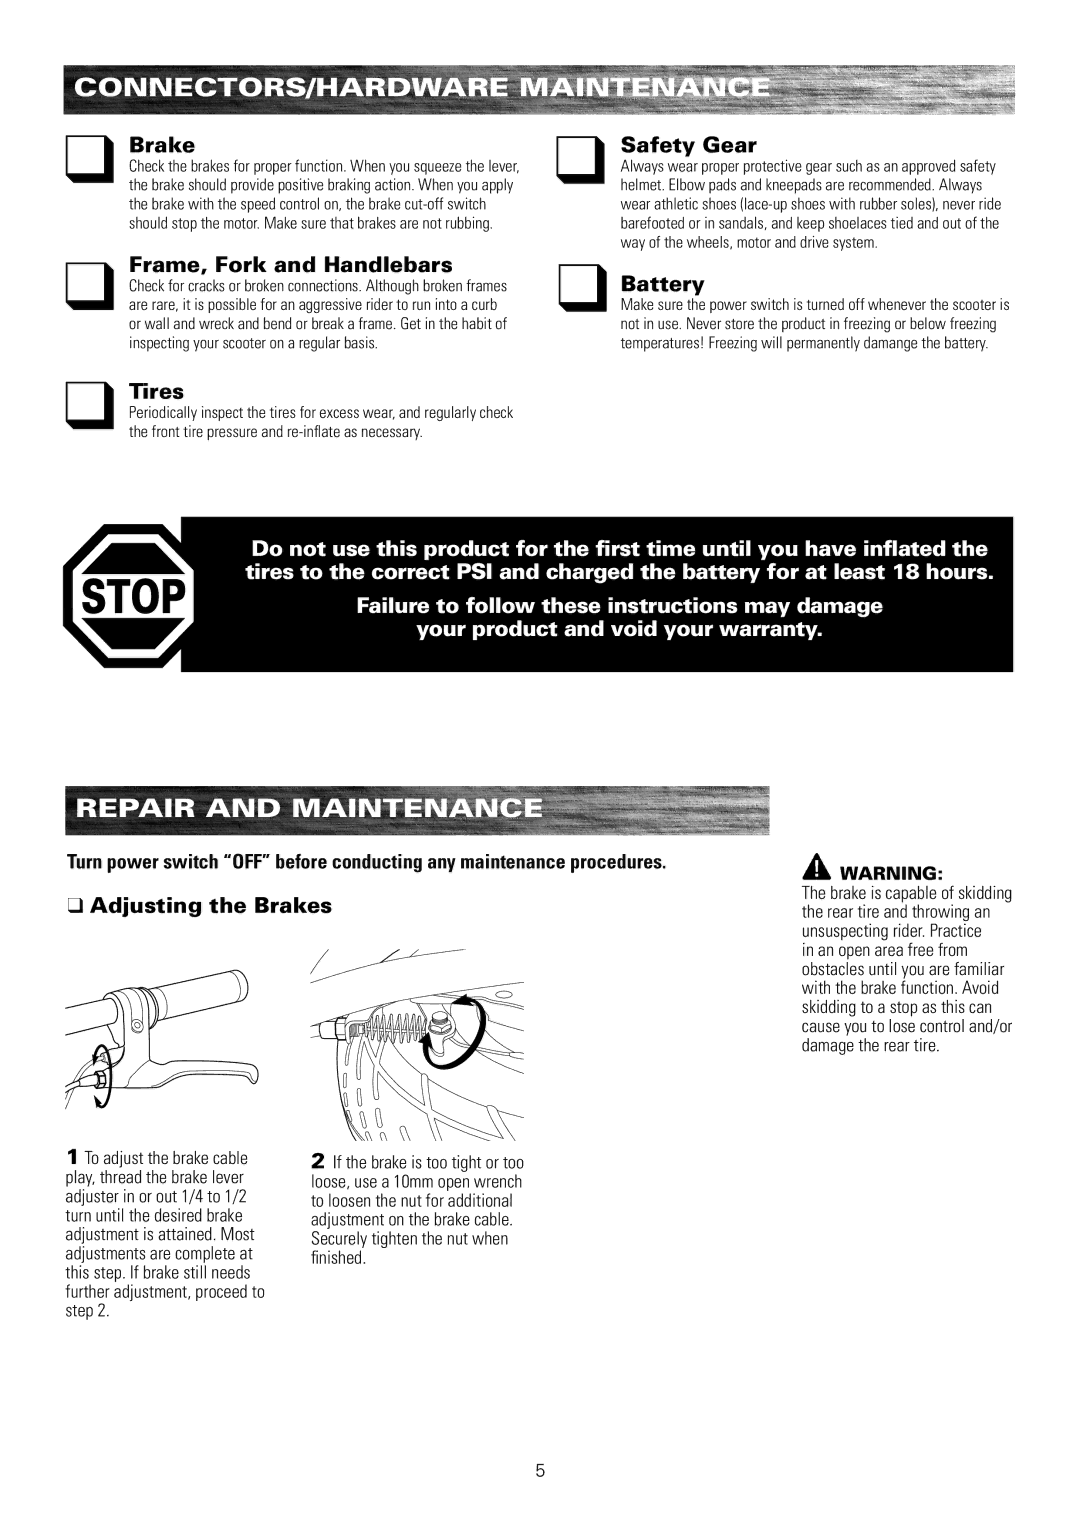
qAdjusting the Brakes
WARNING:
The brake is capable of skidding the rear tire and throwing an unsuspecting rider. Practice
in an open area free from obstacles until you are familiar with the brake function. Avoid skidding to a stop as this can cause you to lose control and/or damage the rear tire.
1 To adjust the brake cable play, thread the brake lever adjuster in or out 1/4 to 1/2 turn until the desired brake adjustment is attained. Most adjustments are complete at this step. If brake still needs further adjustment, proceed to step 2.
2If the brake is too tight or too loose, use a 10mm open wrench to loosen the nut for additional adjustment on the brake cable. Securely tighten the nut when finished.
5