Basic TV to VCR Connection
The basic component (VCR, DVD player etc.) to TV connection is described below. For other hookups, refer to your component’s instruction manual.
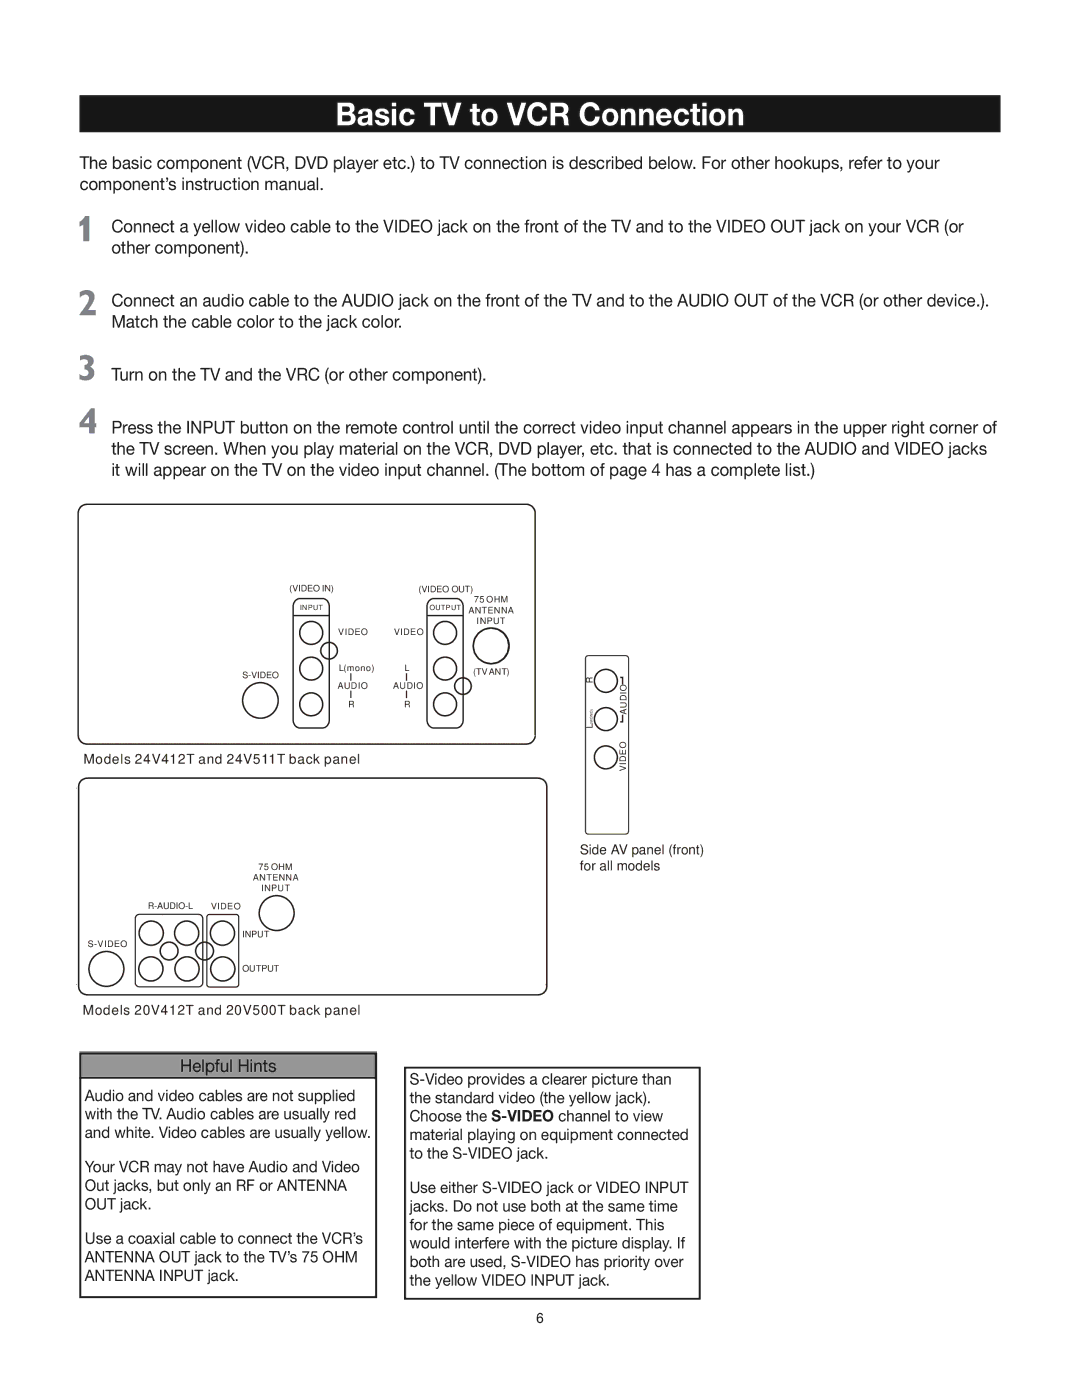
Connect a yellow video cable to the VIDEO jack on the front of the TV and to the VIDEO OUT jack on your VCR (or other component).
Connect an audio cable to the AUDIO jack on the front of the TV and to the AUDIO OUT of the VCR (or other device.). Match the cable color to the jack color.
Turn on the TV and the VRC (or other component).
Press the INPUT button on the remote control until the correct video input channel appears in the upper right corner of the TV screen. When you play material on the VCR, DVD player, etc. that is connected to the AUDIO and VIDEO jacks it will appear on the TV on the video input channel. (The bottom of page 4 has a complete list.)
(VIDEOIN) | (VIDEOOUT) | |
|
| 75 OHM |
INPUT |
| OUTPUT ANTENNA |
|
| INPUT |
VIDEO | VIDEO |
|
L(mono) | L | (TVANT) |
| ||
|
| |
AUDIO | AUDIO |
|
R | R |
|
Models 24V412T and 24V511T back panel
R | AUDIO |
L(MONO) | |
| VIDEO |
75 OHM
ANTENNA
INPUT
INPUT
OUTPUT
Side AV panel (front) for all models
Models 20V412T and 20V500T back panel
Helpful Hints
Audio and video cables are not supplied with the TV. Audio cables are usually red and white. Video cables are usually yellow.
Your VCR may not have Audio and Video Out jacks, but only an RF or ANTENNA OUT jack.
Use a coaxial cable to connect the VCR’s ANTENNA OUT jack to the TV’s 75 OHM ANTENNA INPUT jack.
Use either
6
