Thechannel memory is the list of TV channel numbers your TV will stop on when you press the CHANNEL up

1. AutoProgramming Channels into Channel Memory

--(withor without remote)

or down button. You can program any list of channels into the channel memory.

The quickest way to program your channel memory is to use the

A UTOPROGRAM function. If you

use the AUTOPROGRAM function,

your TV will automatically cycle through all channels and place active channels into the channel memory.

First follow the instructions to autoprogram channels, and then add or erase individual channels as desired.

Notes:

1.Connect home antenna(s) or cable- TV to your set.

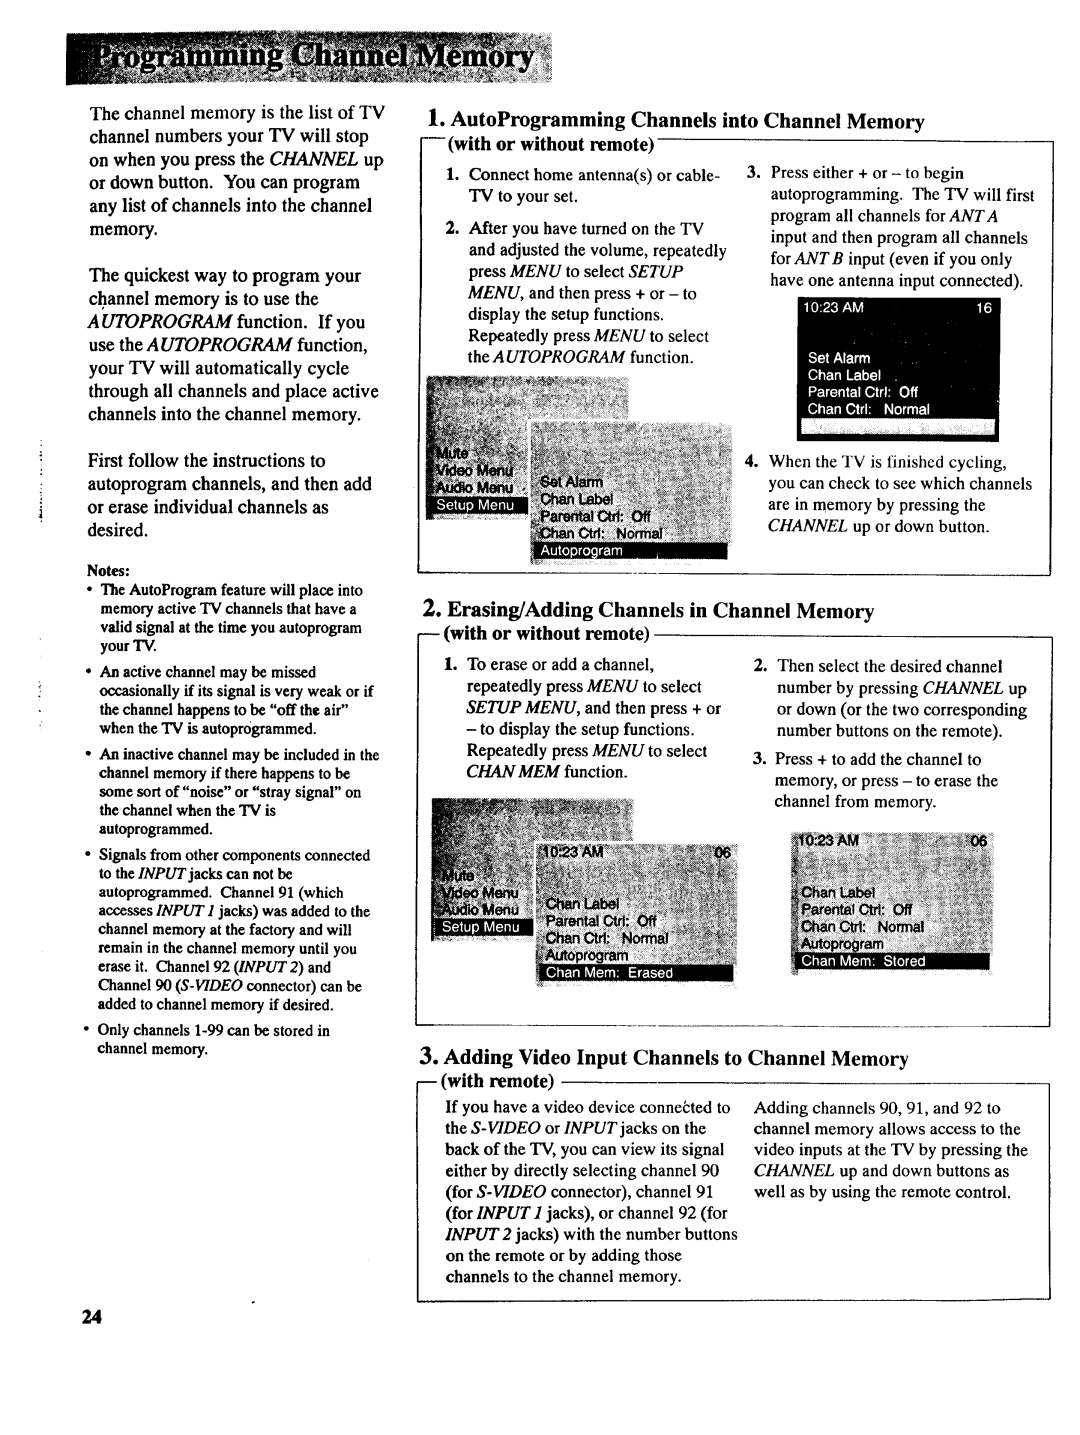
s After you have turned on the TV and adjusted the volume, repeatedly press MENU to select SETUP MENU, and then press + or - to display the setup functions. Repeatedly press MENU to select the A UTOPROGRAM function.

3.Press either + or - to begin autoprogramming. The TV will first program all channels for ANTA input and then program all channels for ANTB input (even if you only have one antenna input connected).

4.When the TV is finishcd cycling, you can check to see which channels are in memory by pressing the CHANNEL up or down button.

The AutoProgram feature will place into

memory active TV channels that have a

valid signal at the time you autoprogram

your 'IV.

2.Erasing/Adding Channels in Channel Memory -- (with or without remote)

An active channel may be missed


occasionally if its signal is very weak or if


the channel happens to be "off the air"


when the TV is autoprogrammed.

An inactive channel may be included in the


channel memory if there happens to be


some sort of "noise" or "stray signal" on


the channel when the 'IV is


autoprogrammed.


Signals from other

components connected


to the INPUT jacks can not be


autoprogrammed.

Channel 91 (which


accesses INPUT 1 jacks) was added to the


channel memory at the factory and will


remain in the channel memory until you


erase it. Channel 92 (INPUT 2) and


Channel 90 (S-VIDEO connector) can be


added to channel memory if desired.

• Only channels 1-99 can be stored in


channel memory.


1. To erase or add a channel, repeatedly press MENU to select SETUP MENU, and then press + or - to display the setup functions.

Repeatedly press MENU to select CHAN MEM function.

2.Then select the desired channel number by pressing CHANNEL up or down (or the two corresponding number buttons on the remote).

3.Press + to add the channel to

memory, or press - to erase the channel from memory.

3.Adding Video Input Channels to Channel Memory m (with remote)

If you have a video device connected to the S-VIDEOor INPUT jacks on the back of the TV, you can view its signal either by directly selecting channel 90 (for S-VIDEOconnector), channel 91 (for INPUT 1 jacks), or channel 92 (for INPUT 2 jacks) with the number buttons on the remote or by adding those channels to the channel memory.

Adding channels 90, 91, and 92 to channel memory allows access to the video inputs at the TV by pressing the CHANNEL up and down buttons as well as by using the remote control.

24

Page 26
Image 26
RCA NCJ11 owner manual AutoProgram feature will place into

NCJ11 specifications

The RCA NCJ11 is a significant entry in the world of digital communication and audio technology, designed primarily for professional users seeking high-quality audio performance and advanced features. As part of RCA's esteemed range of audio and video equipment, the NCJ11 stands out due to its cutting-edge technologies and robust construction.

At its core, the RCA NCJ11 boasts an impressive audio codec that delivers superior sound quality, making it an ideal choice for both studio recording and live broadcasting applications. This device supports high-resolution audio formats, enabling audio engineers and content creators to work with samples up to 24-bit/192kHz. This capability ensures that even the most subtle nuances in sound are captured and played back with fidelity, making it a preferred choice for professionals serious about audio quality.

Another standout feature of the NCJ11 is its integrated noise-cancellation technology. This advanced feature is designed to reduce unwanted background noise, allowing users to focus on the sound they want to capture or reproduce. The noise-cancellation algorithms employed by the NCJ11 are continually refined, providing consistent results, which is critical for both studio recordings and outdoor shoots.

Connectivity is a key aspect of the RCA NCJ11, as it includes a range of input and output options. Users can seamlessly connect microphones, instruments, and other audio sources via multiple XLR and quarter-inch inputs. Additionally, the NCJ11 features USB connectivity for easy integration with computers and digital audio workstations, facilitating seamless workflow for mixing and editing.

The NCJ11 is also characterized by its user-friendly interface, which includes an intuitive control panel and a bright LCD display. This design allows users to easily navigate through settings and make adjustments on the fly, which is particularly beneficial in dynamic environments.

Furthermore, the RCA NCJ11 is built with durability in mind. Its sturdy construction can withstand the rigors of frequent use, whether in a studio setting or on the road. This resilient design ensures that the device remains functional and reliable over time, making it a sound investment for audio professionals.

In summary, the RCA NCJ11 shines with its high-resolution audio capabilities, integrated noise-cancellation technology, comprehensive connectivity options, user-friendly interface, and robust construction. These features make it an outstanding choice for anyone looking to enhance their audio production or broadcasting experience. Whether in a professional studio or during live events, the RCA NCJ11 is engineered to deliver exceptional performance that meets the demands of the modern audio landscape.