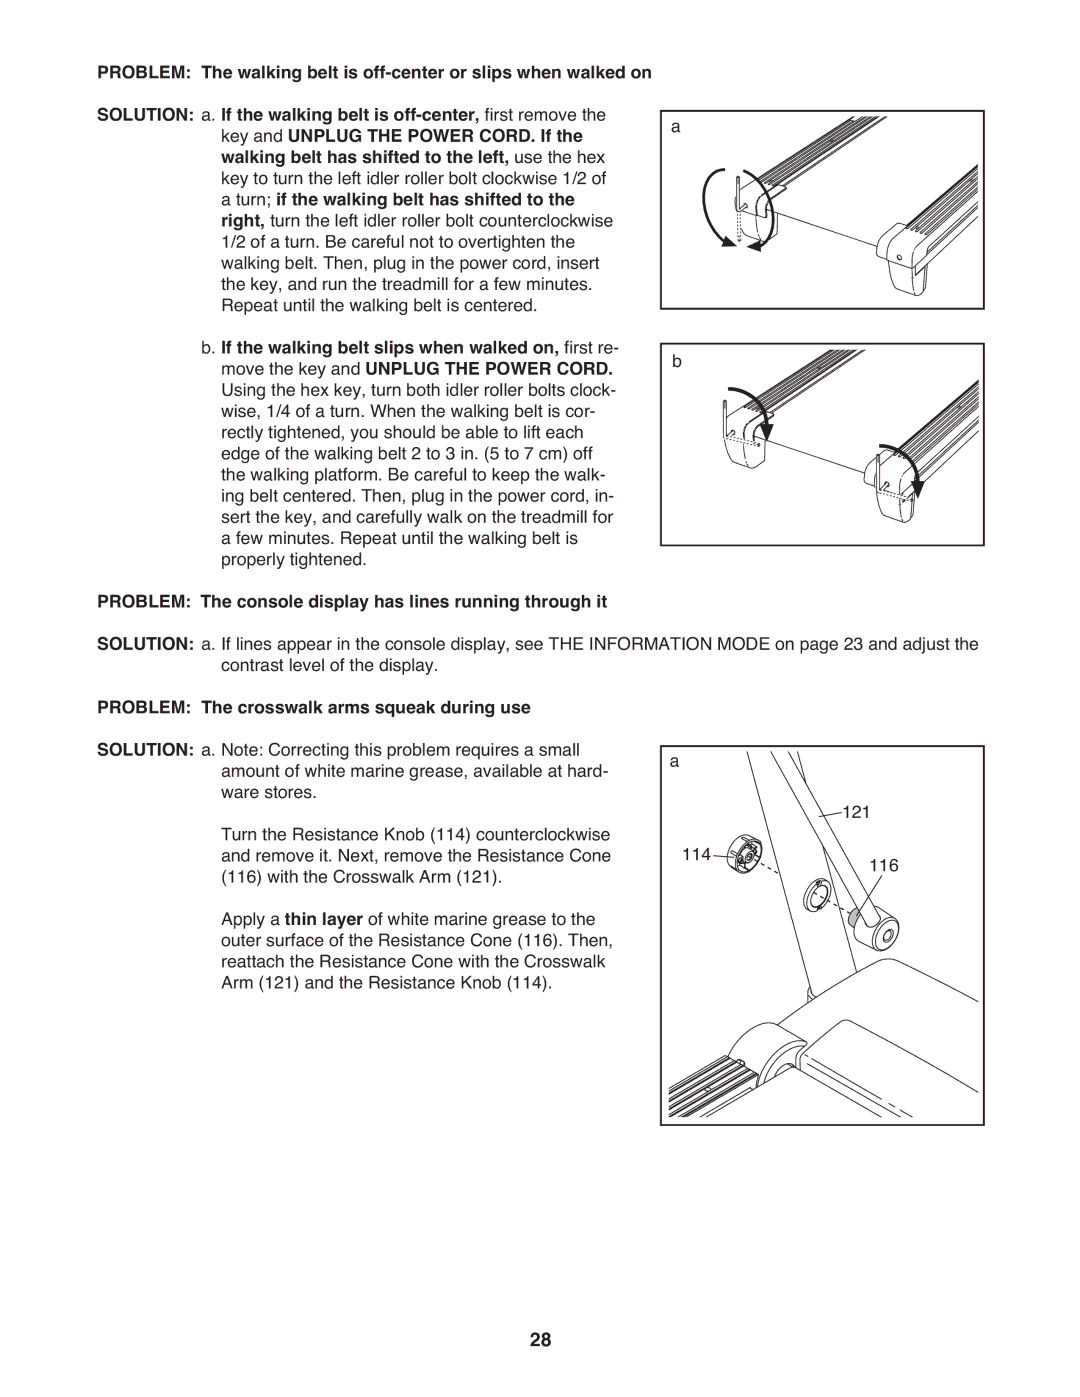
PROBLEM: The walking belt is
SOLUTION: a. If the walking belt is
a |
b. If the walking belt slips when walked on, first re- |
|
|
|
|
|
|
|
|
|
| |
|
|
|
|
| |
move the key and UNPLUG THE POWER CORD. |
| b |
|
|
|
Using the hex key, turn both idler roller bolts clock- |
|
|
|
|
|
|
|
|
|
| |
wise, 1/4 of a turn. When the walking belt is cor- |
|
|
|
|
|
rectly tightened, you should be able to lift each |
|
|
|
|
|
edge of the walking belt 2 to 3 in. (5 to 7 cm) off |
|
|
|
|
|
the walking platform. Be careful to keep the walk- |
|
|
|
|
|
ing belt centered. Then, plug in the power cord, in- |
|
|
|
|
|
sert the key, and carefully walk on the treadmill for |
|
|
|
|
|
a few minutes. Repeat until the walking belt is |
|
|
|
|
|
|
|
|
|
| |
properly tightened. |
|
|
|
|
|
PROBLEM: The console display has lines running through it |
|
|
|
|
|
SOLUTION: a. If lines appear in the console display, see THE INFORMATION MODE on page 23 and adjust the | ||
contrast level of the display. |
|
|
PROBLEM: The crosswalk arms squeak during use |
|
|
SOLUTION: a. Note: Correcting this problem requires a small | a |
|
amount of white marine grease, available at hard- |
| |
ware stores. |
| 121 |
Turn the Resistance Knob (114) counterclockwise | 114 | |
and remove it. Next, remove the Resistance Cone | 116 | |
(116) with the Crosswalk Arm (121). |
| |
Apply a thin layer of white marine grease to the |
|
|
outer surface of the Resistance Cone (116). Then, |
|
|
reattach the Resistance Cone with the Crosswalk |
|
|
Arm (121) and the Resistance Knob (114). |
|
|
28
