INSTALLATION
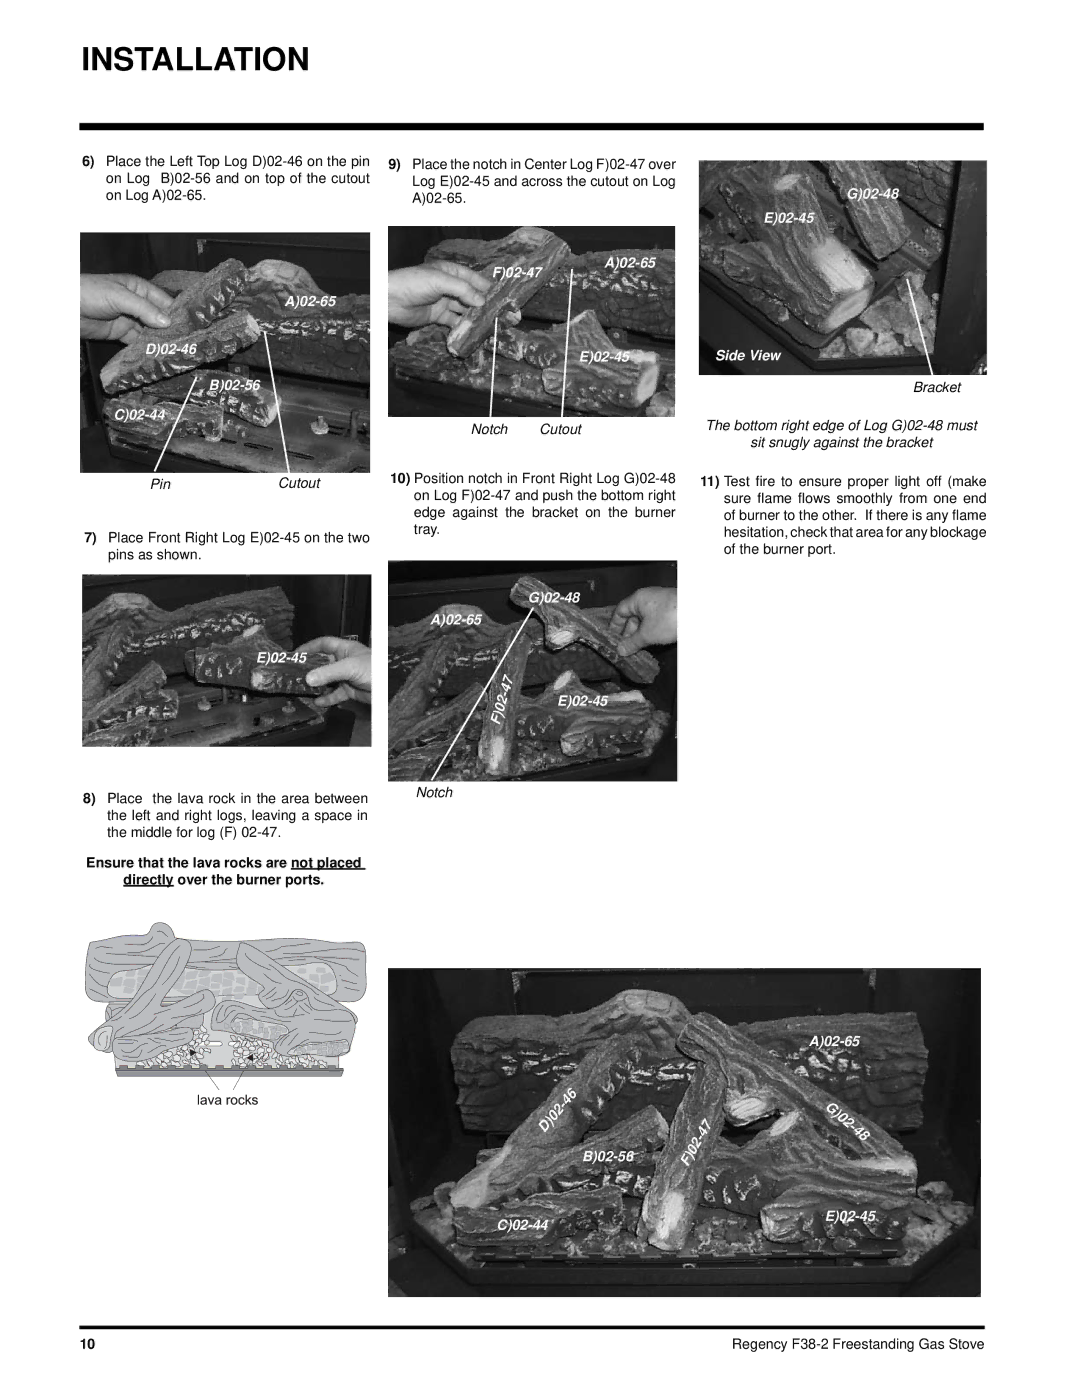
6) Place the Left Top Log | 9) Place the notch in Center Log | ||
on Log | Log | ||
on Log |
|
| |
|
|
| |
|
| ||
|
|
| |
|
|
|
|
|
|
| |
|
|
|
|
| Notch | Cutout | |
| |||
G)02-48
E)02-45
Side View
Bracket
The bottom right edge of Log
sit snugly against the bracket
PinCutout
7)Place Front Right Log
10)Position notch in Front Right Log
G)02-48
A)02-65
| 47 |
|
- | ||
F)02 |
| |
|
| |
11)Test fire to ensure proper light off (make sure flame flows smoothly from one end of burner to the other. If there is any flame hesitation, check that area for any blockage of the burner port.
8) Place the lava rock in the area between | Notch |
| |
the left and right logs, leaving a space in |
|
the middle for log (F) |
|
Ensure that the lava rocks are not placed |
|
directly over the burner ports. |
|
|
|
| |
D)02 |
| F)02 | - 47 |
|
| ||
|
|
|
G)02 |
|
- | |
| 48 |
10 | Regency |