MAINTENANCE
Installing Glass:
1)Install both center and side glass onto aluminium extrusions as per diagram.
2) | Place glass assembly into door frame. |
3) | Install retainers by placing 1 drop of glue |
| where previously glued and put in place. |
4) | Install side retainers. |
IMPORTANT
Disconnect power supply
before servicing
IMPORTANT: These fans collect a lot of dust from within your home. Ensure you maintain these fan motors on a regular basis by vacuuming out the fan squirrel cages, around the motor, and around the grills on the back of the stove.
WARNING: Electrical Grounding In- structions This appliance is equipped with a three pronged (grounding) plug for your protection against shock haz- ard and should be plugged directly into a properly grounded
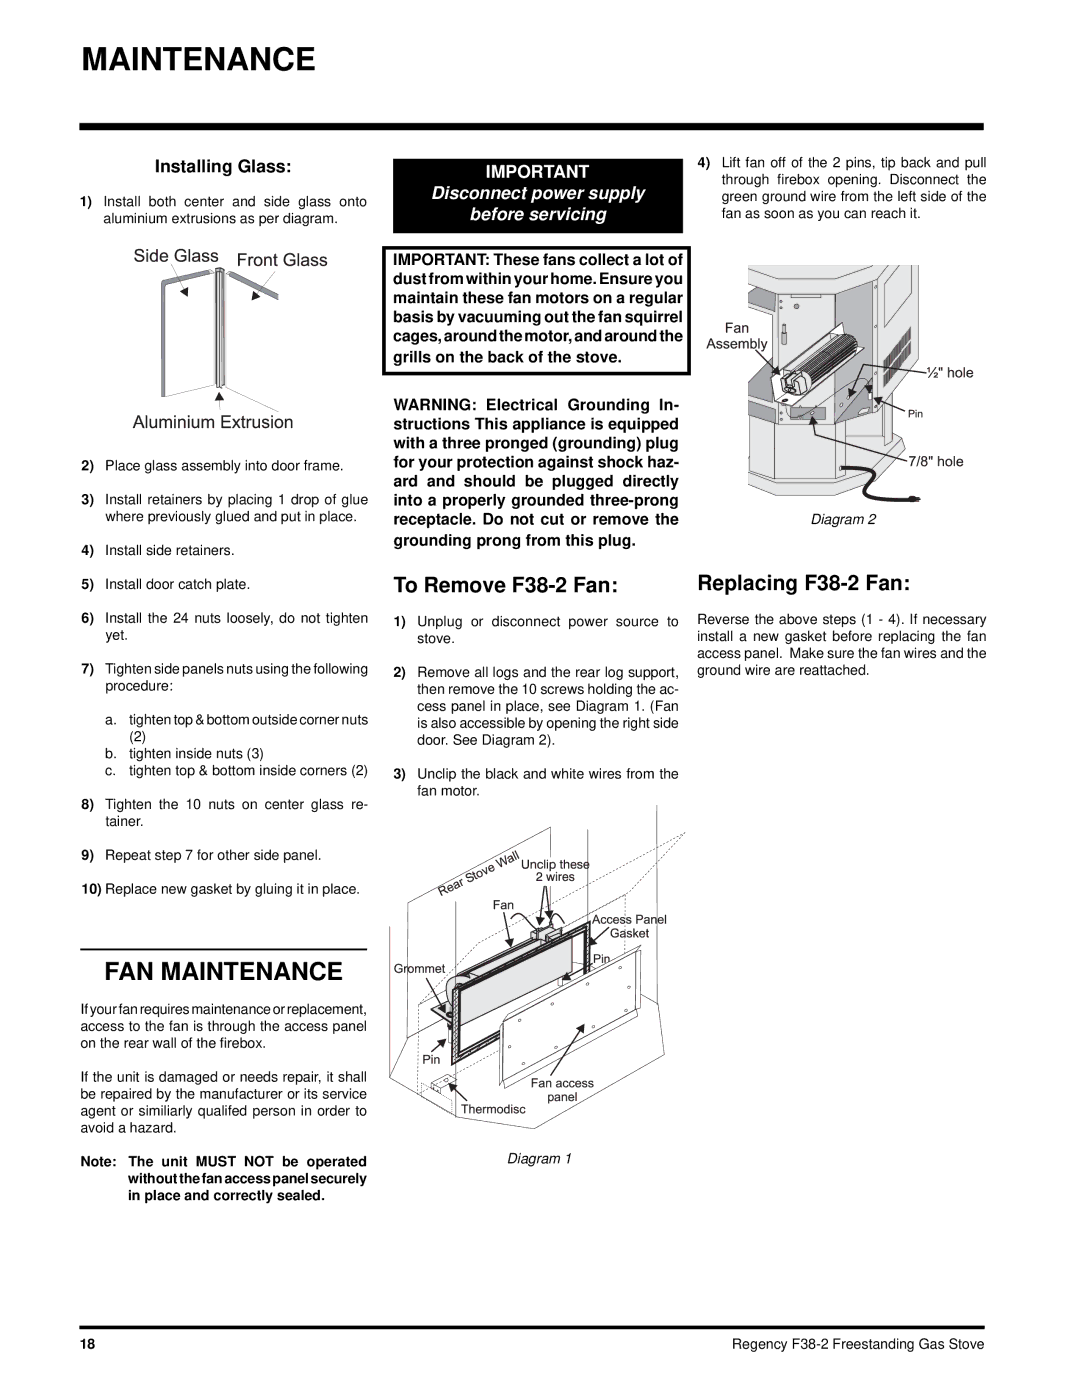
4)Lift fan off of the 2 pins, tip back and pull through firebox opening. Disconnect the green ground wire from the left side of the fan as soon as you can reach it.
Diagram 2
5) | Install door catch plate. |
6) | Install the 24 nuts loosely, do not tighten |
| yet. |
7) | Tighten side panels nuts using the following |
| procedure: |
| a. tighten top & bottom outside corner nuts |
| (2) |
| b. tighten inside nuts (3) |
| c. tighten top & bottom inside corners (2) |
8) | Tighten the 10 nuts on center glass re- |
| tainer. |
9) | Repeat step 7 for other side panel. |
10) | Replace new gasket by gluing it in place. |
To Remove F38-2 Fan:
1)Unplug or disconnect power source to stove.
2)Remove all logs and the rear log support, then remove the 10 screws holding the ac- cess panel in place, see Diagram 1. (Fan is also accessible by opening the right side door. See Diagram 2).
3)Unclip the black and white wires from the fan motor.
Replacing F38-2 Fan:
Reverse the above steps (1 - 4). If necessary install a new gasket before replacing the fan access panel. Make sure the fan wires and the ground wire are reattached.
FAN MAINTENANCE
If your fan requires maintenance or replacement, access to the fan is through the access panel on the rear wall of the firebox.
If the unit is damaged or needs repair, it shall be repaired by the manufacturer or its service agent or similiarly qualifed person in order to avoid a hazard.
Note: The unit MUST NOT be operated | Diagram 1 |
without the fan access panel securely |
|
in place and correctly sealed. |
|
18 | Regency |