OPERATION
Plunge Cutting
See Figure 13, 14 and 15.
WARNING:
To avoid loss of control, broken blades, or dam- age to the material being cut, always use extreme caution when making plunge cuts. We do not recommend plunge cutting on materials other than wood.
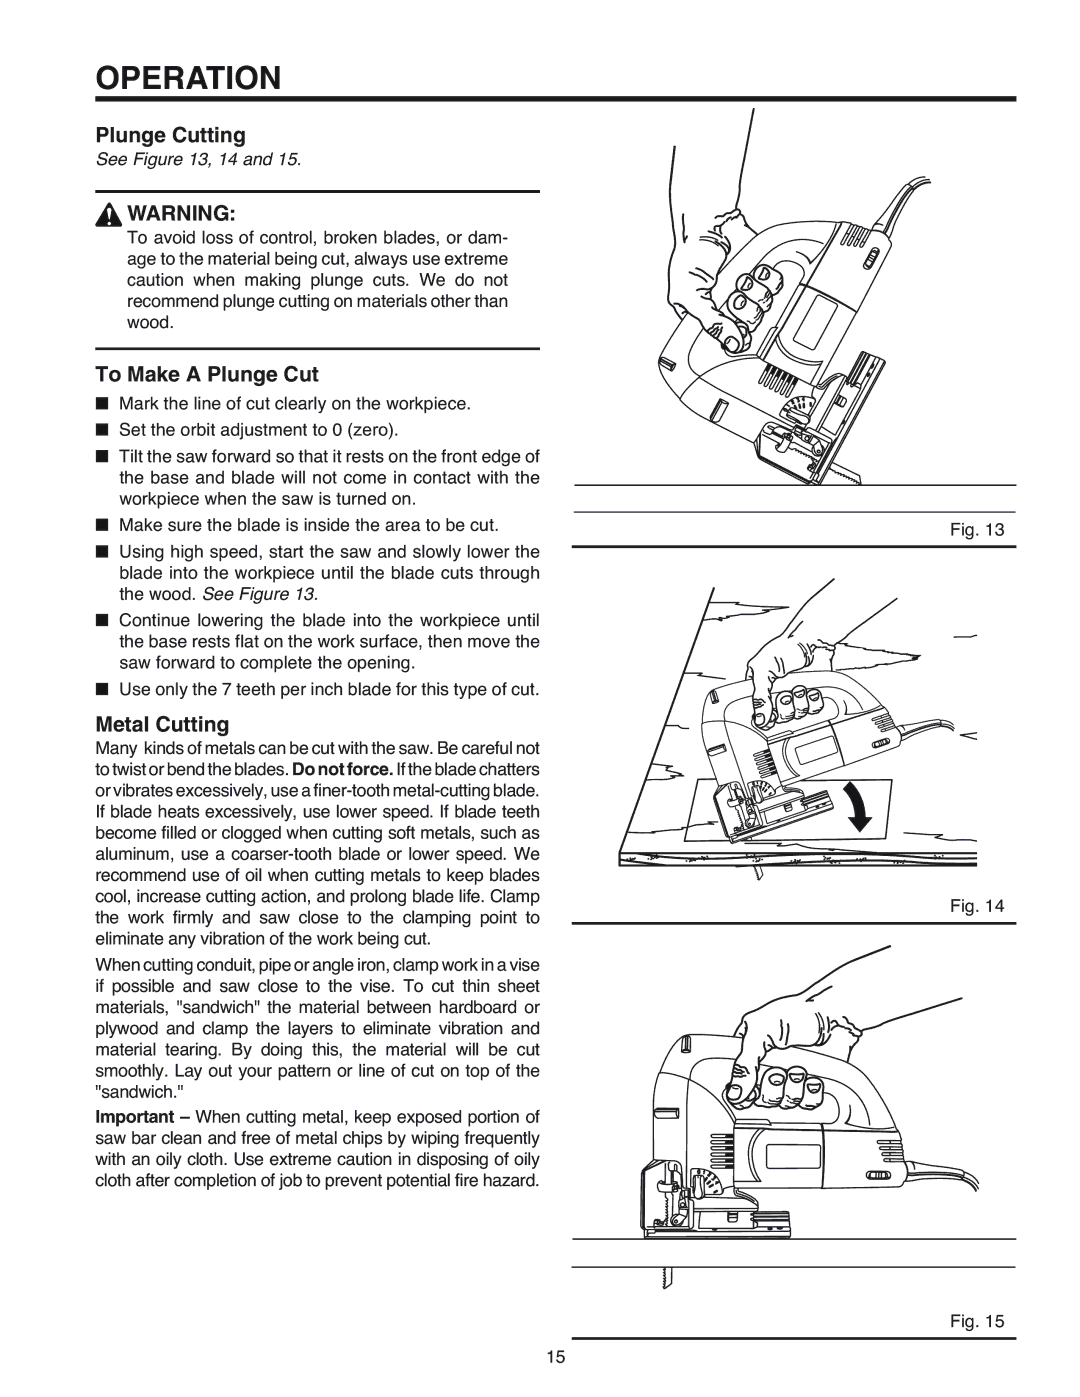
To Make A Plunge Cut
■Mark the line of cut clearly on the workpiece.
■Set the orbit adjustment to 0 (zero).
■Tilt the saw forward so that it rests on the front edge of the base and blade will not come in contact with the workpiece when the saw is turned on.
■Make sure the blade is inside the area to be cut.
■Using high speed, start the saw and slowly lower the blade into the workpiece until the blade cuts through the wood. See Figure 13.
■Continue lowering the blade into the workpiece until the base rests flat on the work surface, then move the saw forward to complete the opening.
■Use only the 7 teeth per inch blade for this type of cut.
Metal Cutting
Many kinds of metals can be cut with the saw. Be careful not to twist or bend the blades. Do not force. If the blade chatters or vibrates excessively, use a
When cutting conduit, pipe or angle iron, clamp work in a vise if possible and saw close to the vise. To cut thin sheet materials, "sandwich" the material between hardboard or plywood and clamp the layers to eliminate vibration and material tearing. By doing this, the material will be cut smoothly. Lay out your pattern or line of cut on top of the "sandwich."
Important – When cutting metal, keep exposed portion of saw bar clean and free of metal chips by wiping frequently with an oily cloth. Use extreme caution in disposing of oily cloth after completion of job to prevent potential fire hazard.
Fig. 13
Fig. 14
Fig. 15
15