ASSEMBLY
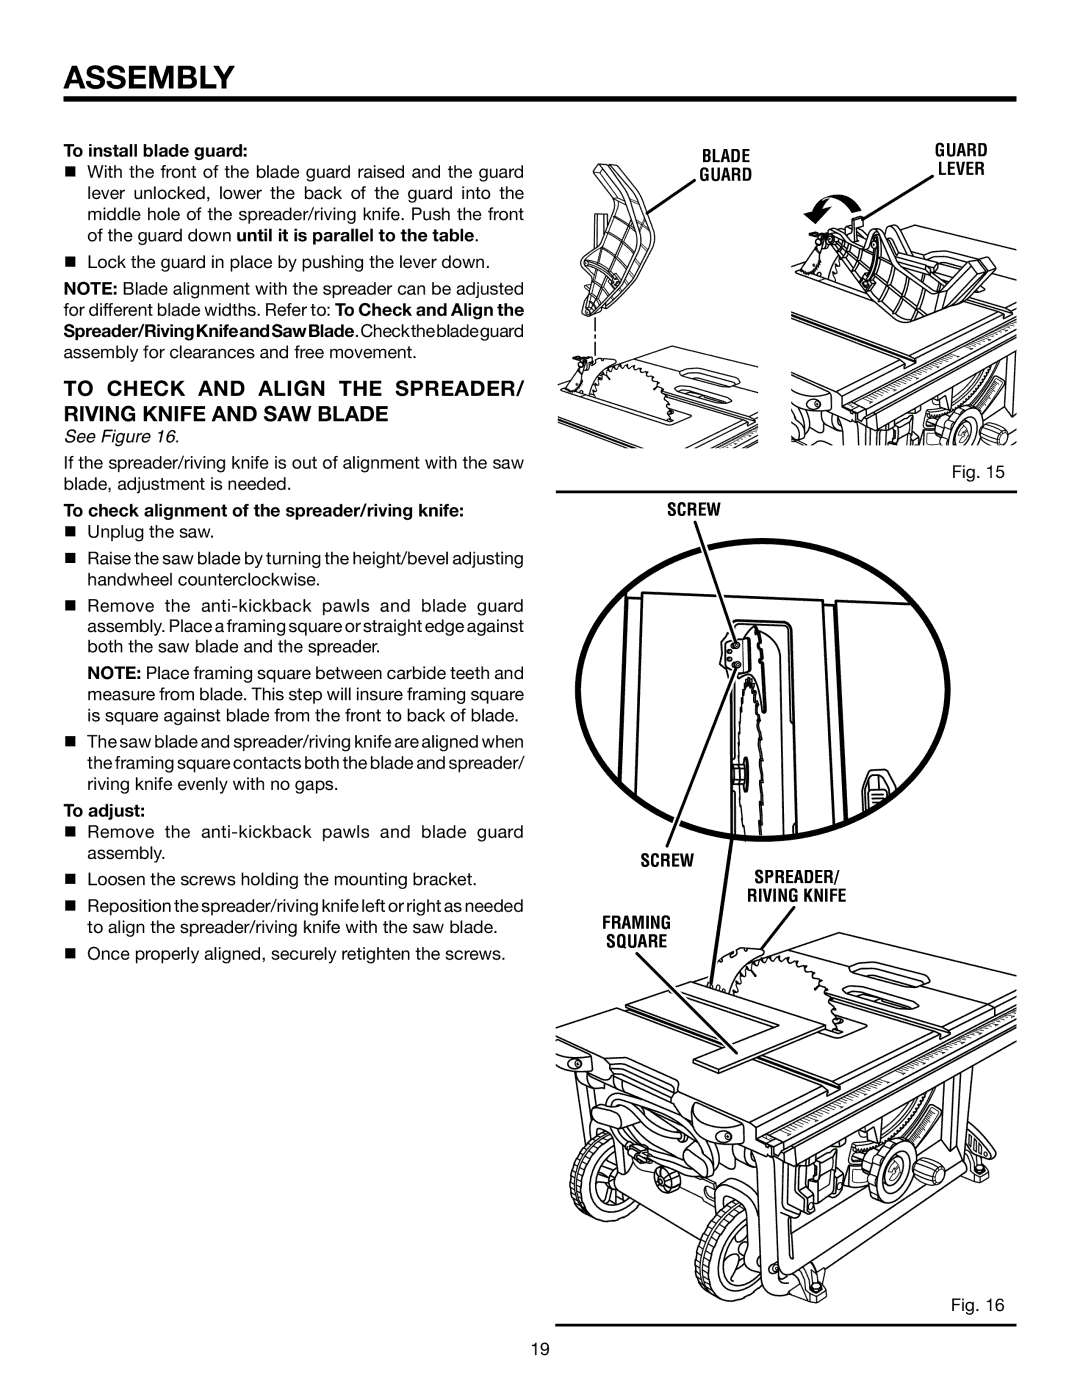
To install blade guard:
With the front of the blade guard raised and the guard lever unlocked, lower the back of the guard into the middle hole of the spreader/riving knife. Push the front of the guard down until it is parallel to the table.
Lock the guard in place by pushing the lever down.
NOTE: Blade alignment with the spreader can be adjusted
for different blade widths. Refer to: To Check and Align the Spreader/RivingKnifeandSawBlade.Checkthebladeguard assembly for clearances and free movement.
TO Check and Align the spreader/ riving knife and Saw Blade
See Figure 16.
If the spreader/riving knife is out of alignment with the saw blade, adjustment is needed.
To check alignment of the spreader/riving knife:
Unplug the saw.
Raise the saw blade by turning the height/bevel adjusting handwheel counterclockwise.
Remove the
Note: Place framing square between carbide teeth and measure from blade. This step will insure framing square is square against blade from the front to back of blade.
The saw blade and spreader/riving knife are aligned when the framing square contacts both the blade and spreader/ riving knife evenly with no gaps.
To adjust:
Remove the
Loosen the screws holding the mounting bracket.
Reposition the spreader/riving knife left or right as needed to align the spreader/riving knife with the saw blade.
Once properly aligned, securely retighten the screws.
BLADE | guard | |
LEVER | ||
guard | ||
|
Fig. 15
SCREW
SCREW
SPREADER/
riving knife
FRAMING
SQUARE
Fig. 16
19