ASSEMBLY
WORK STAND SET-UP
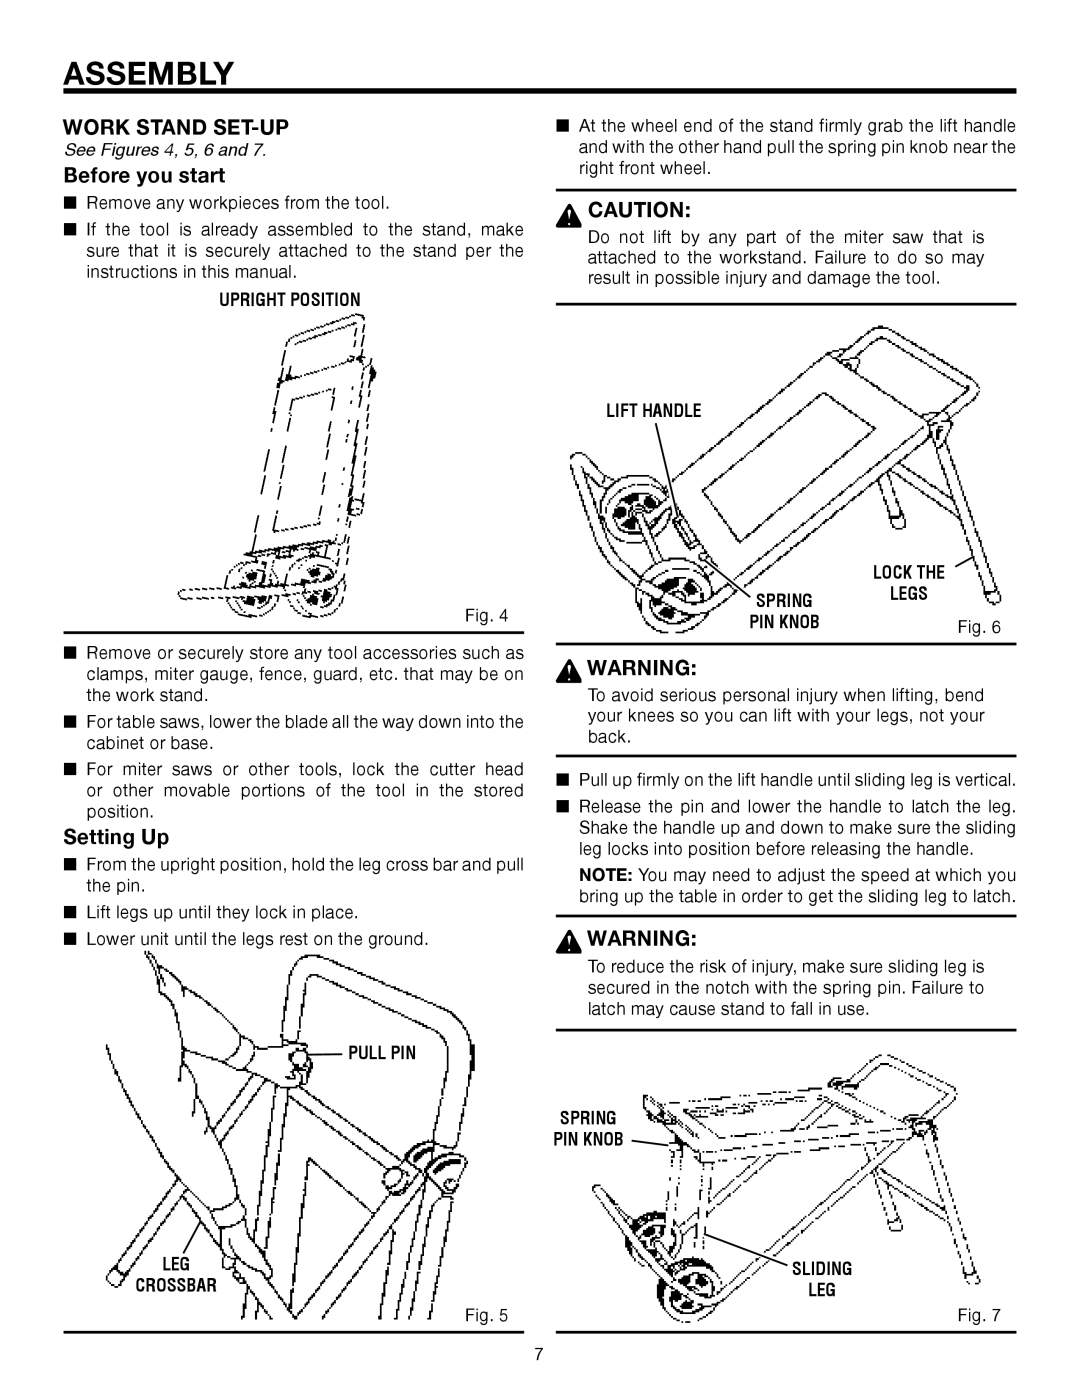
See Figures 4, 5, 6 and 7.
Before you start
nRemove any workpieces from the tool.
nIf the tool is already assembled to the stand, make sure that it is securely attached to the stand per the instructions in this manual.
UPRIGHT POSITION
Fig. 4
nRemove or securely store any tool accessories such as clamps, miter gauge, fence, guard, etc. that may be on the work stand.
nFor table saws, lower the blade all the way down into the cabinet or base.
nFor miter saws or other tools, lock the cutter head or other movable portions of the tool in the stored position.
Setting Up
nFrom the upright position, hold the leg cross bar and pull the pin.
nLift legs up until they lock in place.
nLower unit until the legs rest on the ground.
PULL PIN
LEG
CROSSBAR
Fig. 5
nAt the wheel end of the stand firmly grab the lift handle and with the other hand pull the spring pin knob near the right front wheel.
CAUTION:
Do not lift by any part of the miter saw that is attached to the workstand. Failure to do so may result in possible injury and damage the tool.
LIFT HANDLE
| LOCK THE |
SPRING | LEGS |
| |
PIN KNOB | Fig. 6 |
|
|
![]() WARNING:
WARNING:
To avoid serious personal injury when lifting, bend your knees so you can lift with your legs, not your back.
nPull up firmly on the lift handle until sliding leg is vertical.
nRelease the pin and lower the handle to latch the leg. Shake the handle up and down to make sure the sliding leg locks into position before releasing the handle.
NOTE: You may need to adjust the speed at which you bring up the table in order to get the sliding leg to latch.
![]() WARNING:
WARNING:
To reduce the risk of injury, make sure sliding leg is secured in the notch with the spring pin. Failure to latch may cause stand to fall in use.
SPRING
PIN KNOB ![]()
SLIDING
LEG
Fig. 7
7