![]() Rimage 480i Printer
Rimage 480i Printer
Centering the image on the disc
The Rimage 2000i provides two ways to center the image on the disc. You can use the Auto Centering method or the Manual Centering method. This process describes both processes. The Auto Centering method is accurate to within +/- 0.5 mm. You can improve the centering position accuracy with the manual centering adjustment to better than +/- 0.2 mm. For optimal print quality, use this procedure to center the image on the disc.
Tip: For additional | 1. | Navigate to Printing Preferences. |
|
|
|
| |
information about these | 2. | Load a disc in the printer. |
|
features, access the online |
|
|
|
help in Printing |
| a. To open the printer tray, press | . The printer tray opens. |
Preferences. |
|
|
|
b.Place a 120 mm white disc on the tray.
Tip: Use the Center Image functionality only if the printed image is not centered on the disc. Image centering is set at the time of manufacture and usually does not need to be recalibrated in the field.
|
|
|
|
|
| +50 |
|
|
|
|
|
| +40 |
|
|
|
|
|
| |
|
|
|
|
|
| +30 |
|
|
|
|
|
| |
|
|
|
|
|
| +20 |
|
|
|
|
|
| |
|
|
|
|
| 0 | +10 |
|
|
|
|
| ||
|
|
|
|
| ||
|
|
|
|
| ||
|
|
|
|
|
| |
|
|
|
|
|
| |
|
|
|
|
|
| |
|
|
|
|
|
| |
|
|
|
|
|
| |
|
|
|
|
|
| |
|
|
|
|
|
| |
|
|
|
|
|
| |
|
|
|
|
|
| |
|
|
|
| rtcia e V | l | |
|
|
| Horizontal | |||
|
|
| Horizontal | |||
|
|
| ||||
|
|
| ||||
3.Select Center Image. The Centering Margins for Disc Color Printer 480i dialog box displays.
4.Center the image.
•To Auto Center the image, select Center Image. The Rimage 2000i automatically centers the image.
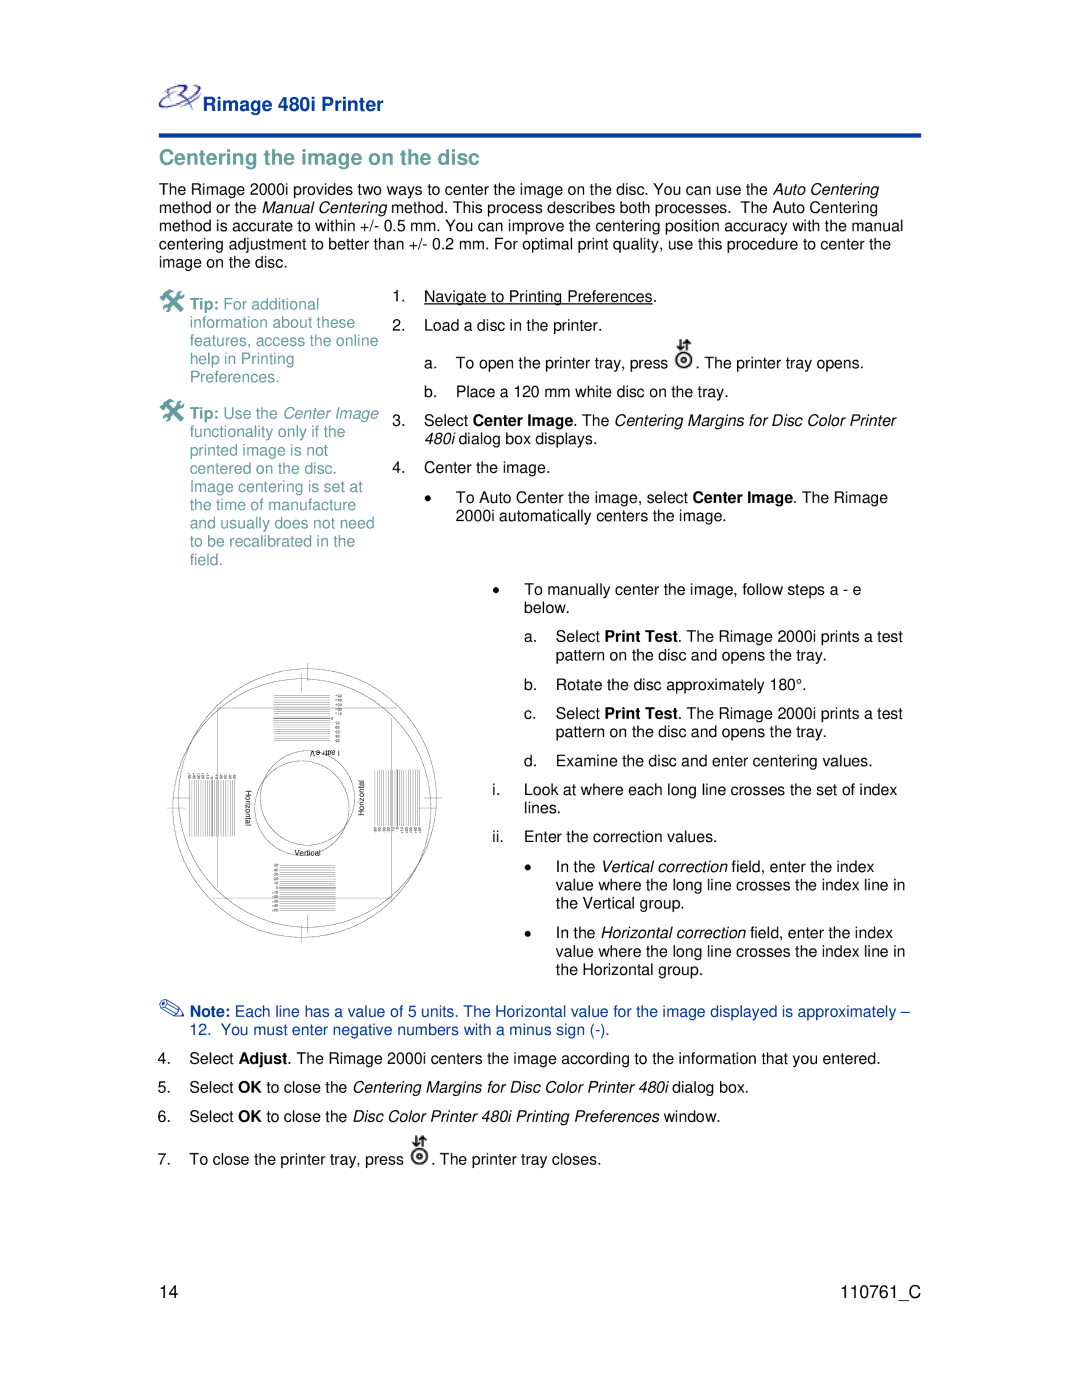
•To manually center the image, follow steps a - e below.
a.Select Print Test. The Rimage 2000i prints a test pattern on the disc and opens the tray.
b.Rotate the disc approximately 180°.
c.Select Print Test. The Rimage 2000i prints a test pattern on the disc and opens the tray.
d.Examine the disc and enter centering values.
i.Look at where each long line crosses the set of index lines.
Vertical
0
+10
+20
+30
+40
+50
ii.Enter the correction values.
•In the Vertical correction field, enter the index value where the long line crosses the index line in the Vertical group.
•In the Horizontal correction field, enter the index value where the long line crosses the index line in the Horizontal group.
Note: Each line has a value of 5 units. The Horizontal value for the image displayed is approximately –
12. You must enter negative numbers with a minus sign (-).
4.Select Adjust. The Rimage 2000i centers the image according to the information that you entered.
5.Select OK to close the Centering Margins for Disc Color Printer 480i dialog box.
6.Select OK to close the Disc Color Printer 480i Printing Preferences window.
7.To close the printer tray, press ![]() . The printer tray closes.
. The printer tray closes.
14 | 110761_C |
