Advanced Operation
Recording With The Voice Recorder
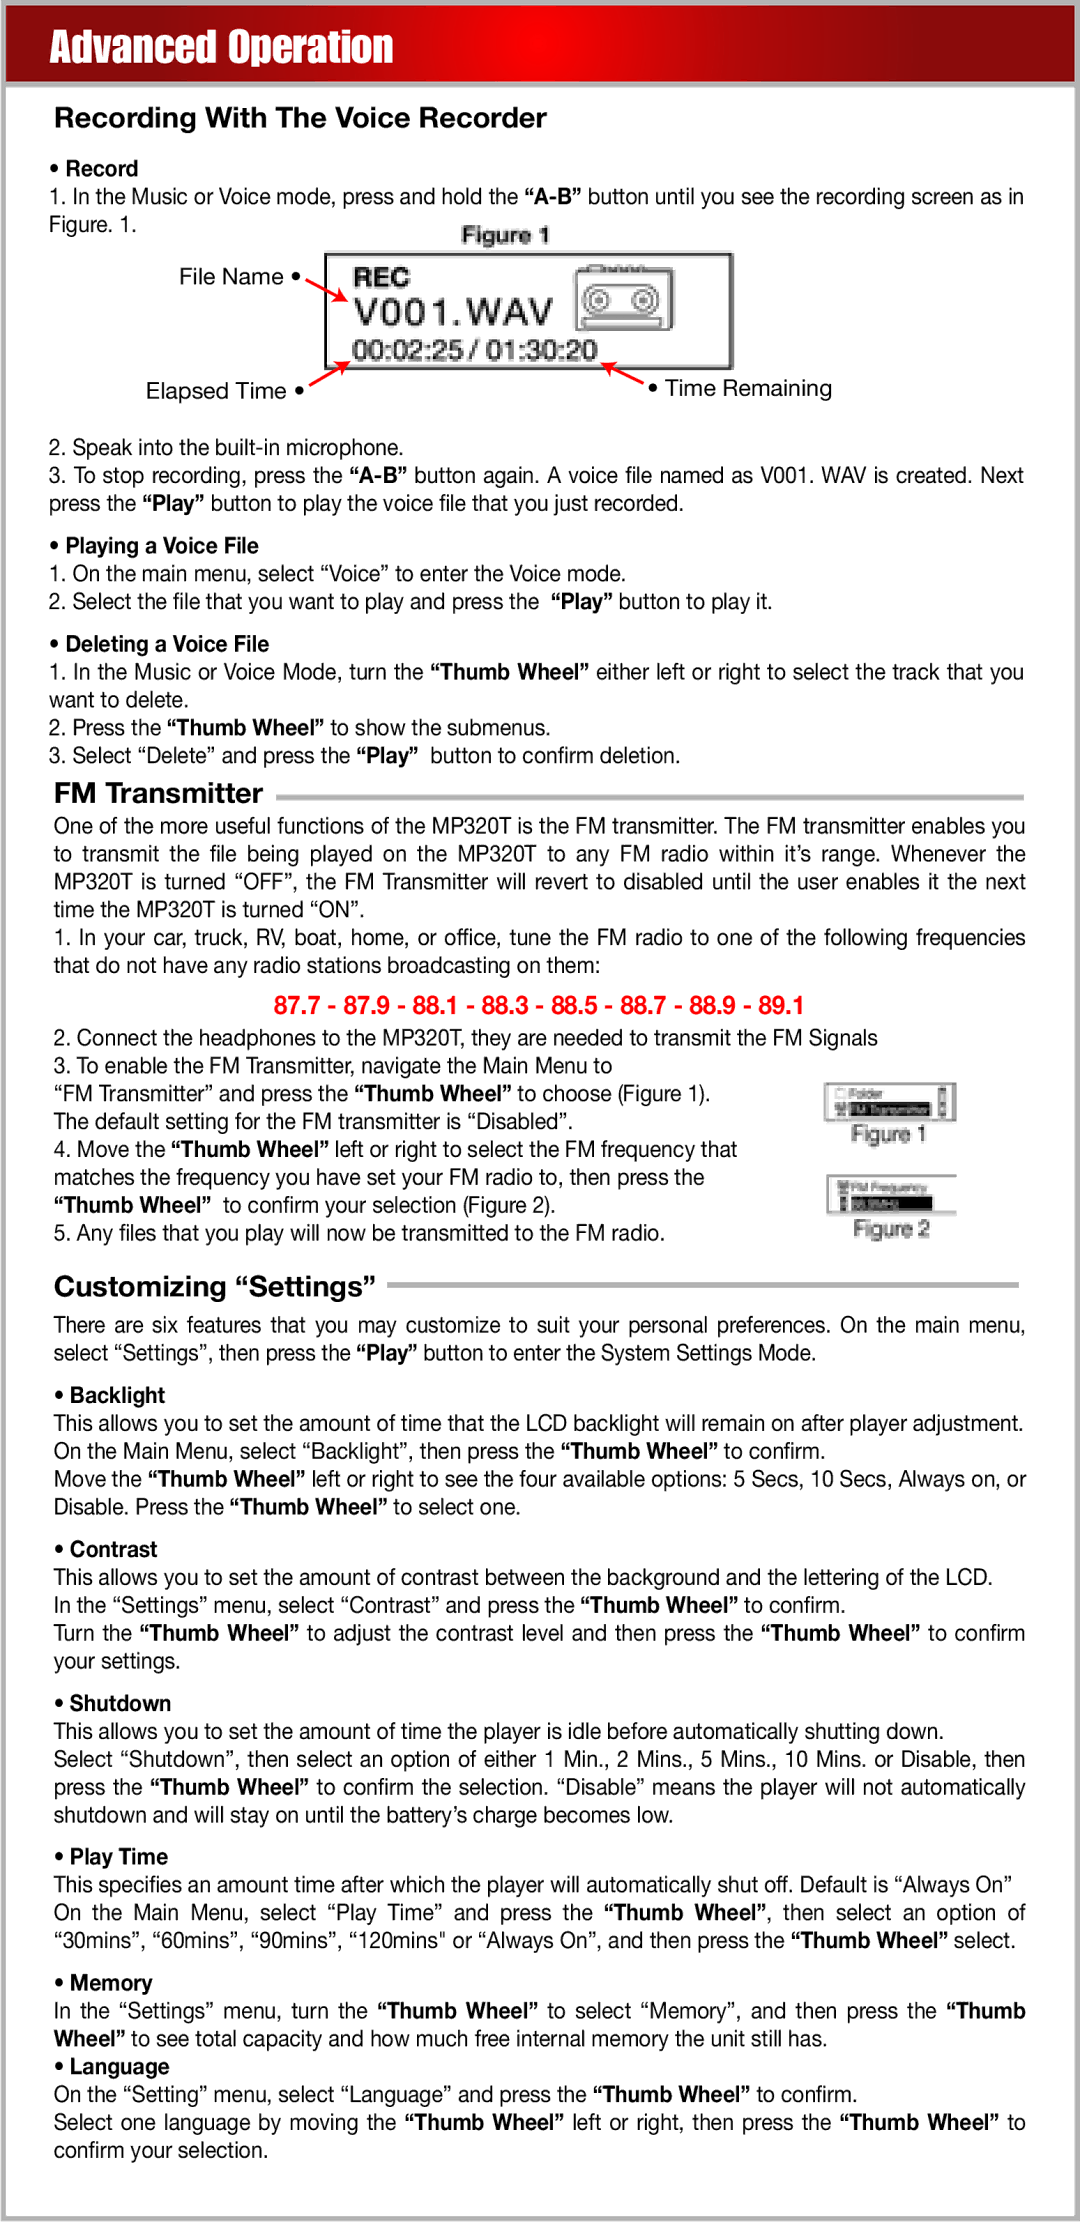
•Record
1.In the Music or Voice mode, press and hold the
File Name •
Elapsed Time • | • Time Remaining |
2.Speak into the
3.To stop recording, press the
•Playing a Voice File
1.On the main menu, select “Voice” to enter the Voice mode.
2.Select the file that you want to play and press the “Play” button to play it.
•Deleting a Voice File
1.In the Music or Voice Mode, turn the “Thumb Wheel” either left or right to select the track that you want to delete.
2.Press the “Thumb Wheel” to show the submenus.
3.Select “Delete” and press the “Play” button to confirm deletion.
FM Transmitter
One of the more useful functions of the MP320T is the FM transmitter. The FM transmitter enables you to transmit the file being played on the MP320T to any FM radio within it’s range. Whenever the MP320T is turned “OFF”, the FM Transmitter will revert to disabled until the user enables it the next time the MP320T is turned “ON”.
1.In your car, truck, RV, boat, home, or office, tune the FM radio to one of the following frequencies that do not have any radio stations broadcasting on them:
87.7- 87.9 - 88.1 - 88.3 - 88.5 - 88.7 - 88.9 - 89.1
2.Connect the headphones to the MP320T, they are needed to transmit the FM Signals
3.To enable the FM Transmitter, navigate the Main Menu to
“FM Transmitter” and press the “Thumb Wheel” to choose (Figure 1). The default setting for the FM transmitter is “Disabled”.
4.Move the “Thumb Wheel” left or right to select the FM frequency that matches the frequency you have set your FM radio to, then press the “Thumb Wheel” to confirm your selection (Figure 2).
5.Any files that you play will now be transmitted to the FM radio.
Customizing “Settings”
There are six features that you may customize to suit your personal preferences. On the main menu, select “Settings”, then press the “Play” button to enter the System Settings Mode.
• Backlight
This allows you to set the amount of time that the LCD backlight will remain on after player adjustment. On the Main Menu, select “Backlight”, then press the “Thumb Wheel” to confirm.
Move the “Thumb Wheel” left or right to see the four available options: 5 Secs, 10 Secs, Always on, or Disable. Press the “Thumb Wheel” to select one.
• Contrast
This allows you to set the amount of contrast between the background and the lettering of the LCD. In the “Settings” menu, select “Contrast” and press the “Thumb Wheel” to confirm.
Turn the “Thumb Wheel” to adjust the contrast level and then press the “Thumb Wheel” to confirm your settings.
• Shutdown
This allows you to set the amount of time the player is idle before automatically shutting down.
Select “Shutdown”, then select an option of either 1 Min., 2 Mins., 5 Mins., 10 Mins. or Disable, then press the “Thumb Wheel” to confirm the selection. “Disable” means the player will not automatically shutdown and will stay on until the battery’s charge becomes low.
• Play Time
This specifies an amount time after which the player will automatically shut off. Default is “Always On” On the Main Menu, select “Play Time” and press the “Thumb Wheel”, then select an option of “30mins”, “60mins”, “90mins”, “120mins" or “Always On”, and then press the “Thumb Wheel” select.
• Memory
In the “Settings” menu, turn the “Thumb Wheel” to select “Memory”, and then press the “Thumb Wheel” to see total capacity and how much free internal memory the unit still has.
• Language
On the “Setting” menu, select “Language” and press the “Thumb Wheel” to confirm.
Select one language by moving the “Thumb Wheel” left or right, then press the “Thumb Wheel” to confirm your selection.