INSTALLATION
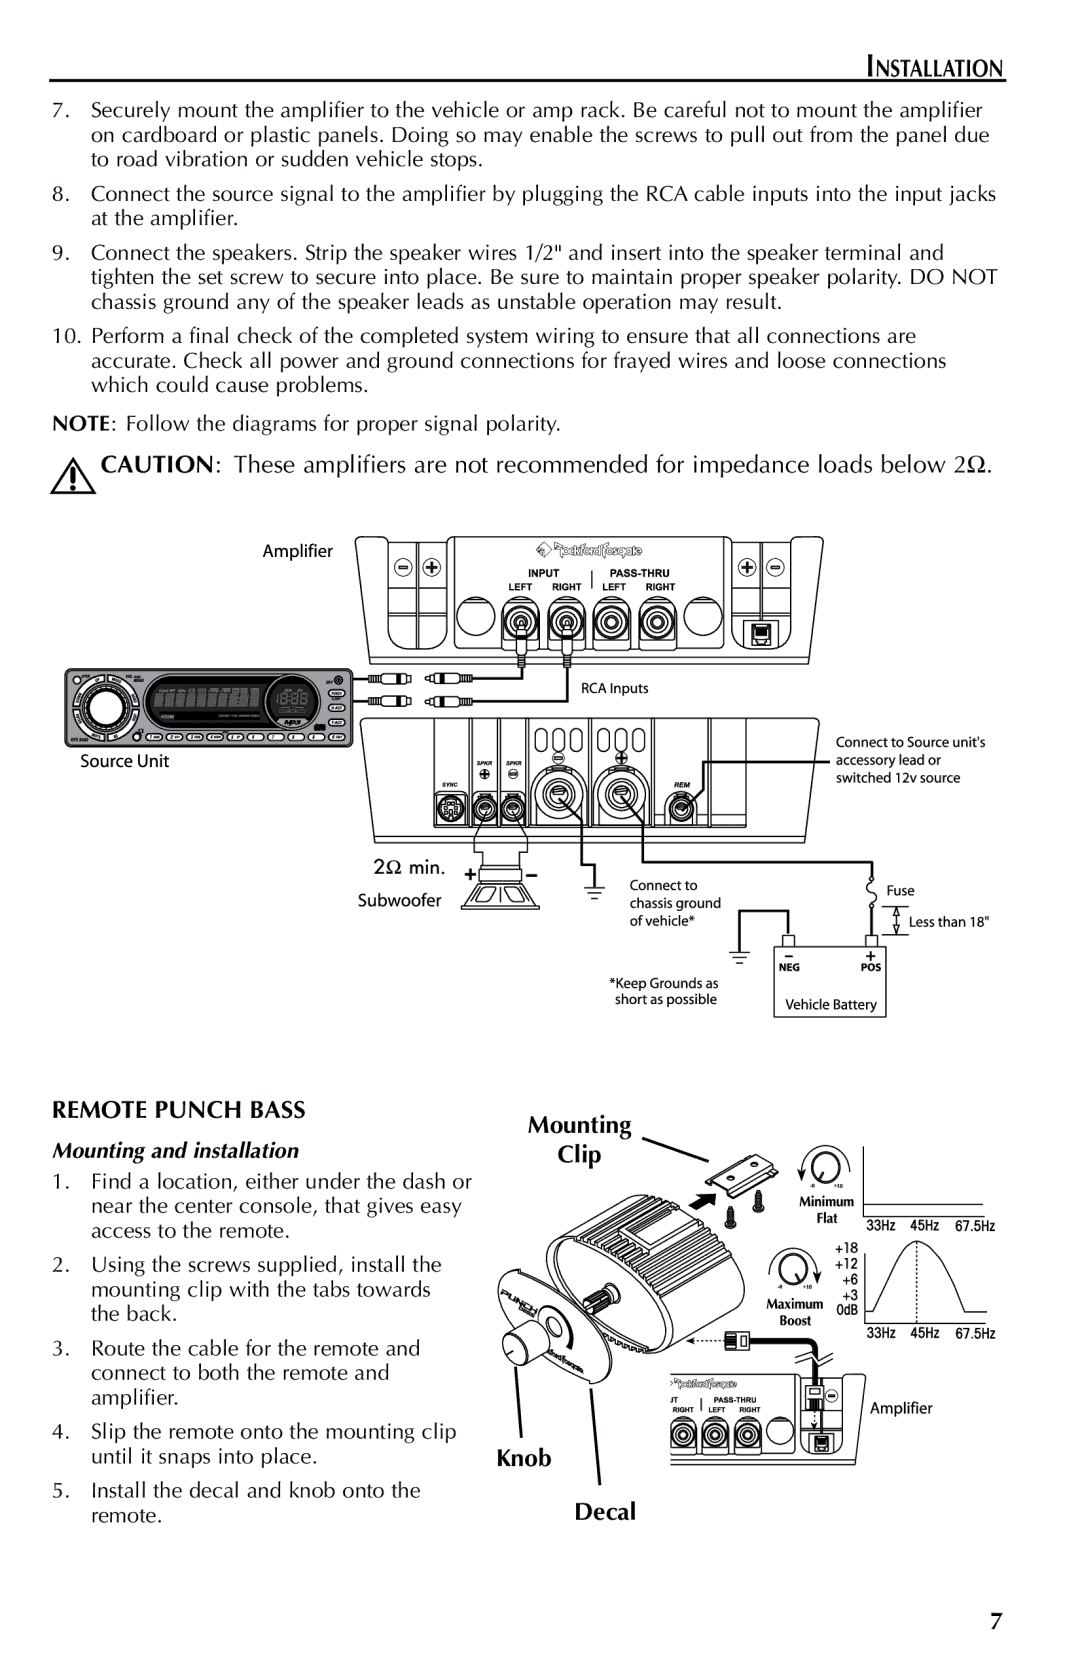
7.Securely mount the amplifier to the vehicle or amp rack. Be careful not to mount the amplifier on cardboard or plastic panels. Doing so may enable the screws to pull out from the panel due to road vibration or sudden vehicle stops.
8.Connect the source signal to the amplifier by plugging the RCA cable inputs into the input jacks at the amplifier.
9.Connect the speakers. Strip the speaker wires 1/2" and insert into the speaker terminal and tighten the set screw to secure into place. Be sure to maintain proper speaker polarity. DO NOT chassis ground any of the speaker leads as unstable operation may result.
10.Perform a final check of the completed system wiring to ensure that all connections are accurate. Check all power and ground connections for frayed wires and loose connections which could cause problems.
NOTE: Follow the diagrams for proper signal polarity.
!CAUTION: These amplifiers are not recommended for impedance loads below 2Ω.
REMOTE PUNCH BASS
Mounting and installation
1.Find a location, either under the dash or near the center console, that gives easy access to the remote.
2.Using the screws supplied, install the mounting clip with the tabs towards the back.
3.Route the cable for the remote and connect to both the remote and amplifier.
4.Slip the remote onto the mounting clip until it snaps into place.
5.Install the decal and knob onto the remote.
Mounting
Clip
Knob
Decal
7