Stylish, Light, Compact Design
Main Features
Do not open or modify in any way the unit or its AC adaptor
Protect the unit from strong impact. Do not drop it
Placement
Power Supply
Maintenance
Additional Precautions
Contents
Front Panel
Panel Descriptions
Panel Descriptions
Rear Panel
Before You Play
Connect the supplied Power Cord to the supplied AC adaptor
Making Connections
Before you begin making connections, confirm the following
Installing the Music Stand
Using the stand
Connecting Pedals
Adjusting the Sound’s Volume and Brilliance
Turning the Power On and Off
Connecting Headphones
Turning On the Power
Listening to Demo Songs
Playing the Keyboard
Hold down the Reverb button and press the Effects button
Voice/GM2 Sct
Listening to Internal Songs
Playing Back All Songs Continuously All Song Play
Playing the Keyboard
Page
Performing with a Variety of Sounds
Press one of the Tone buttons to choose a Tone Group
Press the or + button to select a Tone from the Tone Group
Changing the Tone variations
Performing With Two Layered Tones Dual Play
Hold down the Piano button and press the Strings/Pad Button
To exit Dual Play, press either Tone button
Press the Split button, getting its indicator to light
Press the Piano button
To exit Split Play, press the Split button once more
Changing the Lower Tone
Changing Tone Group and Tone Variation
Changing the Volume Balance for Dual Play and Split Play
Use the Balance knob to adjust the volume balance
Changing the Keyboard’s Split Point
Hold down the Effects button and press the Transpose Button
Changing the Keyboard’s Touch
Press the or + buttons to select the touch
Press the Effects button or the Transpose button
Changing the Velocity When the Key Touch Is Set to Fixed
Adding Reverberation to Sounds The Reverb Effect
Press the Reverb button, getting its indicator to light
Changing the Depth of Reverb Effect
Hold down the Reverb button and press the or + Button
Adding a Variety Effects to the Sound
Press the Effects button, getting its indicator to light
Changing the Depth of Effect
Hold down the Effects button and press the or + button
Press the Organ button and select the organ tone
Press the corresponding key
Transposing the Key of the Keyboard Key Transpose
Using the Metronome
Changing the Volume
Changing the Tempo
Changing the Tonal Quality Equalizer
Boosting the Low-Frequency Range Sound Control
21,3
Press the Equalizer button
Playing Along with Rhythms
What is Session Partner?
Playing Along with Rhythms
Performing Along With Session Partner
Press the Start/Stop button
While holding down the Part button, press the or + button
Selecting Parts
Selecting a Rhythm
Press the Part button
Press the or + button to select the Rhythm
Press the or + buttons to adjust the tempo
Changing a Rhythm’s Tempo
Selecting a Rhythm’s Chord Progression
To exit, press the Chord Progression button
To stop the Rhythm, press the Start/Stop button
Hold down the Chord Progression button and press Rec button
Recording the Chord Progression Chord Progression
Selecting Stored Settings
Storing Settings Setup
Recording a Performance
Recording a Performance
Press the Rec button
Recording a Performance Using Session Partner
Recording a Performance
Press the Play/Stop button to stop recording
Recording along with internal songs
Recording Selected Track buttons
Hold down the Display button and press the Rec button
Erasing Recorded Performances
Other Functions
How to Make Settings
Changing How the Pedals Work
Changing How the Pedal Effects Are Applied
How the Soft PedalFC2 effects are applied
How the Sostenuto PedalFC1 effects are applied
Changing the Effect Type
Switch to Function mode p , and press the Effects button
Works of the Soft PedalFC2
Works of the Sostenuto PedalFC1
Tuning to Other Instruments’ Pitches Master Tuning
Setting the Part to Which Effects Are Added
Switch to Function mode p , and press Piano button
Changing the Pitch Lower Tone in Octave Steps Octave Shift
Switch to Function mode p , and press Transpose button
Adjusting the Tuning Temperament
Changing the Beat Metronome
Press the or + button to change the temperament
Setting the Root Note of the Chord Progression
Setting the Intro and Ending On or Off
Setting the Chord Display On or Off
Fixing a Set Chord Progression
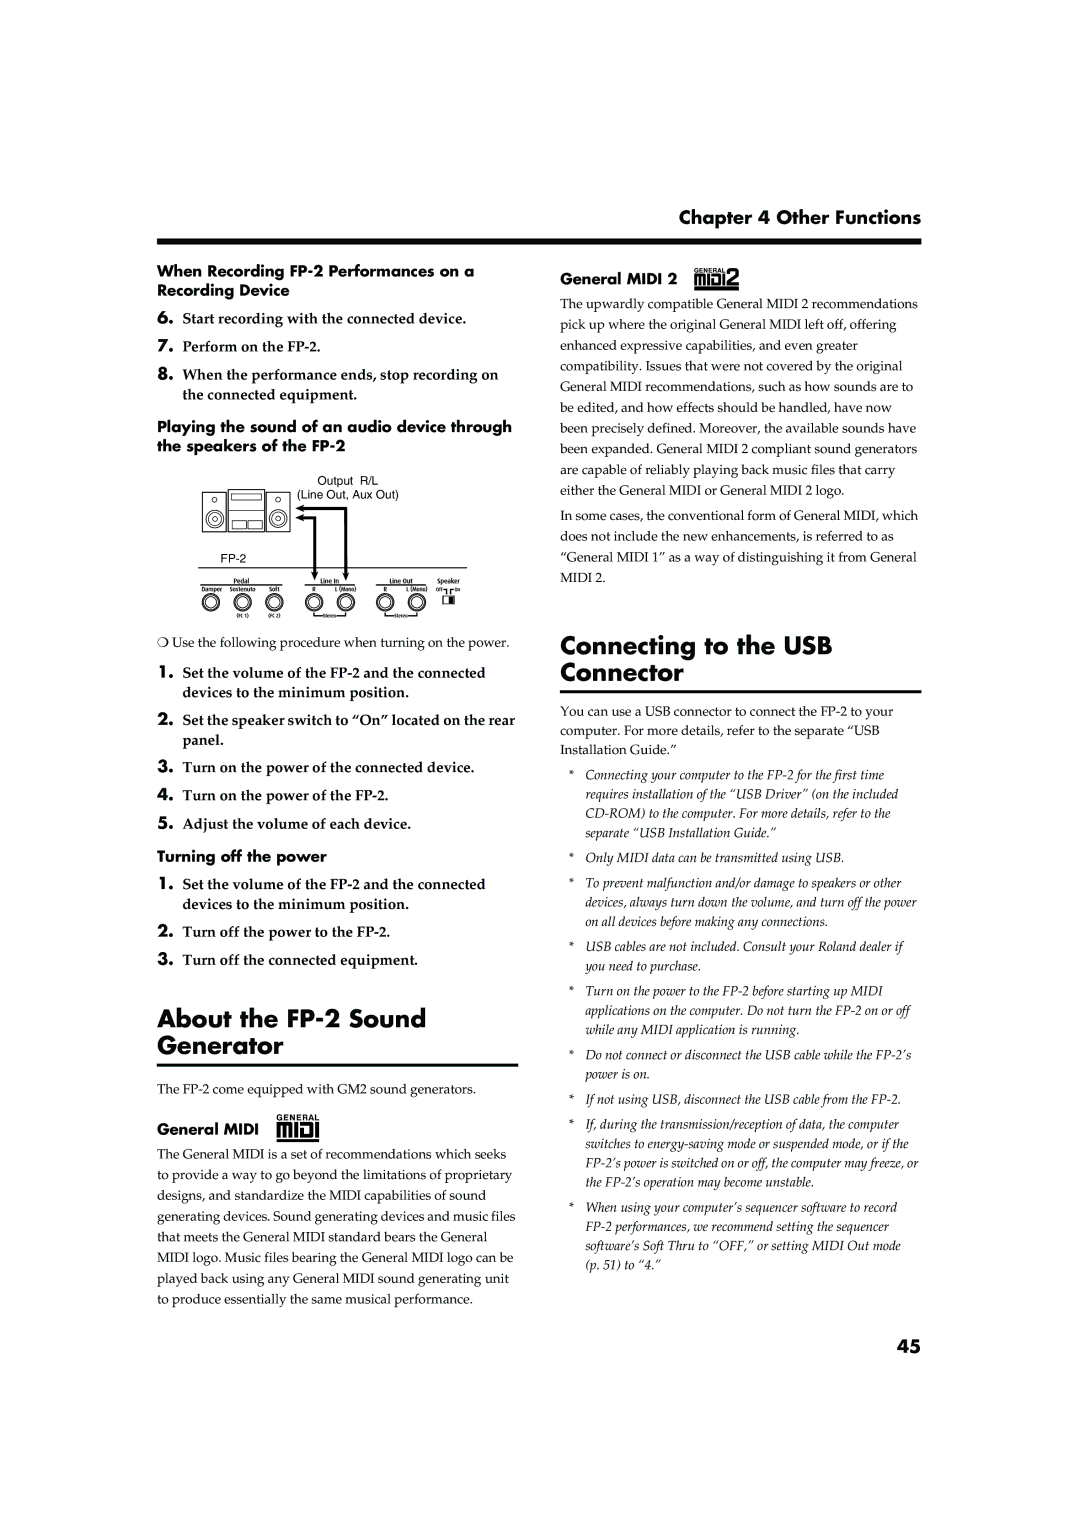
Connecting to Audio Equipment
Changing the Equalizer Settings
Connection Examples
Gain
About the FP-2 Sound Generator
Connecting to the USB Connector
Connectors
Connecting Midi Devices
How to Enjoy Midi
Making the Connections
Midi Send Channel Settings
Midi Settings
Switching Local Control On and Off
Press the or + button to select the transmission channel
Using the Pedal to Switch Setup Pedal shift
Setting the Midi Out Mode
Press the or + button to switch Local Control on and off
Press the or + button to select the Midi Out Mode
How to Use the V-LINK
Using the V-LINK function
Press the or + button to select pedal setting
Stop the external sequencer
Turn on the power once again
Making the Settings for the USB Driver
Adjust the volume
Disabling Everything Except Piano Play Panel Lock
Case Cause/What to do
Troubleshooting
Sticks
Troubleshooting
Display Meaning
Error Messages/Other Messages
Organ
Tone List
Tone List
Pop Drum Set Jazz Drum Set Vox Drum Set House Drum Set
Rhythm Set List
GM2 Room Set GM2 Power Set GM2 Electric Set
GM2 Jazz Set GM2 Brush Set
Genre Chord Beat Progression Pattern No
Rhythm List
Chord Progression
Chord Progression Pattern List
Chord Progression Pattern List
DM7
Chord Fingering List
Chord Fingering List
GM7
AM7
→ Listening to Demo Songs p
Internal Song List
Internal Song List
Settings Stored in the Setup
Stored Settings
Not Stored Settings
You want to Buttons
Easy Operation List
Easy Operation List
Active Sense Reset
Mode 3, 4M=1
Function
Mode
Main Specifications
Index
Session Partner 27-28
Index
Africa
Information
For Canada
03458634 ’04-12-4N