Main Features
Using the Unit Safely page 2-3 and Important Notes
Page
For the U.K
Maintenance
Power Supply
Placement
Additional Precautions
Contents
Front Panel
Rear Panel
Signal Flow
About Midi
Installing the Divided Pickup on the Guitar or Bass
Items to Have On Hand
Guitars That Cannot Be Used with the GK-2A/GK-2B
Selecting the Guitar or Bass
Connection Examples
Preparations to Make Before Performing
Turning Off the Power
Turning On the Power
Adjusting the Input Sensitivity
Playing Sounds from a Sound Module
System Parameters and Patch Parameters
What is a Patch?
Selecting Patches
System Parameters
About the Display
How to Switch Patches
When Not Switching Patches
Patch Parameters
Setting the Midi Transmit Channel Basic CH
Setting the Midi Channel
Setting the Transmission Mode MONO/POLY
When in Poly Mode
Control Change
Setting the Control Channel CTL CH
Press PATCH/VALUE to select the Basic channel number
Program Change
Performing on the Guitar
Press PATCH/VALUE to select the Control channel number
Setting the Midi Data Path
Connecting to a Computer
Setting the Midi Port
Signal Paths That Can Be Selected With
Calling Up the Input Sensitivity Settings
Setting the Feeling of the Performance Play Feel
Setting the Pedal and Switch Functions Assign
31, 64-95 Midi Control Change CC#1-31, CC#64-95
Functions That Can Be Selected With
Controller Function
Pu Patch Up
Ou Octave Up
Pd Patch Down
Pt Patch Up/Down
Od Octave Down
V1-V4 Vibrato
U4 Glide Up 4/d4 Glide Down
U5-u8 Glide Up 5-8/d5-d8 Glide Down
B1 Pitch Bend
Setting the Range in Which Pitches Are Changed Bend Range
Shifting the Pitch of the Sound Transpose
Settings That Can Be Selected With
Setting the Bend Range
Switching Sounds on External Devices PRG Change
Press Write
Storing the Settings Write
Muting Specific Strings
Press PATCH/VALUE to select the save-destination patch
Copying Patches
Confirm that the GI-20 is set to Play Mode
Press PATCH/VALUE to select the copy-destination patch
Convenient Functions Featured by the GI-20
Tuning Tuner
Convenient Functions Featured by the GI-20
Off
Receiving Saved Data Using Midi Bulk Load Midi
Bend Data Thin Function
Turn the power off
Receive Saved Data Through USB Bulk Load USB
Use a USB cable to connect the computer and the GI-20
Receive Control Change Data Thin Function
Reducing the Amount of Control Change Data Transmitted
Limiting the Extent of the Bend Range Bend Range MAX
Press PATCH/VALUE to select 12 or
Press PATCH/VALUE to select SP or GE Turn the power off
Selecting the Type of USB Driver
Turn off the power to the GI-20
Reset to Default Factory Settings Factory Reset
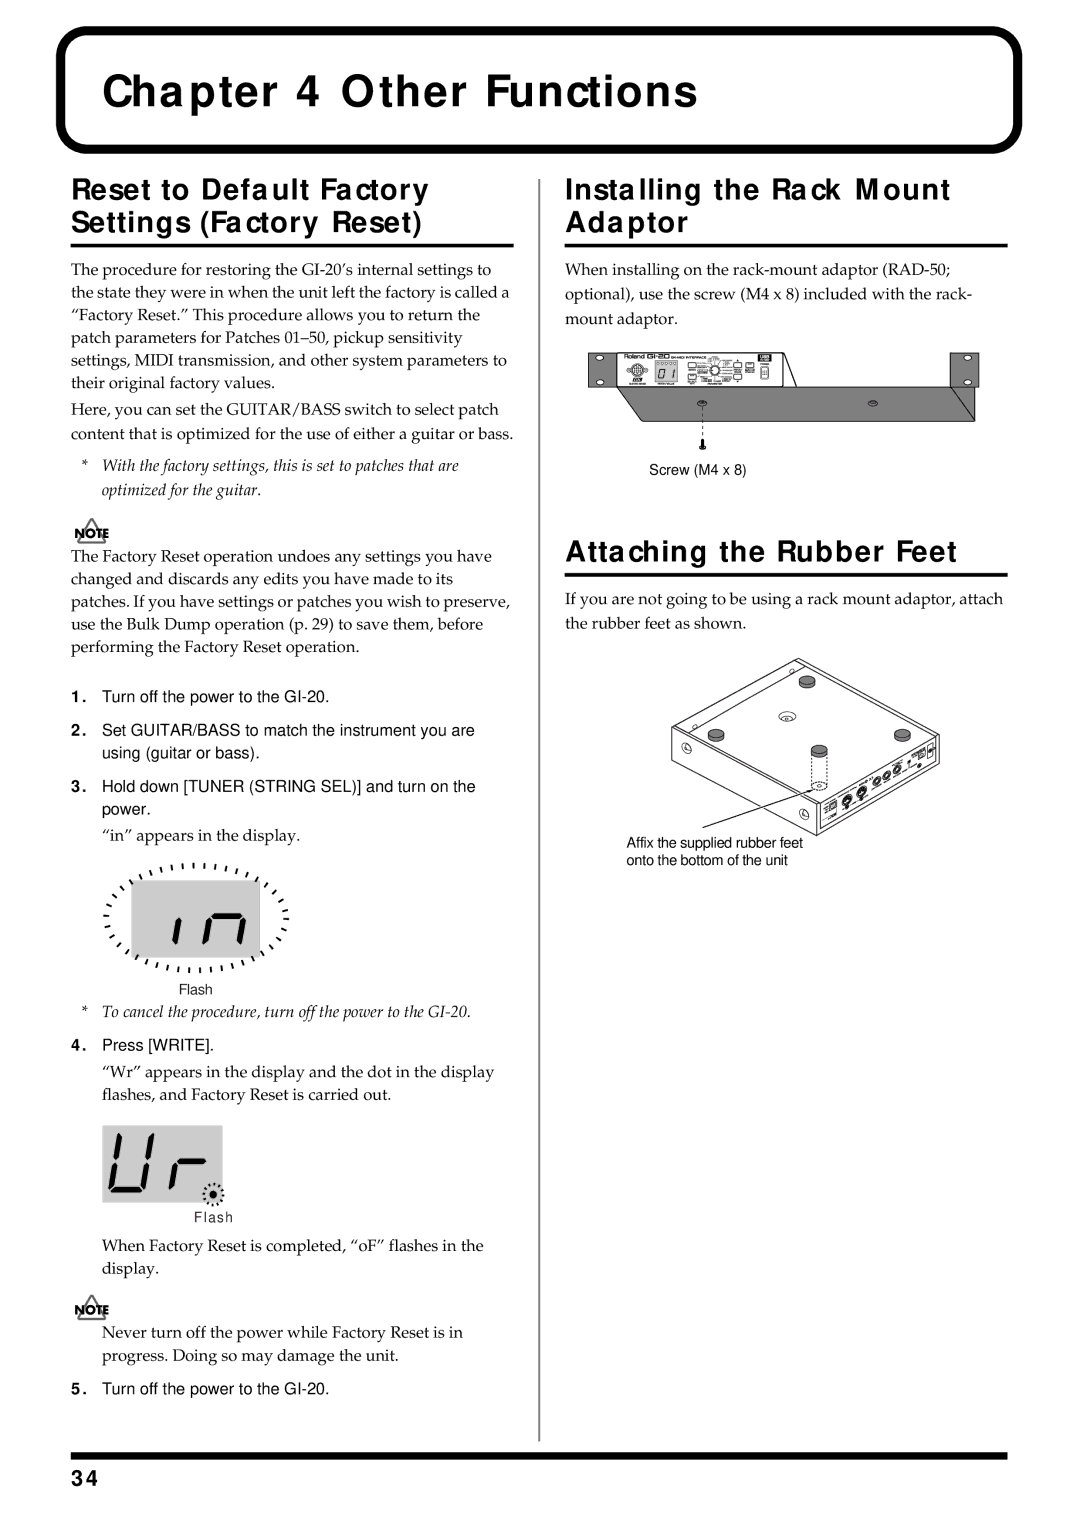
Installing the Rack Mount Adaptor
Attaching the Rubber Feet
Sound doesn’t vary when the settings are changed
Troubleshooting
Volume fluctuates from one string to another
Pitch doesn’t change smoothly
Pitch is wrong out of tune with the guitar/bass
Problems occur after switching GI-20 patches
Is Midi Bend Range the same for both sending and receiving?
Reason
Error Messages
Action
Data Format for Exclusive Messages
One-way Transfer Procedure
Roland Exclusive Messages
Address-mapped Data Transfer
Data set 1 DT1 12H
System Exclusive Message
Midi Implementation
Channel Voice Messages
Control Change
Appendices Transmit Data
Channel Mode Message
System Realtime Message
Data Set 1 DT1 12H
Appendices Exclusive Communications
Decimal and Hexadecimal table
Midi Implementation Chart
Specifications
GI-20 GK-MIDI Interface
Computer
GI-20
Open the System Properties dialog box
Driver Installation
With the GI-20 disconnected, start up Windows
Click the Hardware tab, and then click Driver Signing
Prepare the CD-ROM
Installing & Setting Up the Driver Windows
Switch on the GI-20’s power switch
Connect the GI-20 to your computer
If What action do you want Windows to take? is set to Warn
If What action do you want Windows to take? is set to Block
Click OK
Click Yes
Next, you need to make the driver settings. p
If you changed What action do you want Windows to take?
Make sure that File signature verification is set to Ignore
Fig.d13
Fig.d16
If File signature verification is set to Warn
Click Yes Continue the installation
If File signature verification is set to Block
If you changed File signature verification
Restart Windows
Click the Hardware tab, and then click Driver signature
\Win98Me\Setupinf.exe
SetupInf dialog box, click OK
Open Control Panel
Settings
Windows XP
Click the Midi tab
Windows 98 users
Open the Multimedia Properties dialog box
Set Midi output
Installing the driver
Use either OMS or FreeMIDI as the Midi driver
Verify the Install Location, and click Install
Setting the driver
Installing & Setting Up the Driver Macintosh
Click Restart to restart your Macintosh
Create a New Studio setup dialog box will appear. Click OK
OMS Driver Search dialog box will appear. Click Search
My Studio Setup Window, click the keyboard icon
After you have finished the above check, exit OMS Setup
About Quick Setup dialog box will appear. Click Continue
Fig.d43
Page
GI-20 is not detected when making OMS or FreeMIDI settings
Problems related to the USB driver
Cannot install the driver correctly
Find new hardware wizard does not execute automatically
Does your computer meet the USB specifications?
Troubleshooting
Deleting incorrect device information
Windows XP/2000 users
Can’t install/delete/use the driver in Windows XP/2000
Deleting the driver
Did you make Driver Signing Options?
Windows Me/98 users
Macintosh users
Index
Index
Tuner String SEL
Avis
Information

