OPERATION
SCREWDRIVING
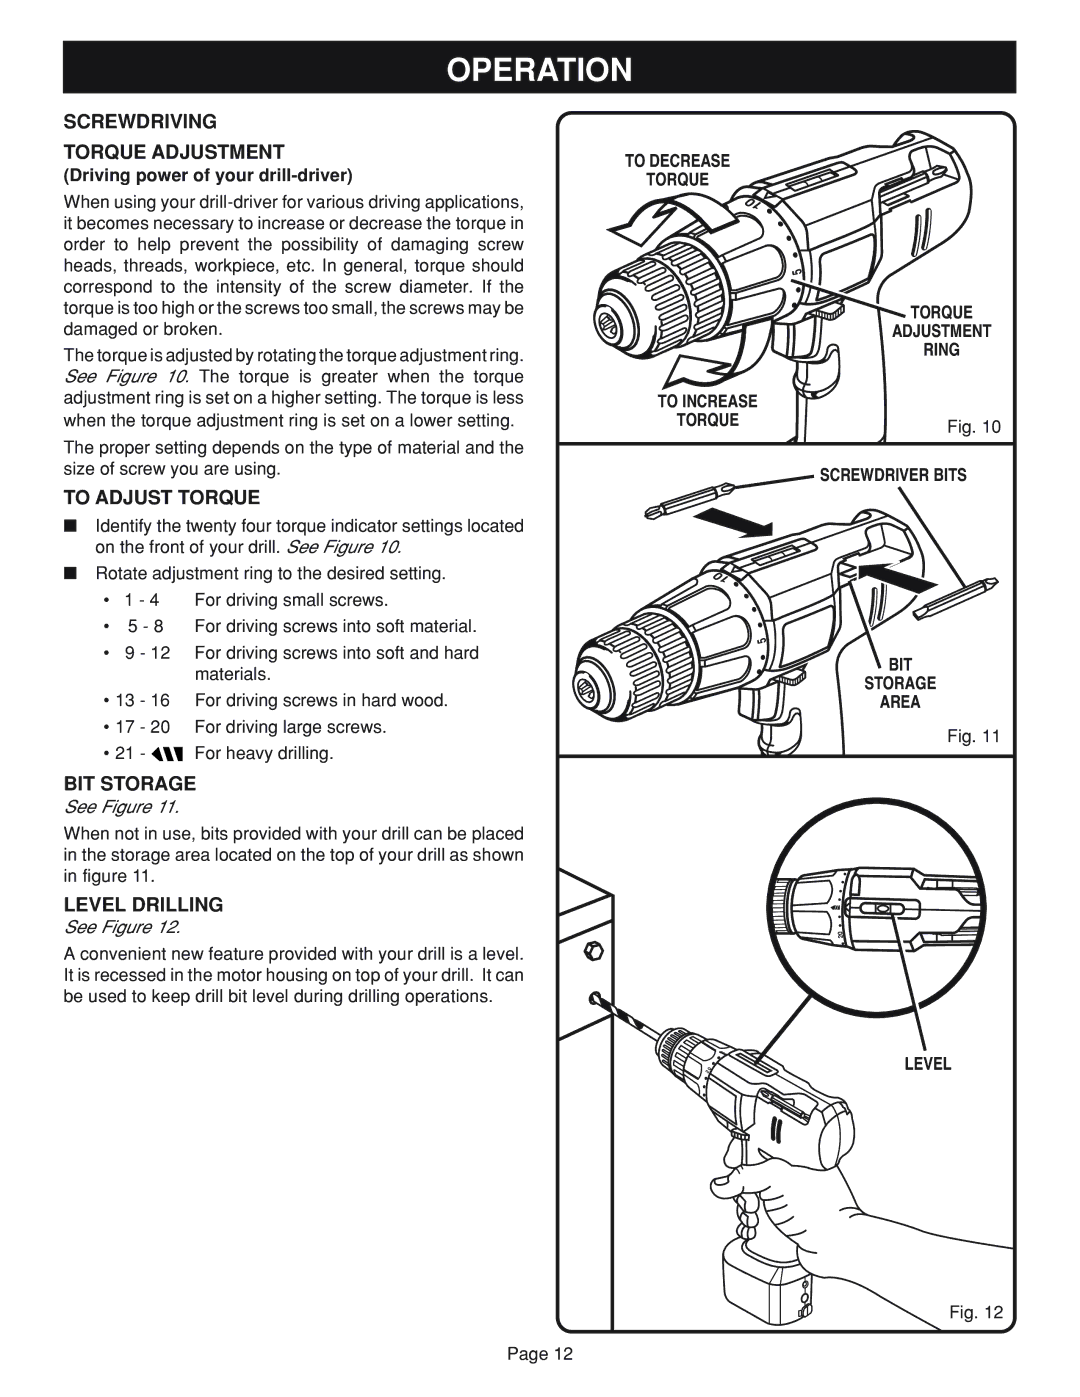
TORQUE ADJUSTMENT
(Driving power of your drill-driver)
When using your
The torque is adjusted by rotating the torque adjustment ring. See Figure 10. The torque is greater when the torque adjustment ring is set on a higher setting. The torque is less when the torque adjustment ring is set on a lower setting.
The proper setting depends on the type of material and the size of screw you are using.
TO ADJUST TORQUE
■Identify the twenty four torque indicator settings located on the front of your drill. See Figure 10.
■Rotate adjustment ring to the desired setting.
•1 - 4 For driving small screws.
•5 - 8 For driving screws into soft material.
•9 - 12 For driving screws into soft and hard materials.
•13 - 16 For driving screws in hard wood.
•17 - 20 For driving large screws.
•21 ![]()
![]()
BIT STORAGE
See Figure 11.
When not in use, bits provided with your drill can be placed in the storage area located on the top of your drill as shown in figure 11.
LEVEL DRILLING
See Figure 12.
A convenient new feature provided with your drill is a level. It is recessed in the motor housing on top of your drill. It can be used to keep drill bit level during drilling operations.
TO DECREASE
TORQUE
01
TO INCREASE
TORQUE
01
5
5
![]() TORQUE ADJUSTMENT
TORQUE ADJUSTMENT
RING
Fig. 10
SCREWDRIVER BITS
BIT
STORAGE
AREA
Fig. 11
20
2 | 0 |
|
Page 12
LEVEL
Fig. 12