OPERATION
CUTTING WITH YOUR COMPOUND MITER SAW
![]() WARNING:
WARNING:
When using a work clamp or
![]() WARNING:
WARNING:
To avoid serious personal injury, always push the miter table clamp back down before making a cut. Failure to do so could result in movement of the miter table while making a cut.
![]() WARNING:
WARNING:
To avoid serious personal injury, keep hands outside the no hands zone; at least 3 in. from blade. Never perform any cutting operation freehand (without holding workpiece against the fence). The blade could grab the workpiece if it slips or twists.
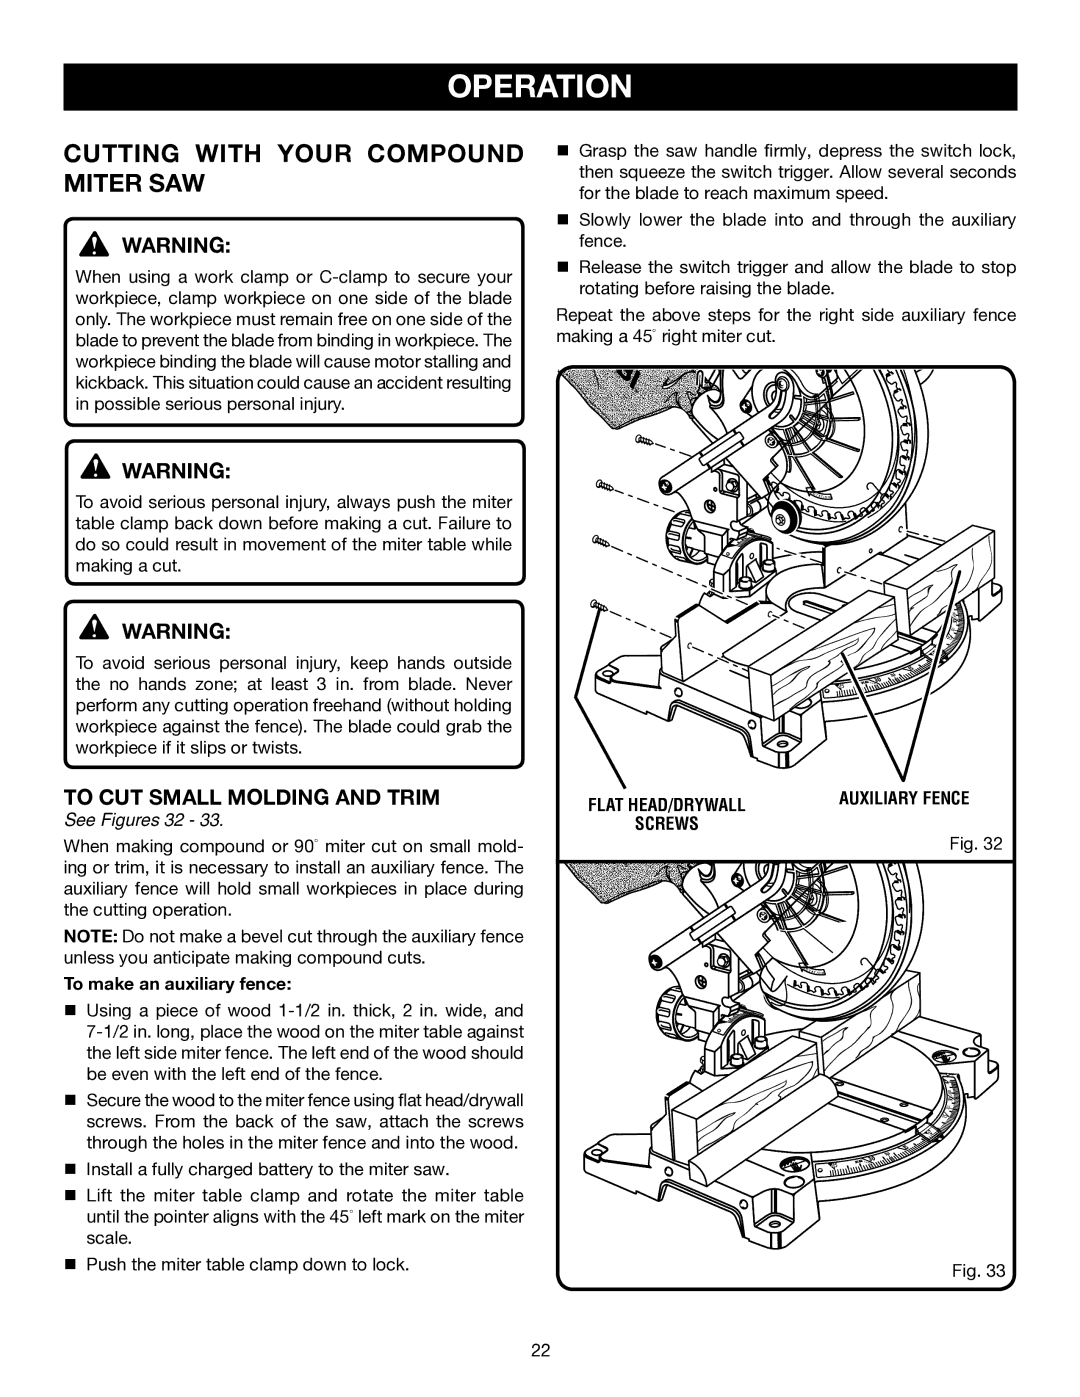
TO CUT SMALL MOLDING AND TRIM
See Figures 32 - 33.
When making compound or 90° miter cut on small mold- ing or trim, it is necessary to install an auxiliary fence. The auxiliary fence will hold small workpieces in place during the cutting operation.
NOTE: Do not make a bevel cut through the auxiliary fence unless you anticipate making compound cuts.
To make an auxiliary fence:
nUsing a piece of wood
nSecure the wood to the miter fence using flat head/drywall screws. From the back of the saw, attach the screws through the holes in the miter fence and into the wood.
nInstall a fully charged battery to the miter saw.
nLift the miter table clamp and rotate the miter table until the pointer aligns with the 45° left mark on the miter scale.
nPush the miter table clamp down to lock.
nGrasp the saw handle firmly, depress the switch lock, then squeeze the switch trigger. Allow several seconds for the blade to reach maximum speed.
nSlowly lower the blade into and through the auxiliary fence.
nRelease the switch trigger and allow the blade to stop rotating before raising the blade.
��Repeat the above steps for the right side auxiliary fence making a 45° right miter cut.
� |
|
� | � � |
� � � � |
� � � � �
��
� � �
��
��
���
�� | ���� | �� |
|
|
FLAT HEAD/DRYWALL | AUXILIARY FENCE |
| |
SCREWS |
|
Fig. 32
� |
|
� | � � |
� � � � |
� ![]() �
�
� � � � �
� �
� � �
��
��
���
�� | ���� | �� |
|
|
Fig. 33
22