OPERATION
CHISELS AND SCREWDRIVER BLADES
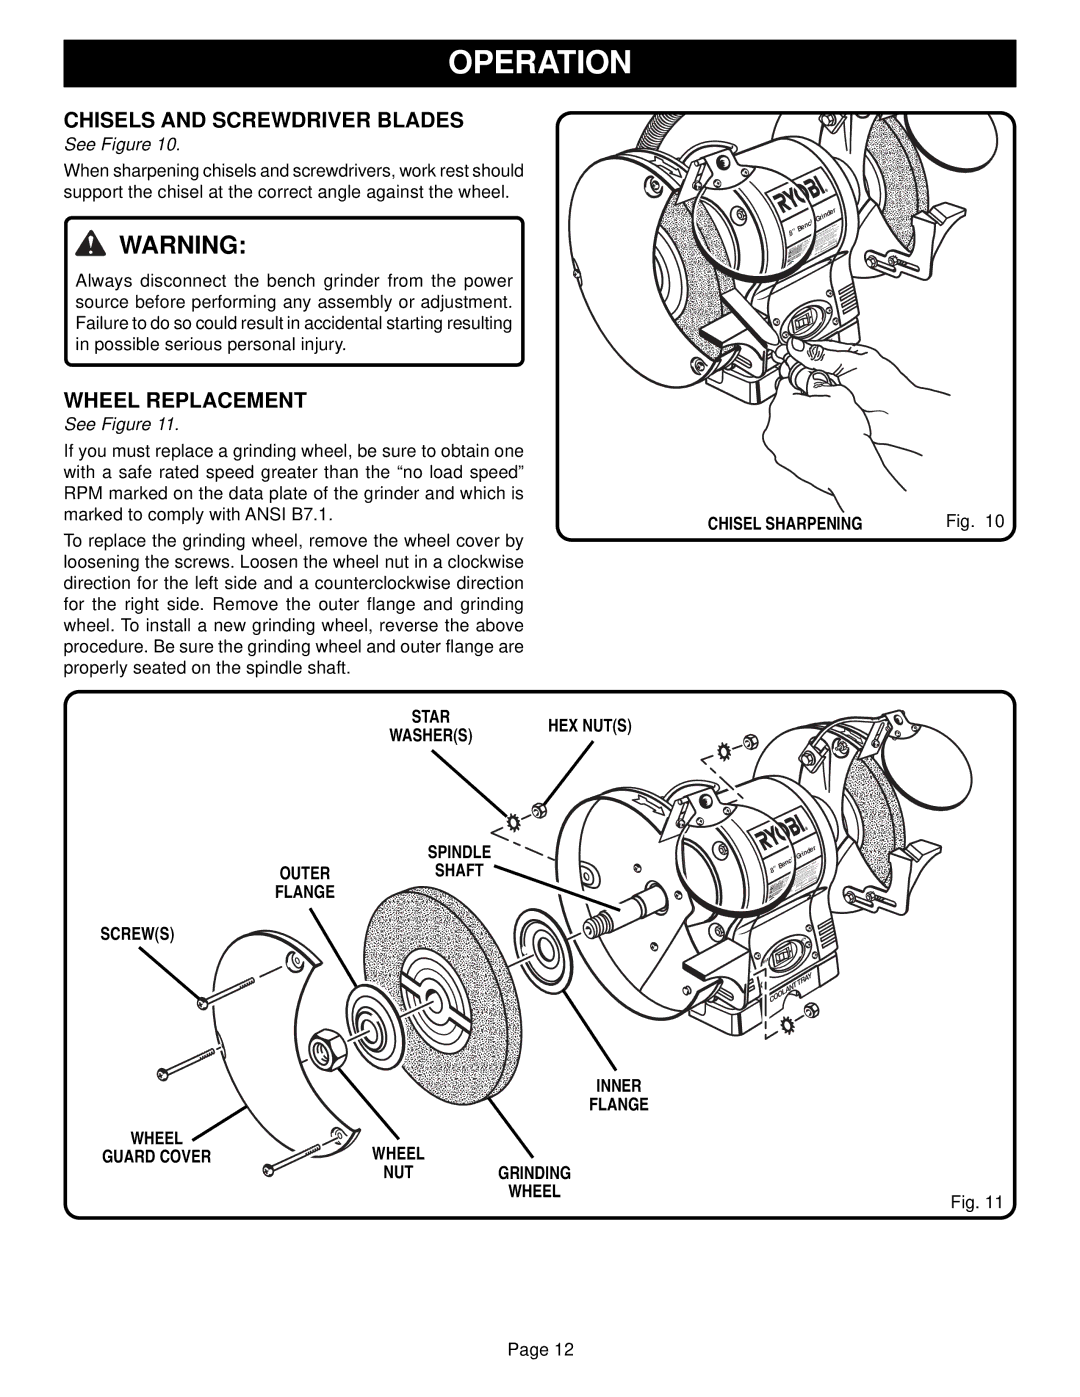
See Figure 10.
When sharpening chisels and screwdrivers, work rest should support the chisel at the correct angle against the wheel.
WARNING:
Always disconnect the bench grinder from the power source before performing any assembly or adjustment. Failure to do so could result in accidental starting resulting in possible serious personal injury.
WHEEL REPLACEMENT
See Figure 11.
If you must replace a grinding wheel, be sure to obtain one with a safe rated speed greater than the “no load speed” RPM marked on the data plate of the grinder and which is marked to comply with ANSI B7.1.
To replace the grinding wheel, remove the wheel cover by loosening the screws. Loosen the wheel nut in a clockwise direction for the left side and a counterclockwise direction for the right side. Remove the outer flange and grinding wheel. To install a new grinding wheel, reverse the above procedure. Be sure the grinding wheel and outer flange are properly seated on the spindle shaft.
STAR | HEX NUT(S) | |
WASHER(S) | ||
|
|
|
|
| Grinder |
8” | Bench | |||
|
|
| ||
|
| ING |
|
|
WARNMENT | E48467 | 43F1 | ||
AV | ERTISSE | |||
ADVERTENCIA |
|
| ||
TRAY |
COOLANT |
CHISEL SHARPENING | Fig. |
SPINDLE
OUTERSHAFT
FLANGE
SCREW(S)
INNER
FLANGE
WHEEL | WHEEL |
|
GUARD COVER | GRINDING | |
| NUT | |
|
| WHEEL |
|
|
| Grinder |
8” | Bench | ||
|
|
| |
| ING |
|
|
WARN ENT |
|
| |
TISSEM | 7 | 43F1 | |
AVER ENCIA | E4846 | ||
ADVERT |
|
|
|
|
|
| 0N |
0FF |
|
|
|
|
|
| TRAY |
COOLANT | |||
Fig. 11
Page 12