
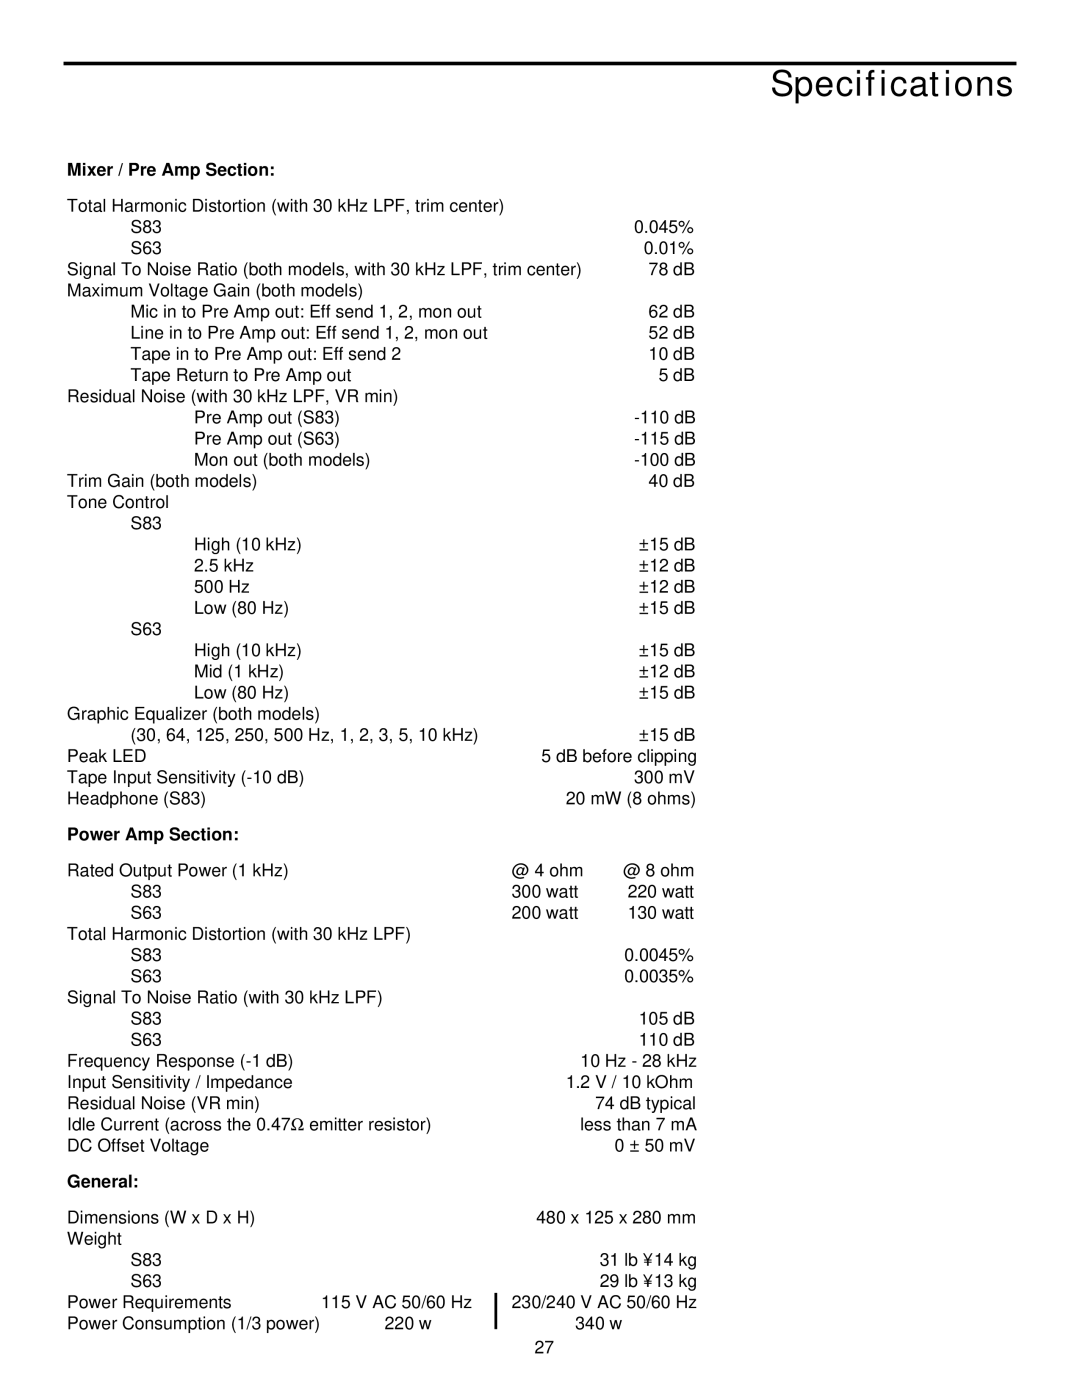
S63, S83, S83 specifications
The Samson S63 and S83 microphones are notable products in the realm of professional audio equipment, offering high performance and reliability for various sound applications. These microphones cater to a wide range of users, from musicians to broadcast professionals, ensuring superior sound quality in every scenario.The Samson S63 is a cardioid dynamic microphone renowned for its robust construction and versatility. It is designed to provide excellent sound capture, especially for live performances and studio recordings. One of its main features is its high output level, which enables the microphone to pick up sound effectively while minimizing background noise. The cardioid pattern is particularly useful for isolating the sound source, reducing the interference from other instruments or background sounds. The S63's frequency response spans from 50 Hz to 15 kHz, making it suitable for a variety of vocal ranges and instruments.
On the other hand, the Samson S83 is a boundary microphone that excels in capturing sound from a wider space, making it ideal for conference rooms, boardrooms, and live events. This microphone features a low-profile design that allows for discreet placement on surfaces, ensuring it blends into any environment. The S83 also employs an omnidirectional pickup pattern, allowing it to capture sound equally from all directions, which is essential in group settings or panel discussions. With a frequency response of 40 Hz to 20 kHz, the S83 ensures clarity for both speech and music.
Both the S63 and S83 are built with durability in mind, featuring sturdy metal construction that can withstand the rigors of frequent use. They also come equipped with internal pop filters, which help to reduce plosive sounds when speaking or singing closely into the microphones. Additionally, these microphones are compatible with various audio equipment, including mixers and audio interfaces, making them highly adaptable for different audio setups.
In summary, the Samson S63 and S83 microphones offer distinct advantages tailored to specific use cases. The S63 is perfect for vocalists and performers requiring a reliable dynamic microphone that handles sound isolation with ease. Meanwhile, the S83 serves as an excellent choice for capturing sound in a broader space, ideal for panel discussions and conferences. Together, they exemplify quality sound engineering and effectiveness essential for both live events and studio environments.