Plasma TV
A Only
Other countries
United States 1-800-SAMSUNG
User Instructions
Contents
Ferrite Core Power Cable, Headphone
List of Features
Accessories
General Information
Viewing the Control Panel
Power Indicator
Remote Control Sensor
+ VOL
Viewing the Connection Panel
Hdmi in 1
Remote Control
VOL
Size
If the remote control doesn’t work, check the following
Installing Batteries in the Remote Control
Connecting VHF and UHF Antennas
Connections
Connecting Cable TV
Connecting to a Cable Box that Descrambles All Channels
Connect this cable to a two-way splitter
Connect an Hdmi Cable
Jack on the DVD Player or
Set-Top Box
Connecting a Camcorder
Each Camcorder has a different back panel configuration
Connect a Video Cable
Connecting a VCR
Video Connection
Connecting a Digital Audio System
Connecting an Amplifier / DVD Home Theater
Connecting a PC
Using the D-Sub Cable
Using the HDMI/DVI Cable
Operation
Plug & Play Feature
Press the Power button on the remote control
Turning the TV On and Off
Setting the Clock Automatically
Press the Enter button
Changing Channels
Using the Volume Buttons
Adjusting the Volume
Using the Tools Button
Using the Mute Button
Memorizing the Channels
Easy Setting
Viewing the Menus
Picture
Storing Channels in Memory Automatic Method
TV begins memorizing all available stations
Auto Program
To Select the Source
To Edit the Input Source Name
Customizing the Picture Settings
Picture Control
Changing the Picture Standard
Activating Black adjust
Adjusting the Detailed Settings
Detailed Settings is available in Standard or Movie mode
Activating Dynamic Contrast
Customizing the Color Space
Color is available when Color Space is set to Custom
Changing the Color Space
Activating White Balance
Flesh Tone
Configuring Picture Options
Adjusting the Color Tone
Activating Edge Enhancement
Input Source Picture Size
Changing the Screen Size
After selecting Zoom1, Zoom2 or Wide Fit
169, Zoom1, Zoom2
Digital Noise Reduction
169 Zoom1 Zoom2
Setting the Hdmi Black Level
Setting the Film Mode
DNIe Digital Natural Image engine
White
Setting the Blue Only Mode
Reducing the Effects of Screen Burn
Scrolling
Resetting the Picture Settings to the Factory Defaults
This function is not available in the Just Scan mode
Preventing Screen Burn-in
Customizing the Sound
Sound Control
Changing the Sound Standard
Sound
Setting the TruSurround XT
Choosing a Multi-Channel Sound MTS Track Digital
Choosing a Multi-Channel Sound MTS Track Analog
Automatic Volume Control
Reduces the difference in volume level among broadcasters
Mode
Setting the TV Speakers On/Off
Connecting Headphones Sold separately
Sound output from the TV speakers is muted
Channel Control
Selecting the Antenna
Clearing Scrambled Channels Digital
Adding and Erasing Channels
Channel List
Setting Your Favorite Channels
Viewing the Channel Lists
You can set channels you watch frequently as favorites
Labeling Channels
Name
Fine Tuning Analog Channels
Checking the Digital-Signal Strength
Fine Tune
PC Display
Using Your TV as a Computer PC Display
Setting Up Your PC Software Based on Windows XP
Display Modes
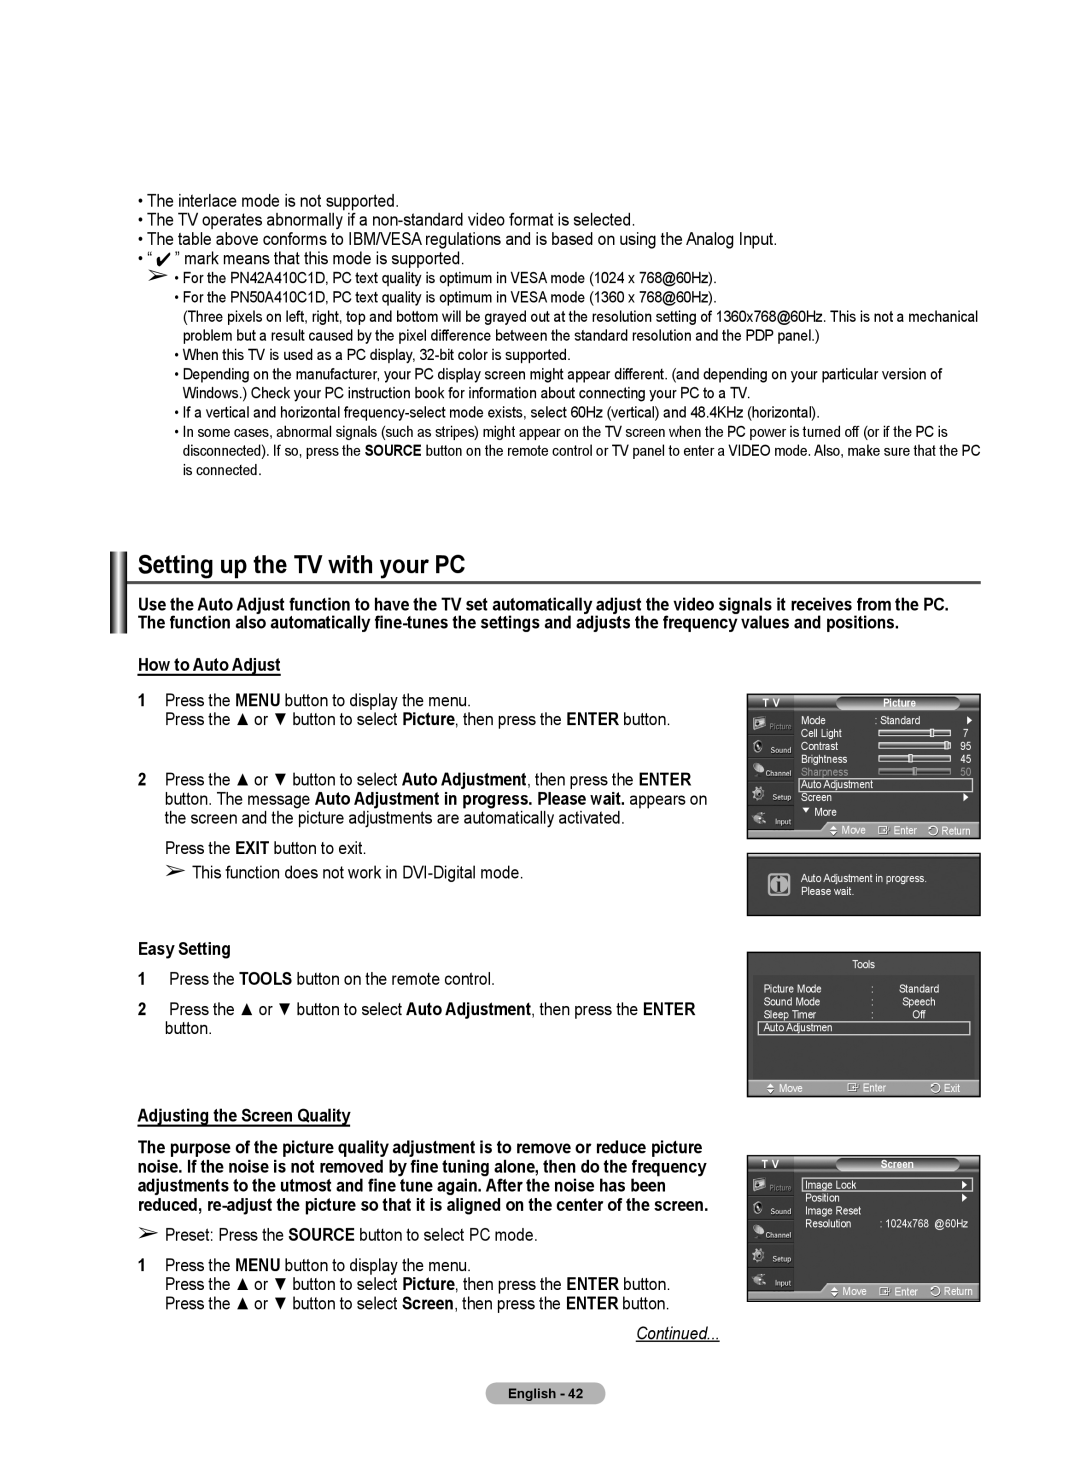
Adjusting the Screen Quality
Setting up the TV with your PC
How to Auto Adjust
Screen
Viewing the Resolution Displays currently set PC resolution
Time Setting
Setting the Time
Time
Clock
Time Zone
Press the Tools button on the remote control
Auto Power Off
To cancel the set sleep timer
Timer
Viewing Closed Captions On-Screen Text Messages Digital
Function Description
Selecting a Menu Language
Digital Captions function operates on digital channels
Default is Default
Viewing Closed Captions On-Screen Text Messages Analog
TV power on/off melody sound volume can be adjusted
Adjusting the TV On/Off Melody Sound
Setting the Light Effect
Melody does not play
Setting the Entertainment mode
Using the Energy Saving Feature
SW Upgrade
Upgrading the Software
Yes No
Setting Up Your Personal ID Number PIN
Using the V-Chip
Chipfunction is not available in HDMI, Component or PC mode
Enter PIN
How to Enable/Disable the V-Chip
TV Parental Guidelines
Chip Lock TV Parental Guidelines
Chip
Canadian English
Canadian English Canadian French
V-Chipscreen will appear. Press the or button to select
Downloadable U.S. Rating, then press the Enter button
Rating
English
Appendix
Securing the TV to the Wall
To avoid the TV from falling
Troubleshooting
Remembering the Position
Wall- mount adjustment Sold separately
Entering the menu
Press the Blue button
Moving to the remembered position
Wall Mount Kit Specifications Vesa
Product Family Inch Vesa Spec. a * B Standard Screw Quantity
How to assemble the Stand-Base
Specifications
Dimensions PN42A410C1D
Dimensions PN50A410C1D
This page is intentionally Left blank
Page
Écran à plasma
De série
Au Canada 1-800-SAMSUNG
États-Unis seulement
Autres pays
Aux États-Unis 1-800-SAMSUNG
Guide de l’utilisateur
Activation et désactivation des haut-parleurs
Table des matières
Branchement d’un amplificateur ou d’un
Suppression des canaux brouillés
Accessoires
Renseignements généraux
Liste des caractéristiques
Voyant d’alimentation
Affichage du panneau de configuration
Capteur de télécommande
Haut-parleurs
Affichage du panneau de branchement
Télécommande
Touches Numériques
Branchement des antennes VHF et UHF
Insertion des piles dans la télécommande
Branchements
Antennes à conducteur rond de 75 ohms
Branchement du câble de télédistribution
Relier ce câble à un répartiteur à deux voies
Qu’est-ce que la HDMI?
Branchement d’un caméscope
De sortie Audio OUT du caméscope
Branchement d’un magnétoscope
Branchement S-Vidéo
Branchement d’un système audionumérique
Branchement d’un ordinateur
’aide du câble D-Sub
’aide du câble HDMI/DVI
Mise sous tension/hors tension du téléviseur
Appuyer sur la touche Power de la télécommande
Fonctionnement
Fonction Prêt-à-l’emploi
Réglage automatique de l’horloge
Prog. Auto
Changement de canal
Utilisation de la touche Tools
Réglage du volume
Utilisation des touches de réglage du volume
Affichage des paramètres
Mémorisation des canaux
Configuration facile
Affichage des menus
Image
Mémorisation des chaînes méthode automatique
Pour choisir la source
Pour entrer le nom de la source d’entrée
Personnalisation des réglages de l’image
Réglage de l’image
Changement du format normal de l’image
Dynamique, Standard ou Cinéma, suivie de la touche Enter
Activation du contraste dynamique
Réglage des détails
Activation du réglage du noir
Activation de la correction gamma
Activation de l’équilibrage du blanc
Modification de l’espace couleur
Personnalisation de l’espace couleur
Réglages des détails
Amélioration des bords
Configuration des options d’image
Rose
Activation des options d’image
HD Haute définition
Modification du format de l’image
Après avoir sélectionné Zoom1, Zoom2 ou Format large
Source de l’entrée Format de l’image
Réduction numérique des bruits
Appuyer sur la touche Exit pour quitter
Réglage du mode Film
Technologie DNIe Digital Natural Image engine
Réglage du Nv nr Hdmi
Défilement
Réglage du mode bleu seulement
Blanc
Bords gris
Rétablir les réglages de l’image sur les réglages par défaut
Prévention de la brûlure d’écran
Réglages audio
Paramètres audio
Réglage automatique du son
Son
Réglage de TruSurround XT
Sélection d’une piste de son multicanaux numérique
Langue privilégiée
Contrôle automatique du volume
Sélection d’une piste de son multicanaux analogique
Réduit la différence de niveau sonore entre les diffuseurs
Activation et désactivation des haut-parleurs du téléviseur
Branchement du casque d’écoute vendu séparément
La sortie son de la sourdine interne est coupée
Suppression des canaux brouillés canaux numériques
Réglage des canaux
Sélection de l’antenne
Appuyer sur la touche Menu
Ajout et suppression de canaux
Visualisation des listes de canaux
Sélection des canaux favoris
Tous les canaux favoris sont affichés dans le menu Favorite
Appuyer sur la touche Tools de la télécommande
Identification des canaux
Ce qui donne la séquence a à Z, 0 à 9, +, -, *, /, espace
Contrôle de l’intensité du signal numérique
Syntonisation précise des canaux analogiques
Utilisation du téléviseur comme écran d’ordinateur
Configuration du logiciel pour PC Windows XP
Écran d’ordinateur
Modes d’affichage
Configuration du téléviseur par l’ordinateur
Réglage de la qualité de l’écran
Écran
Repositionnement de l’image
Viewing the Resolution
Affiche la résolution en cours du PC
Initialisation de la position de l’écran
Option 1 Réglage manuel de l’horloge
Réglage de l’horloge
Réglage de l’horloge
Appuyer sur Enter pour choisir Horloge
Heure
Option 2 Réglage automatique de l’horloge
Réglage de la minuterie activée/désactivée
Horloge
Pour annuler la mise en veille
Arrêt automatique
Réglage de la minuterie de mise en veille
Réglage facile
Description des fonctions
Sélection de la langue de menu
Sous-titres
Sous-titres Mode Sous-titrage Par défaut
Sous-titres On
Réglage de la mélodie de marche/arrêt du téléviseur
Réglage de l’effet lumineux
Aucune mélodie ne se fait entendre
Réglage du mode Divertissement
Fonction économiseur d’énergie
Mise à jour du logiciel
Jour logiciel
Oui Non
Configuration du numéro d’identification personnel NIP
Fonction Puce
Comment activer et désactiver la fonction Puce
On et Off
Contrôle parental TV, suivie de la touche Enter
Des options supplémentaires
’écran Contrôle parental TV s’affiche
Établies en fonction de l’âge
Contrôle parental TV
Perm. tout
Anglais canadien, suivie de la touche Enter
Anglais canadien
Français canadien, suivie de la touche Enter
Fonction V-Chip pour les canaux numériques
Catég. américaine téléchargeable, suivie de la touche Enter
Enter
Pour éviter la chute du téléviseur
Annexe
Fixation du téléviseur au mur
Dénouer la corde avant de déplacer le téléviseur
Problème Solution possible
Dépannage
Mémorisation de la position
Ajustement fixation murale vendue séparément
Pour entrer dans le menu
Réglez à la position souhaitée à l’aide des touches
Réglage à la position mémorisée
Effectuez l’étape 1 de la fonction Pour entrer dans le menu
Spécifications du jeu d’installation murale Vesa
Comment assembler le support
Spécifications
Mise en garde
VUE DE Dessus VUE Avant
VUE DE Dessus
Cette page est laissée Intentionnellement en blanc
Cette page est laissée Intentionnellement en blanc