Adjusting Your LCD Monitor
User Controls
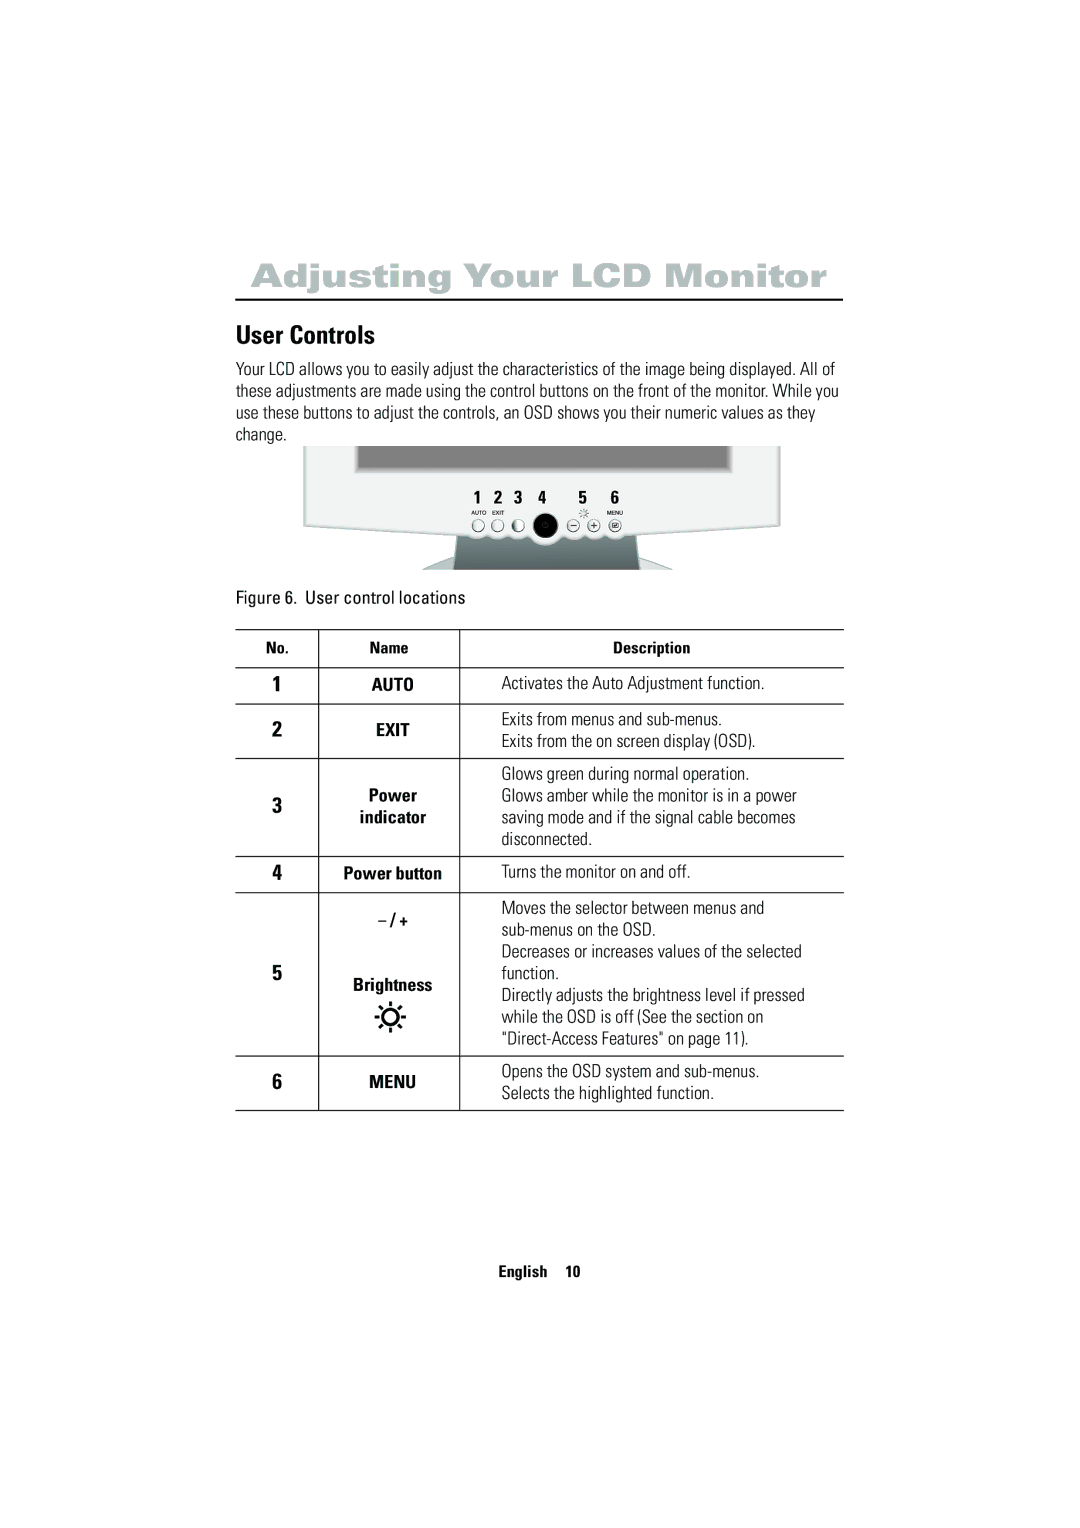
Your LCD allows you to easily adjust the characteristics of the image being displayed. All of these adjustments are made using the control buttons on the front of the monitor. While you use these buttons to adjust the controls, an OSD shows you their numeric values as they change.
1 | 2 | 3 | 4 | 5 | 6 | |||
AUTO EXIT |
|
|
|
|
|
| MENU | |
|
|
|
|
|
|
|
|
|
Figure 6. User control locations
No. | Name | Description | |||
|
|
|
|
| |
1 | AUTO | Activates the Auto Adjustment function. | |||
|
|
|
|
| |
2 |
| EXIT | Exits from menus and | ||
| Exits from the on screen display (OSD). | ||||
|
|
|
| ||
|
|
|
|
| |
| Power | Glows green during normal operation. | |||
3 | Glows amber while the monitor is in a power | ||||
indicator | saving mode and if the signal cable becomes | ||||
| |||||
|
|
|
| disconnected. | |
|
|
|
|
| |
4 | Power button | Turns the monitor on and off. | |||
|
|
|
|
| |
|
| Moves the selector between menus and | |||
|
| ||||
|
|
|
| ||
5 |
|
|
| Decreases or increases values of the selected | |
Brightness | function. | ||||
| Directly adjusts the brightness level if pressed | ||||
|
|
|
| ||
|
|
|
| ||
|
|
|
| while the OSD is off (See the section on | |
|
|
|
| ||
|
|
|
| ||
|
|
|
|
| |
6 | MENU | Opens the OSD system and | |||
Selects the highlighted function. | |||||
|
|
|
| ||
|
|
|
|
| |
English 10