Starting PC mode
![]() If you connect the USB cable to a USB port on your PC and then turn on the power, the camera will automatically switch to "computer connection mode".
If you connect the USB cable to a USB port on your PC and then turn on the power, the camera will automatically switch to "computer connection mode".
![]() In this mode, you can download stored images to your PC through the USB cable.
In this mode, you can download stored images to your PC through the USB cable.
![]() The LCD monitor is always turned off in PC mode.
The LCD monitor is always turned off in PC mode.
![]() The camera status lamp will blink when the files are transferring via the USB connection.
The camera status lamp will blink when the files are transferring via the USB connection.
![]() Connecting the camera to a PC 1. Turn the PC power on.
Connecting the camera to a PC 1. Turn the PC power on.
2. Turn the camera power on.
P 2272
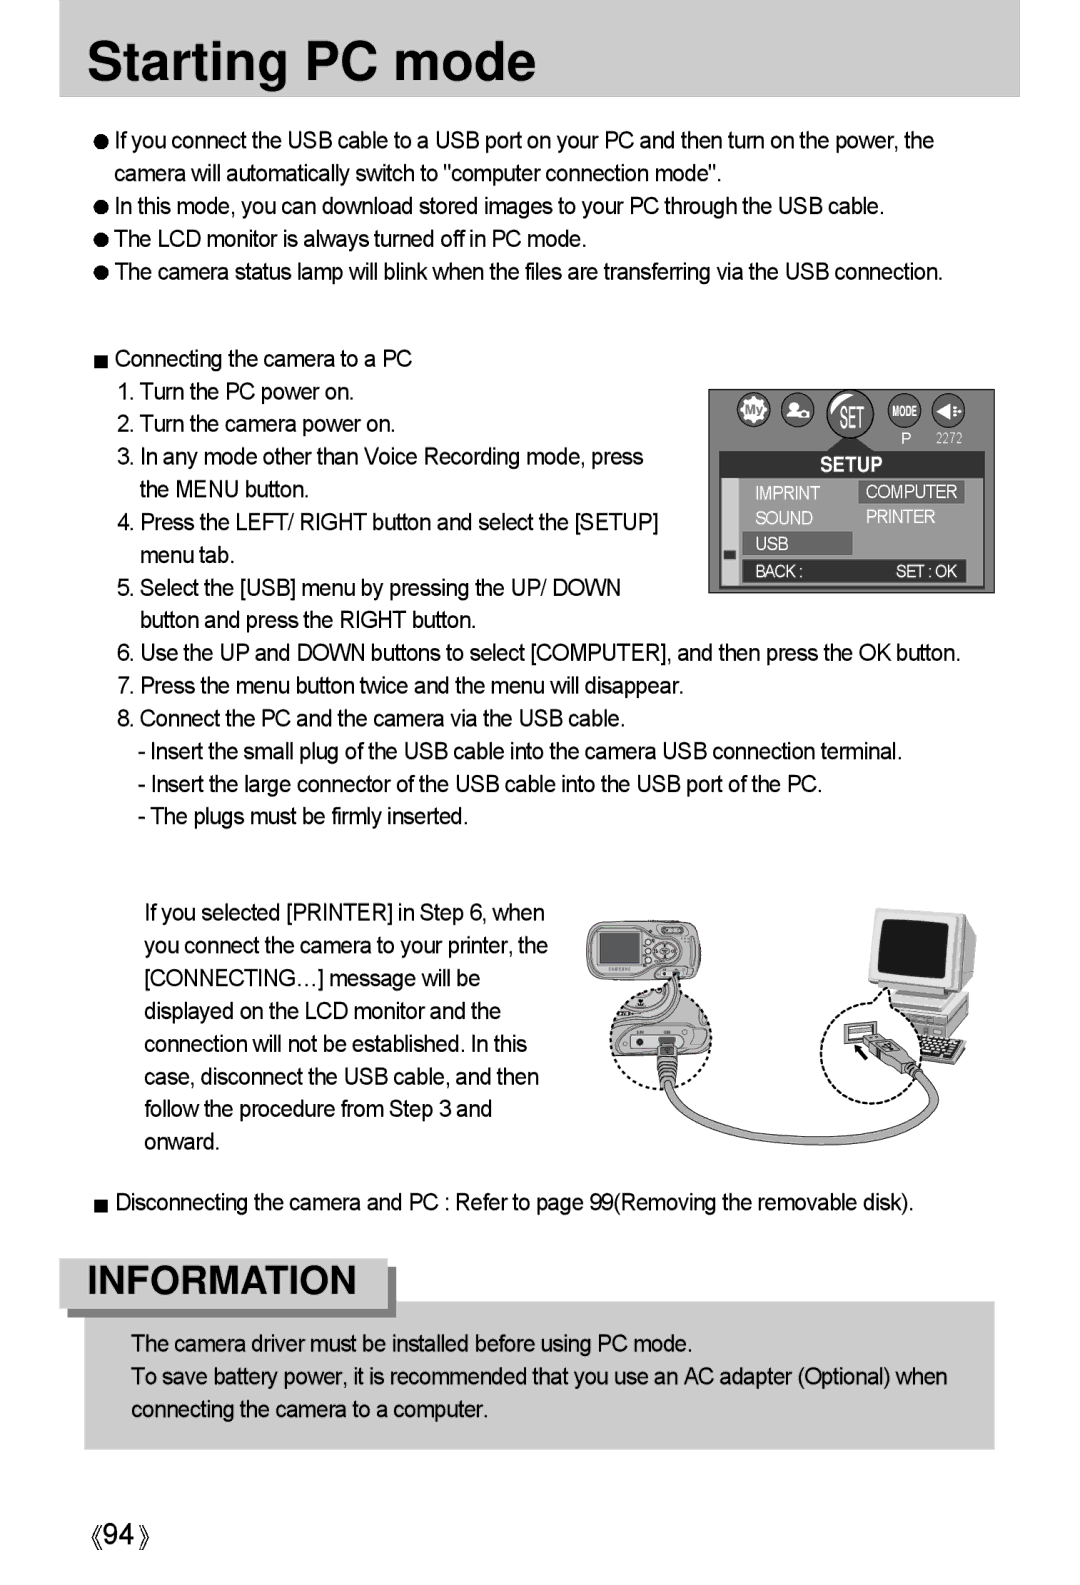
3. In any mode other than Voice Recording mode, press the MENU button.
4. Press the LEFT/ RIGHT button and select the [SETUP]
menu tab. 5. Select the [USB] menu by pressing the UP/ DOWN
button and press the RIGHT button.
6. Use the UP and DOWN buttons to select [COMPUTER], and then press the OK
7. Press the menu button twice and the menu will disappear.
8. Connect the PC and the camera via the USB cable.
- Insert the small plug of the USB cable into the camera USB connection terminal. - Insert the large connector of the USB cable into the USB port of the PC.
- The plugs must be firmly inserted.
![]() If you selected [PRINTER] in Step 6, when you connect the camera to your printer, the [CONNECTING…] message will be displayed on the LCD monitor and the connection will not be established. In this case, disconnect the USB cable, and then follow the procedure from Step 3 and onward.
If you selected [PRINTER] in Step 6, when you connect the camera to your printer, the [CONNECTING…] message will be displayed on the LCD monitor and the connection will not be established. In this case, disconnect the USB cable, and then follow the procedure from Step 3 and onward.
![]() Disconnecting the camera and PC : Refer to page 99(Removing the removable disk).
Disconnecting the camera and PC : Refer to page 99(Removing the removable disk).
INFORMATION
![]() The camera driver must be installed before using PC mode.
The camera driver must be installed before using PC mode.
![]() To save battery power, it is recommended that you use an AC adapter (Optional) when connecting the camera to a computer.
To save battery power, it is recommended that you use an AC adapter (Optional) when connecting the camera to a computer.
![]() 94
94![]()