Camcorder Quick Start Guide |
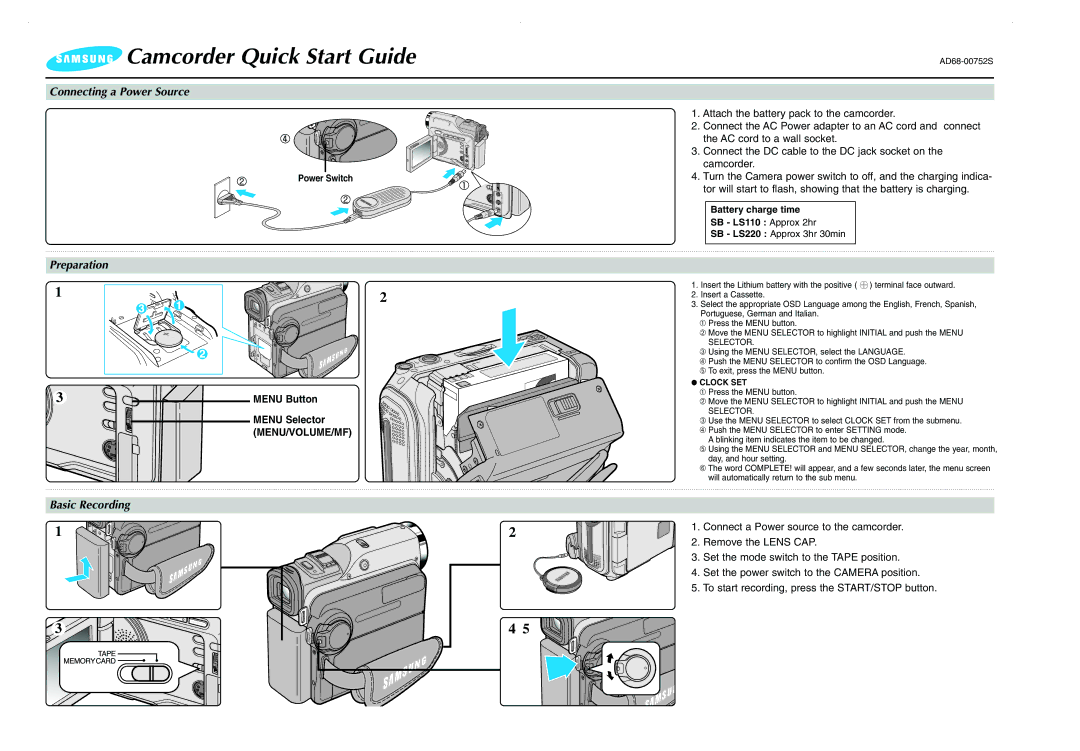
Connecting a Power Source
Power Switch
Preparation |
|
1 | 2 |
|
3 | MENU Button |
MENU Selector (MENU/VOLUME/MF)
Basic Recording
1
3
2
4 5
1.Attach the battery pack to the camcorder.
2.Connect the AC Power adapter to an AC cord and connect the AC cord to a wall socket.
3.Connect the DC cable to the DC jack socket on the camcorder.
4.Turn the Camera power switch to off, and the charging indica- tor will start to flash, showing that the battery is charging.
Battery charge time
SB - LS110 : Approx 2hr
SB - LS220 : Approx 3hr 30min
1.Insert the Lithium battery with the positive ( ![]() ) terminal face outward.
) terminal face outward.
2.Insert a Cassette.
3.Select the appropriate OSD Language among the English, French, Spanish, Portuguese, German and Italian.
➀Press the MENU button.
➁Move the MENU SELECTOR to highlight INITIAL and push the MENU SELECTOR.
➂Using the MENU SELECTOR, select the LANGUAGE.
➃Push the MENU SELECTOR to confirm the OSD Language.
➄ To exit, press the MENU button.
●CLOCK SET
➀ Press the MENU button.
➁ Move the MENU SELECTOR to highlight INITIAL and push the MENU SELECTOR.
➂ Use the MENU SELECTOR to select CLOCK SET from the submenu.
➃Push the MENU SELECTOR to enter SETTING mode. A blinking item indicates the item to be changed.
➄Using the MENU SELECTOR and MENU SELECTOR, change the year, month, day, and hour setting.
➅The word COMPLETE! will appear, and a few seconds later, the menu screen will automatically return to the sub menu.
1.Connect a Power source to the camcorder.
2.Remove the LENS CAP.
3.Set the mode switch to the TAPE position.
4.Set the power switch to the CAMERA position.
5.To start recording, press the START/STOP button.