Cutting or extending the pipe
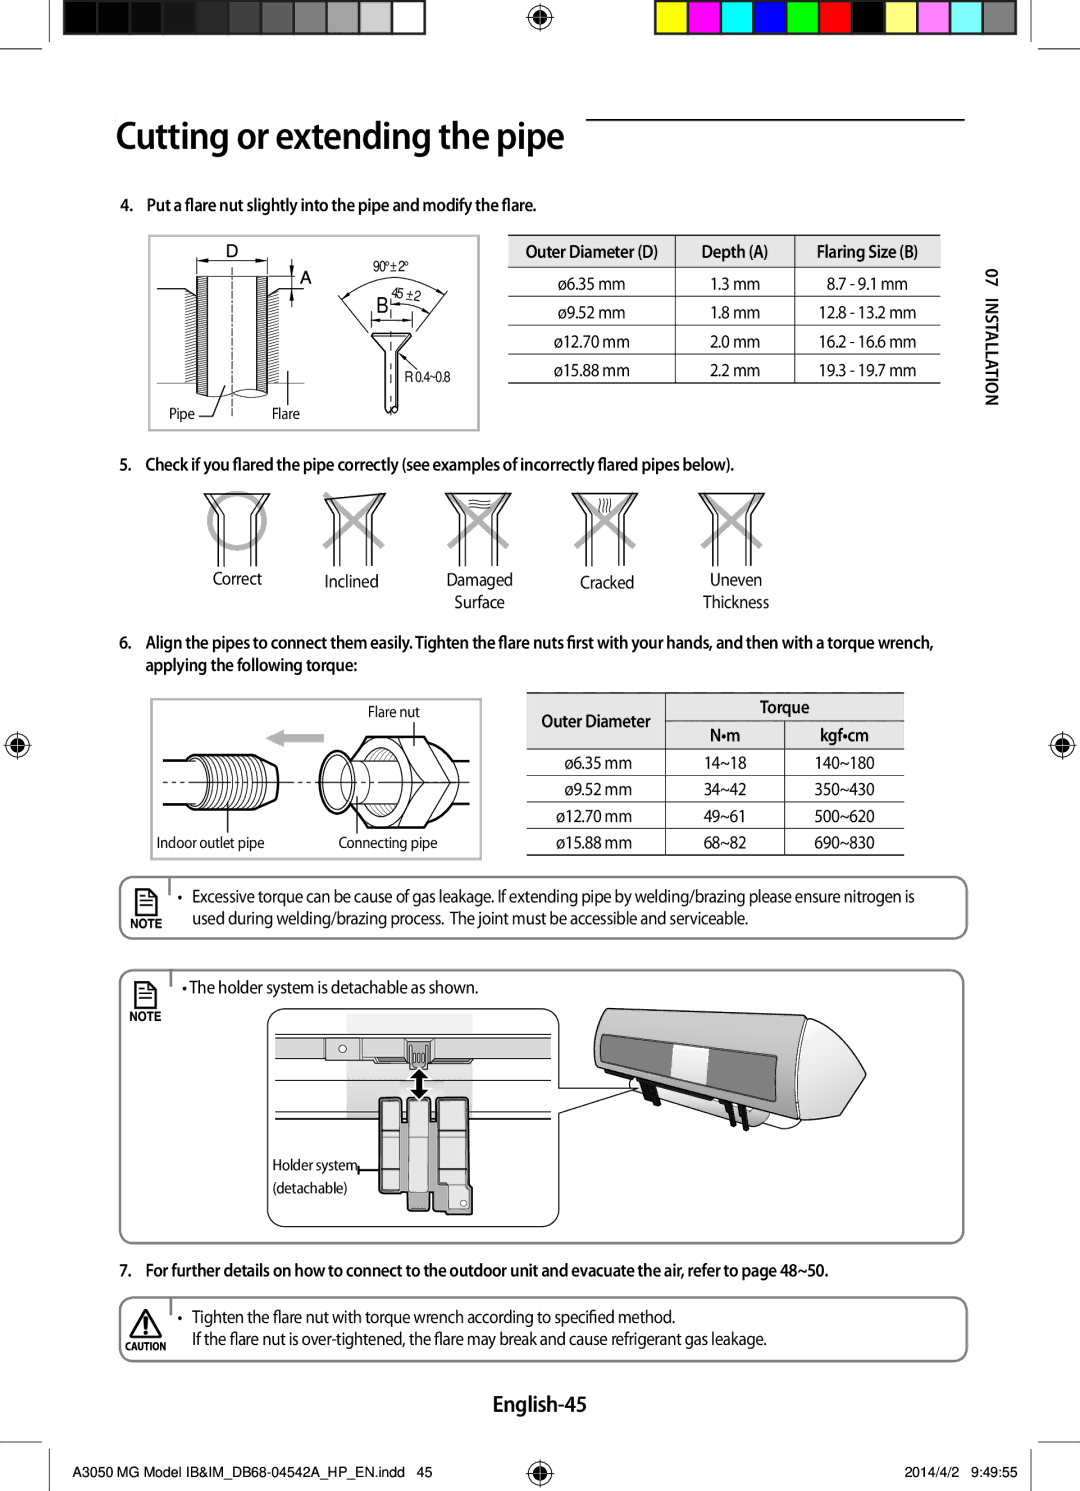
4. Put a flare nut slightly into the pipe and modify the flare.
90°±2°
| 4 |
|
| 5°± | |
B |
| 2° |
|
| |
R0.4~0.8
Pipe ![]() Flare
Flare
Outer Diameter (D) | Depth (A) | Flaring Size (B) | |
|
|
|
|
ø6.35 mm | 1.3 mm | 8.7 | - 9.1 mm |
ø9.52 mm | 1.8 mm | 12.8 | - 13.2 mm |
ø12.70 mm | 2.0 mm | 16.2 | - 16.6 mm |
ø15.88 mm | 2.2 mm | 19.3 | - 19.7 mm |
07 INSTALLATION
5. Check if you flared the pipe correctly (see examples of incorrectly flared pipes below).
Correct | Inclined | Damaged | Cracked | Uneven |
|
| Surface |
| Thickness |
6.Align the pipes to connect them easily. Tighten the flare nuts first with your hands, and then with a torque wrench, applying the following torque:
Flare nut
|
|
|
|
|
|
|
|
|
|
|
|
|
|
|
|
|
|
|
|
|
|
Indoor outlet |
| pipe |
|
|
|
| ||||
| Connecting pipe | |||||||||
Outer Diameter |
| Torque | |
|
|
| |
N•m |
| kgf•cm | |
|
| ||
|
|
|
|
ø6.35 mm | 14~18 |
| 140~180 |
ø9.52 mm | 34~42 |
| 350~430 |
ø12.70 mm | 49~61 |
| 500~620 |
ø15.88 mm | 68~82 |
| 690~830 |
• Excessive torque can be cause of gas leakage. If extending pipe by welding/brazing please ensure nitrogen is used during welding/brazing process. The joint must be accessible and serviceable.
• The holder system is detachable as shown.
Holder system![]()
![]() (detachable)
(detachable)
7. For further details on how to connect to the outdoor unit and evacuate the air, refer to page 48~50.
• Tighten the flare nut with torque wrench according to specified method.
If the flare nut is
English-45
A3050 MG Model
2014/4/2 9:49:55