AAPurging the indoor unit
The indoor unit is supplied with inert gas (nitrogen).
Before installing the unit, check if nitrogen gas flow out of indoor unit.
If this one isn’t true, DO NOT INSTALL THE UNIT since leakage could be inside the indoor unit.
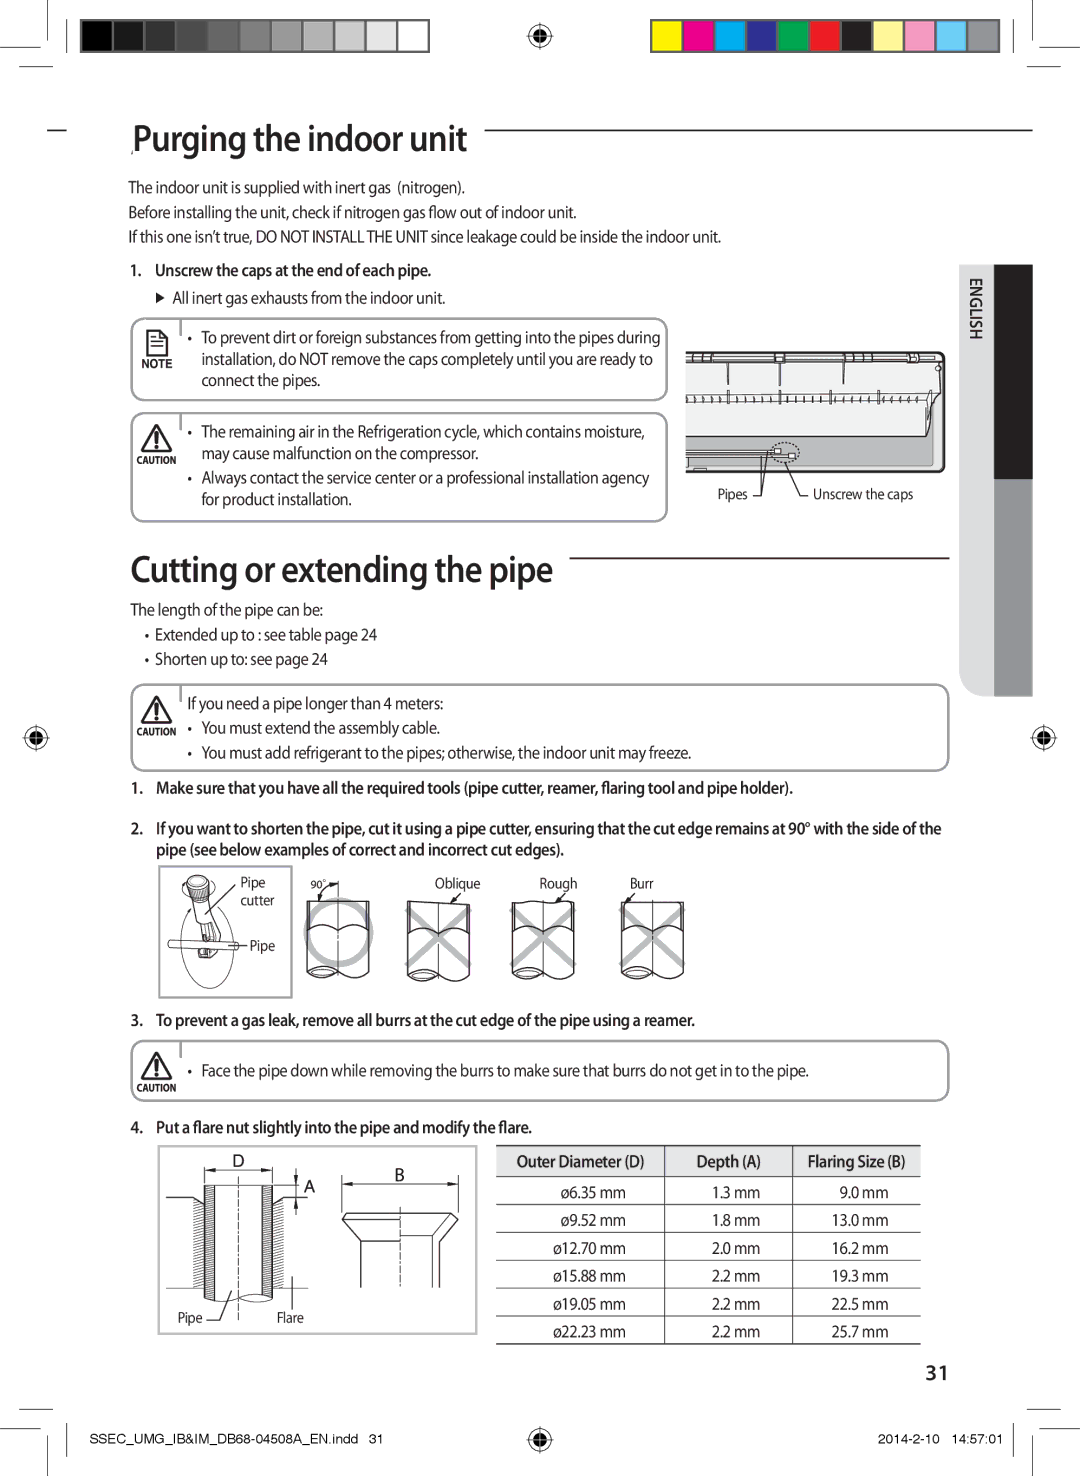
1.Unscrew the caps at the end of each pipe.
All inert gas exhausts from the indoor unit.
• To prevent dirt or foreign substances from getting into the pipes during
installation, do NOT remove the caps completely until you are ready to connect the pipes.
• | The remaining air in the Refrigeration cycle, which contains moisture, |
|
|
|
| may cause malfunction on the compressor. |
|
|
|
|
|
|
| |
• | Always contact the service center or a professional installation agency | Pipes |
| Unscrew the caps |
| for product installation. |
| ||
|
|
Cutting or extending the pipe
The length of the pipe can be:
•Extended up to : see table page 24
•Shorten up to: see page 24
If you need a pipe longer than 4 meters:
• You must extend the assembly cable.
•You must add refrigerant to the pipes; otherwise, the indoor unit may freeze.
1.Make sure that you have all the required tools (pipe cutter, reamer, flaring tool and pipe holder).
2.If you want to shorten the pipe, cut it using a pipe cutter, ensuring that the cut edge remains at 90° with the side of the pipe (see below examples of correct and incorrect cut edges).
Pipe | Oblique | Rough | Burr |
cutter |
|
|
|
![]() Pipe
Pipe
ENGLISH
3. To prevent a gas leak, remove all burrs at the cut edge of the pipe using a reamer.
• Face the pipe down while removing the burrs to make sure that burrs do not get in to the pipe.
4. Put a flare nut slightly into the pipe and modify the flare.
Pipe | Flare |
Outer Diameter (D) | Depth (A) | Flaring Size (B) |
|
|
|
ø6.35 mm | 1.3 mm | 9.0 mm |
ø9.52 mm | 1.8 mm | 13.0 mm |
ø12.70 mm | 2.0 mm | 16.2 mm |
ø15.88 mm | 2.2 mm | 19.3 mm |
ø19.05 mm | 2.2 mm | 22.5 mm |
ø22.23 mm | 2.2 mm | 25.7 mm |
31
