BCD-1000 Series
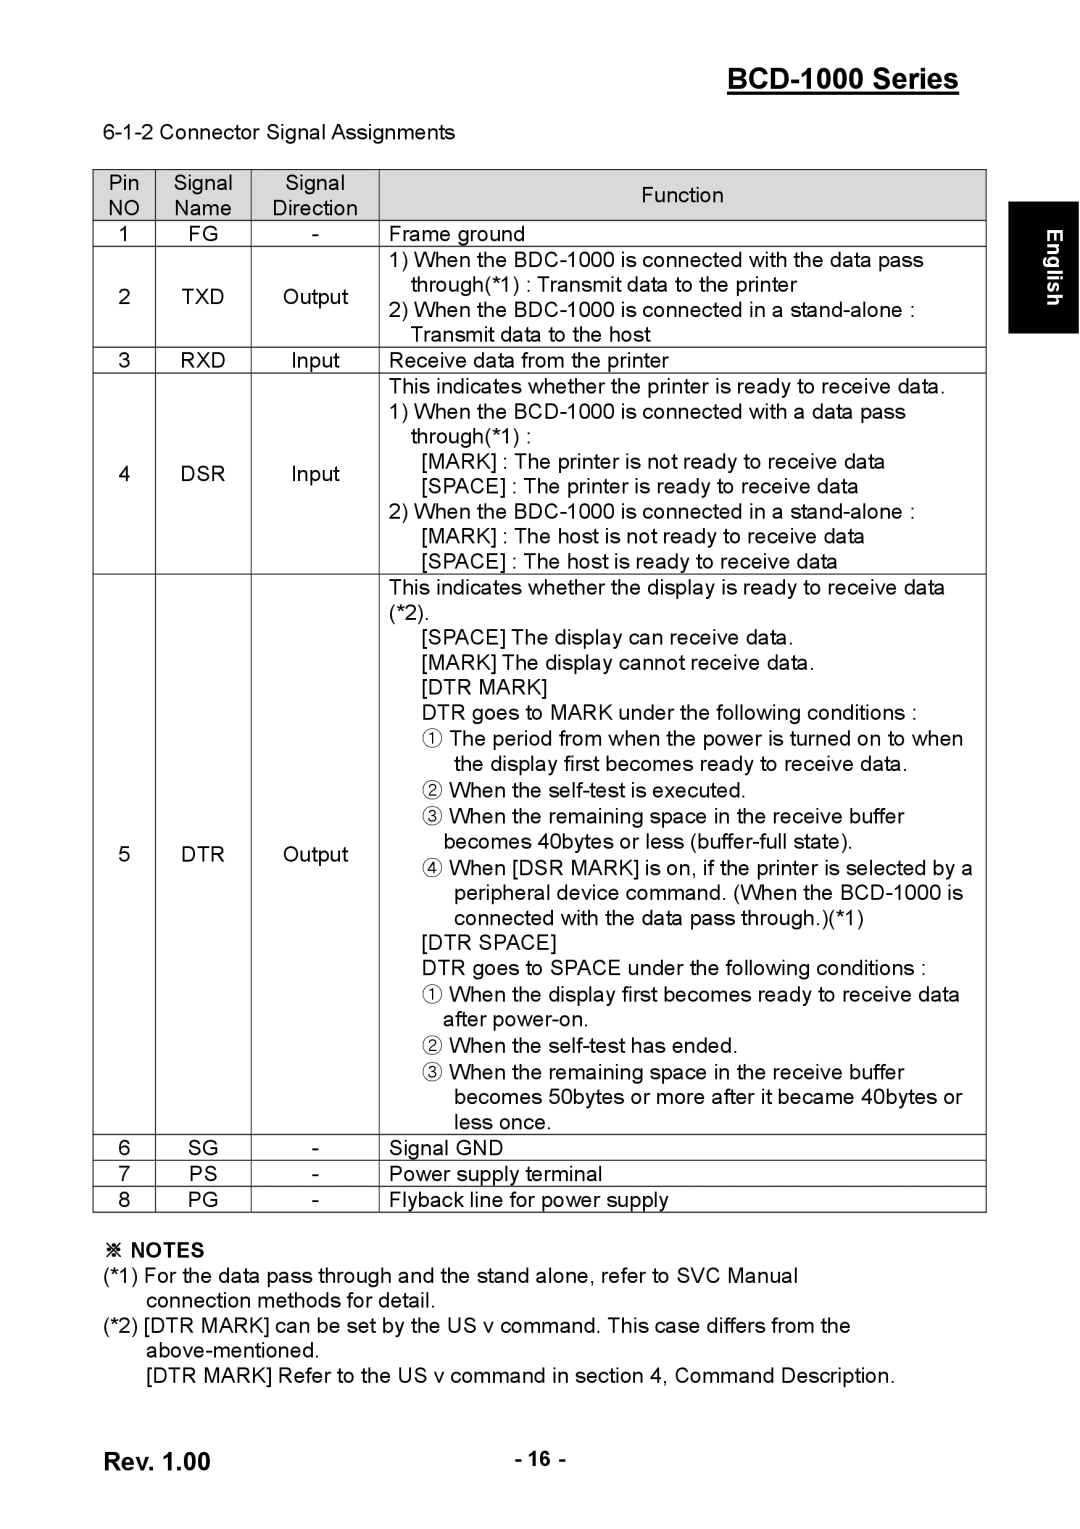
Pin | Signal |
NO | Name |
1 | FG |
2TXD
3RXD
4DSR
5 | DTR |
6SG
7PS
8PG
Signal
Direction
-
Output
Input
Input
Output
-
-
-
Function
Frame ground
1)When the
2)When the
Receive data from the printer
This indicates whether the printer is ready to receive data.
1)When the
[MARK] : The printer is not ready to receive data
[SPACE] : The printer is ready to receive data
2)When the
This indicates whether the display is ready to receive data (*2).
[SPACE] The display can receive data. [MARK] The display cannot receive data. [DTR MARK]
DTR goes to MARK under the following conditions :
①The period from when the power is turned on to when the display first becomes ready to receive data.
②When the
③When the remaining space in the receive buffer becomes 40bytes or less
④When [DSR MARK] is on, if the printer is selected by a peripheral device command. (When the
[DTR SPACE]
DTR goes to SPACE under the following conditions :
①When the display first becomes ready to receive data after
②When the
③When the remaining space in the receive buffer becomes 50bytes or more after it became 40bytes or less once.
Signal GND
Power supply terminal
Flyback line for power supply
English
※NOTES
(*1) For the data pass through and the stand alone, refer to SVC Manual connection methods for detail.
(*2) [DTR MARK] can be set by the US v command. This case differs from the
[DTR MARK] Refer to the US v command in section 4, Command Description.
Rev. 1.00 | - 16 - |
