S E T U P
S E T U P
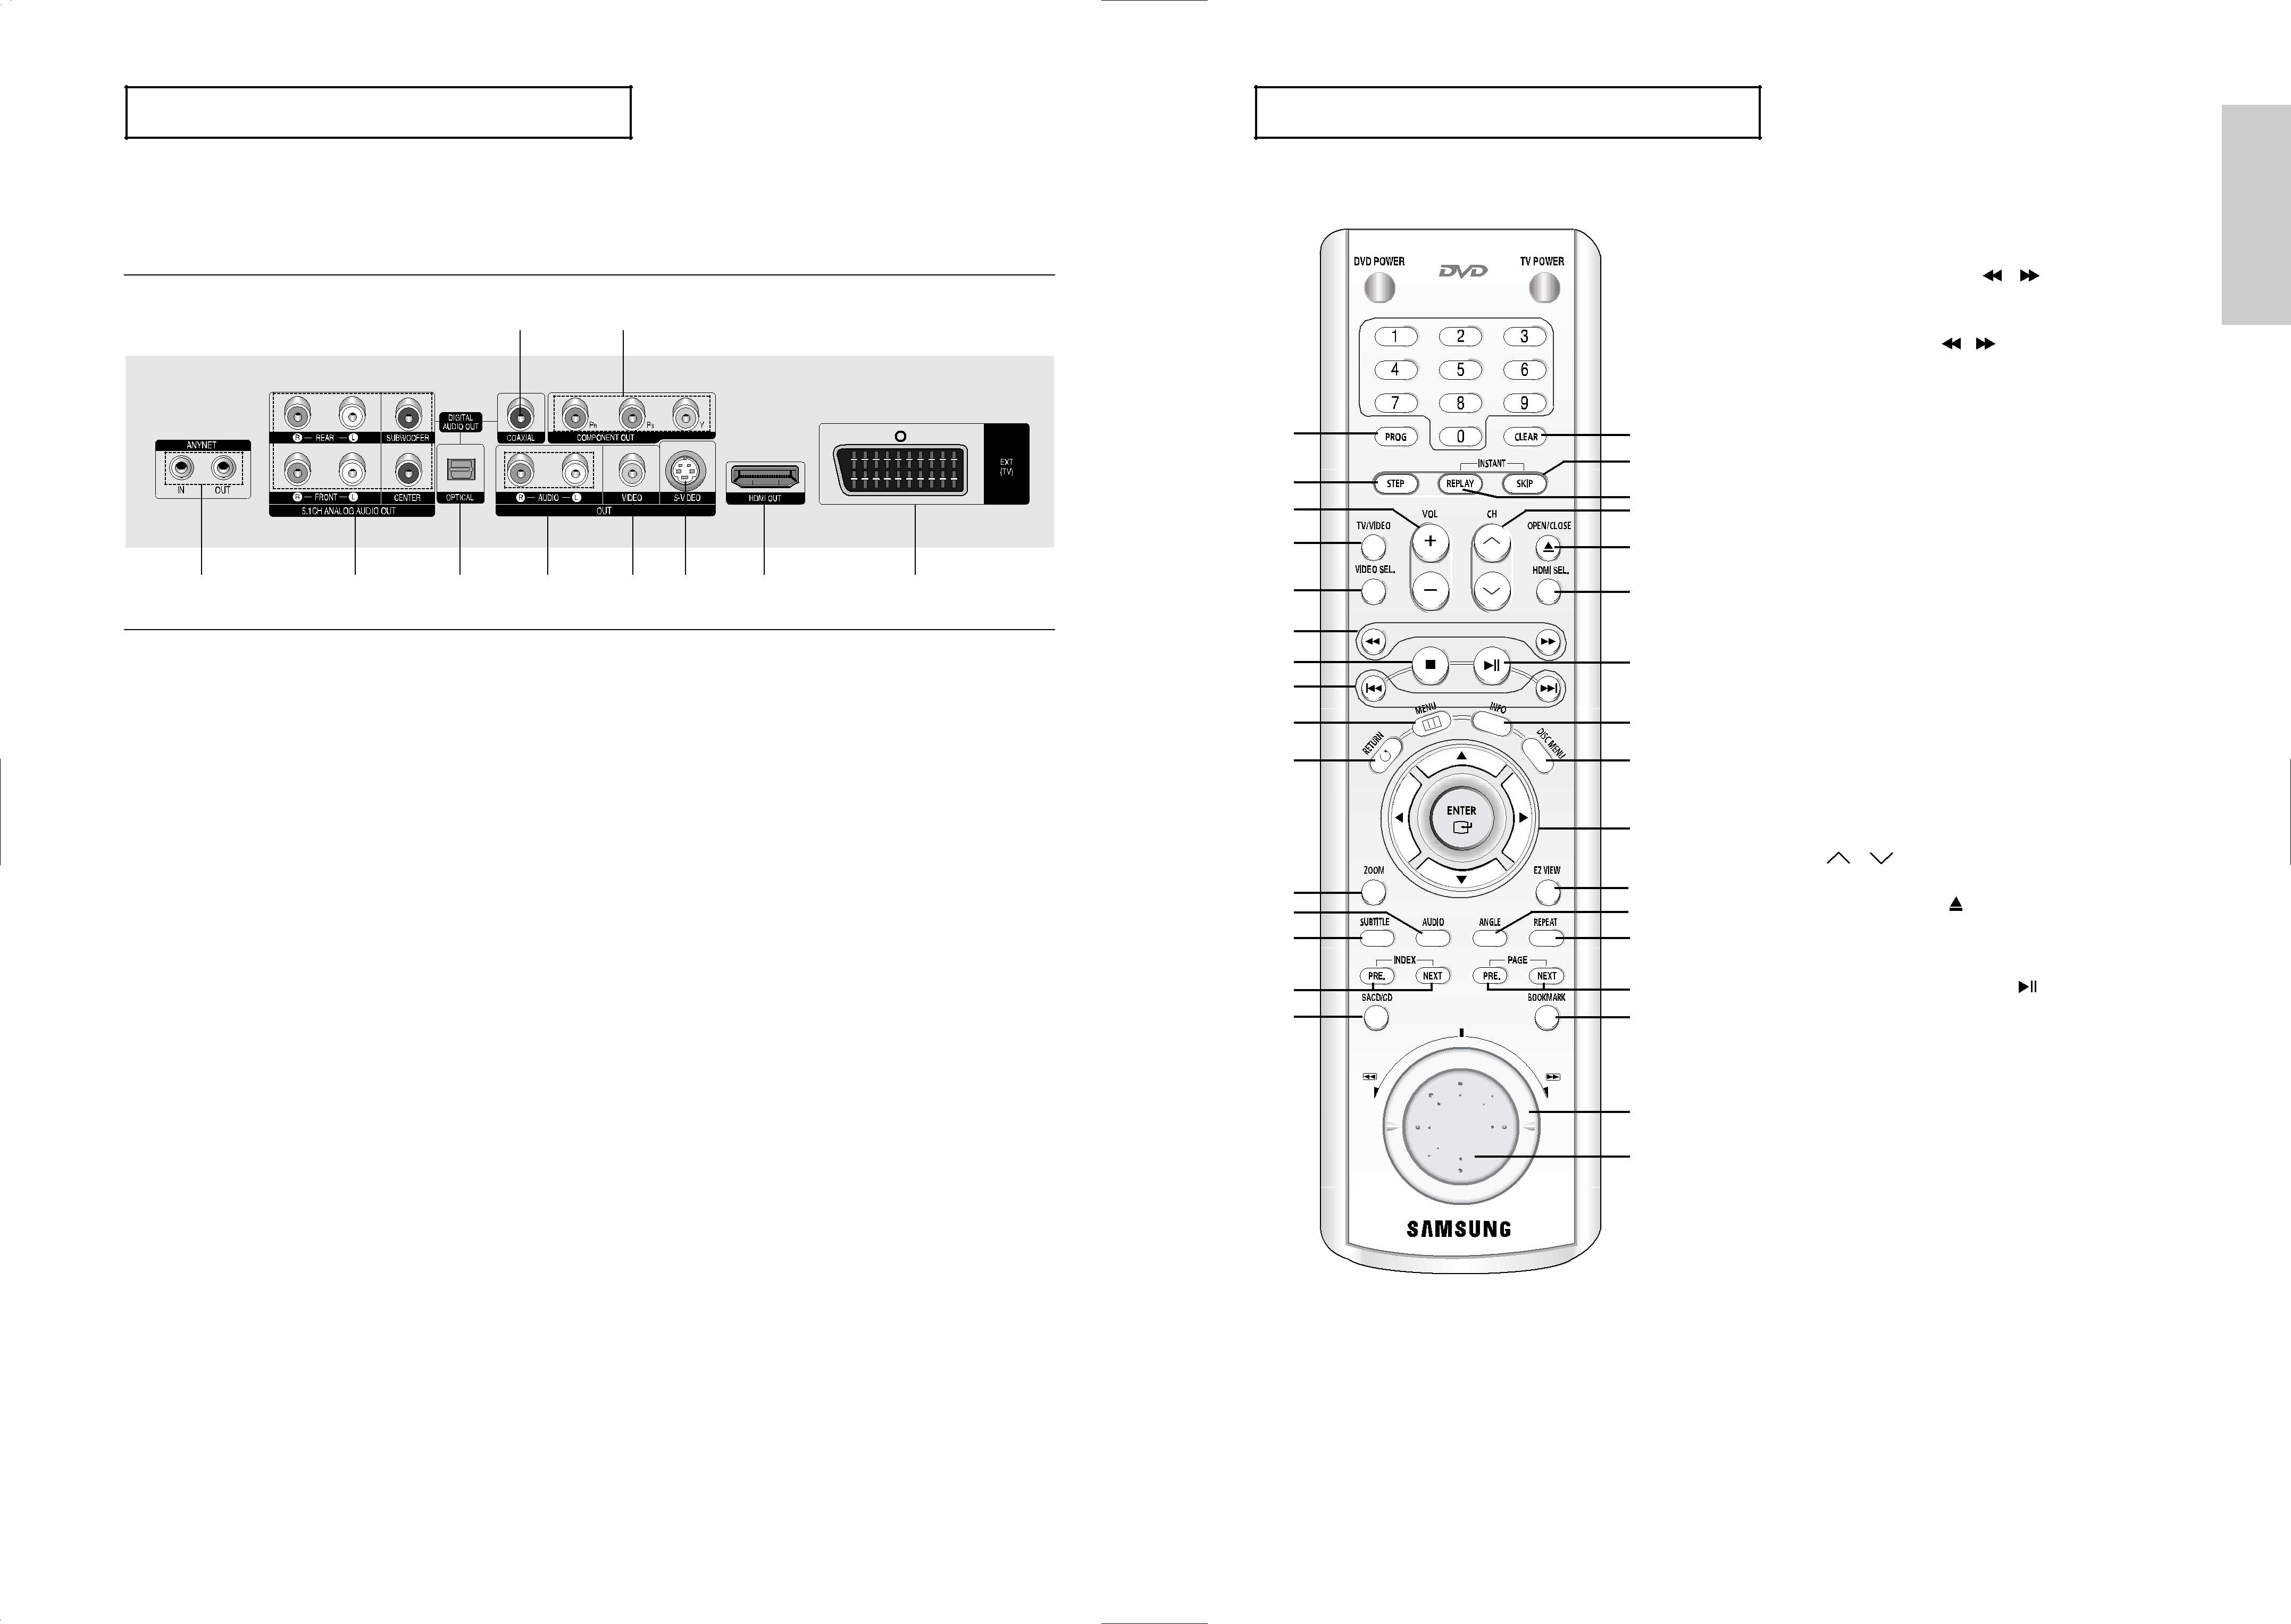
Tour of the Remote Control
Setup
Rear Panel
3 8
1 | 2 | 3 | 4 | 5 | 6 | 7 | 9 |
1

 18
18
2


3 | 19 | |
4 | 20 | |
21 | ||
5 | ||
22 | ||
6 | 23 | |
7 | 24 | |
8 |
| |
9 | 25 |
7. | VIDEO SEL. Button |
|
| |||||
| Selects Video output format. |
|
| |||||
8. | SEARCH Buttons ( | / ) | ||||||
| Allow you to search forward/backward through a disc. | |||||||
9. | STOP Button ( |
|
| ) |
|
| ||
|
|
| ||||||
|
|
| ||||||
10. | SKIP Buttons ( |
|
|
| / |
| ) | |
|
| |||||||
|
| |||||||
| Use to skip the title, chapter or track. | |||||||
11. | MENU Button |
|
|
| ||||
| Brings up the DVD player’s menu. | |||||||
12. RETURN Button |
|
|
| |||||
| Returns to a previous menu. |
|
| |||||
13. ZOOM Button |
|
|
| |||||
| Enlarges DVD picture. |
|
|
| ||||
14. AUDIO Button |
|
|
| |||||
| Use this button to access various audio functions on a disc. | |||||||
15. SUBTITLE Button |
|
| ||||||
16. INDEX Buttons |
|
|
| |||||
| Use to skip the INDEX. |
|
|
| ||||
17. SACD/CD Button |
|
| ||||||
| Selects Super Audio CD or CD playback mode. | |||||||
1.ANYNET JACKS
-Use the Anynet cable to connect the Anynet jack of your television or AV device.
2.5.1CH ANALOG AUDIO OUT JACKS
-Connect to an amplifier with 5.1ch analog input jacks.
3.DIGITAL AUDIO OUT JACKS
-Use either an optical or coaxial digital cable to connect to a compatible Dolby Digital receiver.
-Use either an optical or coaxial digital cable to connect to an A/V Amplifier that contains a Dolby Digital, MPEG2 or DTS decoder.
4.AUDIO OUT JACKS
Connect to the Audio input jacks of your television or audio/video receiver.
5.VIDEO OUT JACK
-Use a video cable to connect to the Video input jack on your television.
-The Video Output in Setup Menu must be set to
SCART.
6.
-Use the
-The Video Output in Setup Menu must be set to
7.HDMI OUT JACK
-Use the HDMI cable to connect this jack to the HDMI jack on your television for the best quality picture.
-If an HDMI cable is connected to an
-If you want to use a Video,
8.COMPONENT VIDEO OUT JACKS
-Use these jacks if you have a TV with Component Video in jacks. These jacks provide PR, PB and Y video.
-If
-If
9.SCART JACK
Connect to a TV scart input jack.
10 |
|
11 | 26 |
12 | 27 |
| 28 |
13 | 29 |
14 | 30 |
15 | 31 |
16 | 32 |
17 | 33 |
| 34 |
| 35 |
18. TV POWER Button |
Turns the TV’s power on or off. |
19. CLEAR Button |
Use to remove menus or status displays from the screen. |
20. INSTANT SKIP Button |
This function skips playback ahead 10 seconds. |
21. INSTANT REPLAY Button |
This function is used to replay the previous 10 seconds |
of a movie from the current position. |
22. CH ( , ) Buttons |
Channel selection. |
23. OPEN/CLOSE ( ) Button |
To open and close the disc tray. |
24. HDMI SEL. Button |
HDMI or DVI Output resolution setup. |
25. PLAY/PAUSE Button ( ) |
Begin/Pause disc play. |
26. INFO Button |
Displays the current disc mode. |
27. DISC MENU Button |
Brings up the Disc menu. |
28. ENTER/"❷➛❿ Buttons |
This button functions as a toggle switch. |
29. EZ VIEW Button |
The aspect ratio of a picture can easily be adjusted |
according to the screen size of your TV (16:9 or 4:3). |
Note
-Consult your TV User’s Manual to find out if your TV supports Progressive Scan
If Progressive Scan is supported, follow the TV User’s Manual regarding Progressive Scan settings in the TV’s menu system.
-If
-The HDMI output of this unit can be connected to a DVI jack on a TV or other device using a conversion adapter. In this case, it is necessary to use a TV or display with an
-There may be no image output if the DVD player is connected to a TV or display that is not compatible with the above format.
-Refer to the TV's instruction manual for detailed information regarding the HDMI terminal.
-See pages 66 ~ 68 to get more information on how to use the setup menu.
1.DVD POWER Button Turns the power on or off.
2.NUMBER Buttons
3.PROG Button
Allows you to program a specific order.
4.STEP Button
Advances play one frame at a time.
5.VOL (+,
6.TV/VIDEO Button
Press to display all of the available video sources ( i.e., TV, Cable, Video)
30. ANGLE Button |
Use to access various camera angles on a DVD. |
31. REPEAT Button |
Allows you to repeat play a title, chapter, track, or disc. |
32. PAGE Buttons |
Use to skip the PAGE. |
33. BOOKMARK Button |
34. SHUTTLE DIAL (Search mode) |
Performs fast motion play. |
35. JOG DIAL (Step mode) |
Operates frame by frame play. In CD mode, |
performs track search. |