Setting the Film Mode
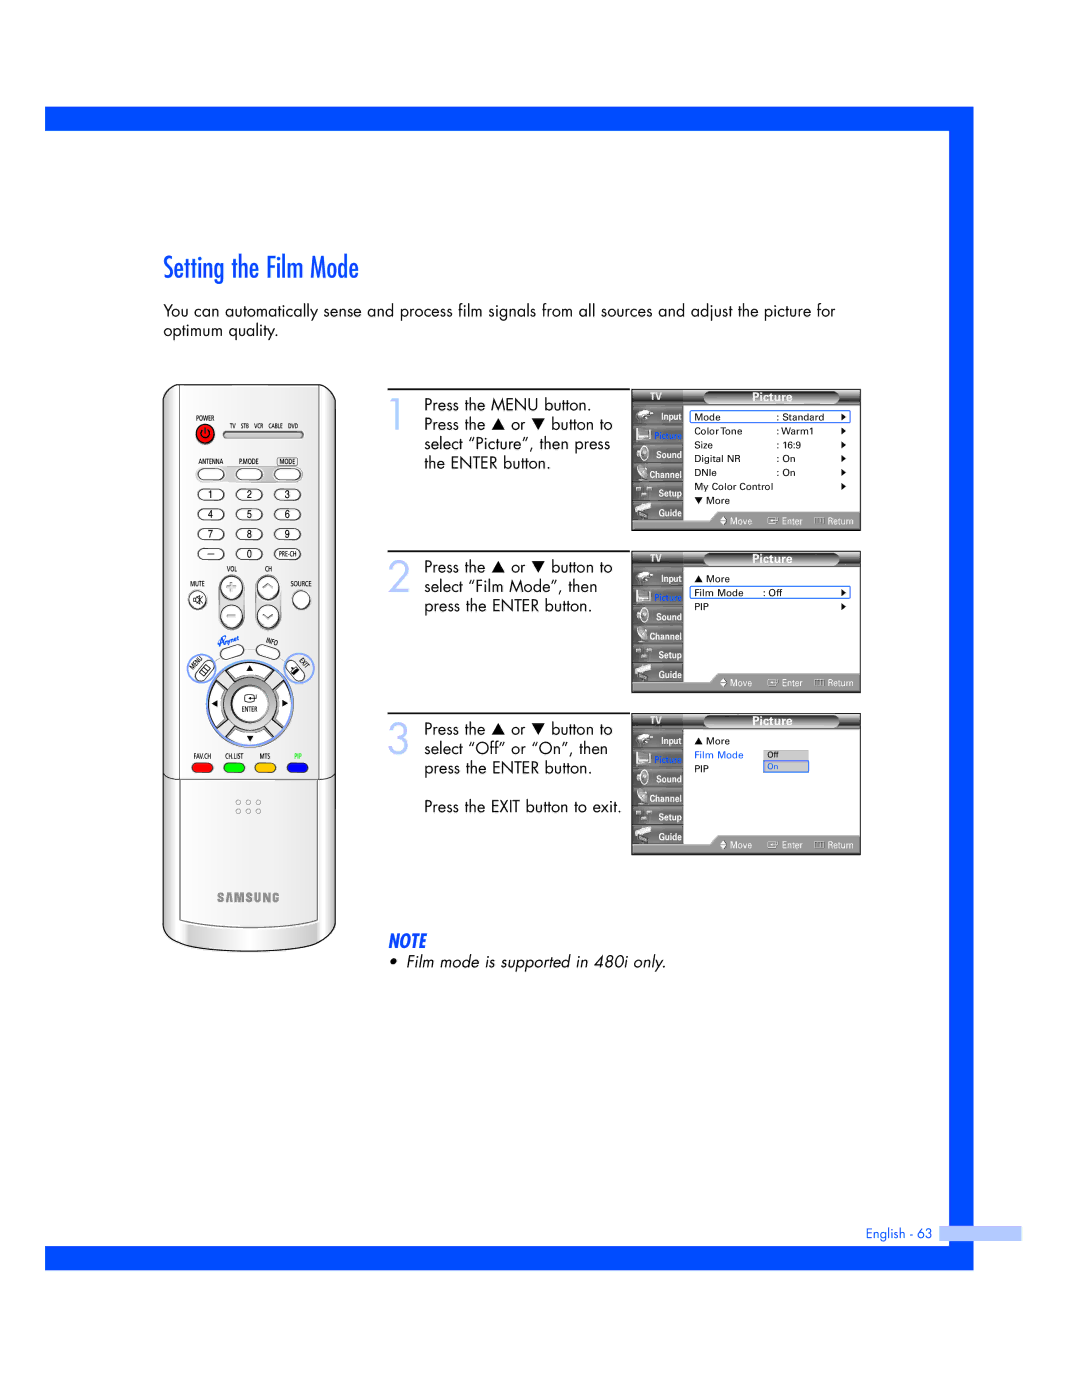
You can automatically sense and process film signals from all sources and adjust the picture for optimum quality.
1 Press the MENU button. Press the … or † button to select “Picture”, then press the ENTER button.
|
| Picture |
| |
Input | Mode | : Standard | √ | |
Picture | Color Tone | : Warm1 | √ | |
Size | : 16:9 | √ | ||
Sound | ||||
Digital NR | : On | √ | ||
| ||||
Channel | DNIe | : On | √ | |
Setup | My Color Control | √ | ||
▼ More |
|
| ||
|
|
| ||
Guide | Move | Enter | Return | |
| ||||
|
|
|
| |
2 Press the … or † button to select “Film Mode”, then press the ENTER button.
3 Press the … or † button to select “Off” or “On”, then press the ENTER button.
Press the EXIT button to exit.
|
| Picture |
|
Input | ▲ More |
|
|
Picture | Film Mode | : Off | √ |
PIP |
| √ | |
Sound |
| ||
|
|
| |
Channel |
|
|
|
Setup |
|
|
|
Guide | Move | Enter | Return |
|
|
| Picture |
|
Input | ▲ More |
|
|
Picture | Film Mode | Off |
|
PIP | On |
| |
Sound |
| ||
|
|
| |
Channel |
|
|
|
Setup |
|
|
|
Guide | Move | Enter | Return |
|
NOTE
• Film mode is supported in 480i only.
